Windows offers you a variety of power plans and you can customize how your PC/laptop uses power depending on your needs. However, some users report that the Windows 11 high performance power plan missing issue. This post provides solutions.
Windows 11 and 10 have several power plans: Balanced, Power Saver, High Performance, and sometimes Ultimate Performance (Ultra performance). You can switch between these plans to get the best performance. However, some users say that they meet the “Windows 11 high performance power plan missing” issue.
High performance can maximize screen brightness and increase PC performance. This plan uses a lot more energy, so if you are a laptop user, the laptop battery won’t last very long without charging.
Also see: How to Turn on/off Ultimate Performance Plan in Windows 11
Then, let’s see how to restore missing power plans in Windows 11.
Method 1: Try MiniTool System Booster
If the high performance power plan is missing on Control Panel, you can try the alternative – MiniTool System Booster to replace high performance power plan. It can optimize electricity consumption based off. Besides, it supports optimizing PC speed, recovering irreplaceable files, clearing browsers’ cookies and history, etc. Now, download it to have a try.
MiniTool System Booster TrialClick to Download100%Clean & Safe
Step 1: After downloading MiniTool System Booster, double-click the exe file to install it. Then, run it to enter its main interface.
Step 2: On the Performance page, click the drop-down menu to choose LiveBoost.
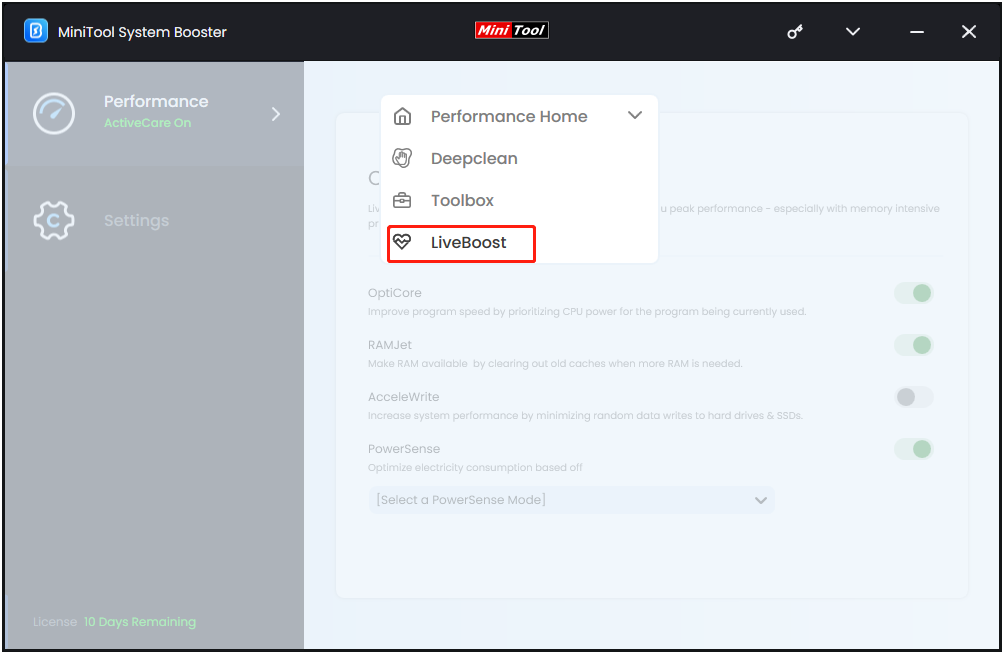
Step 3: The PowerSense option is turned on by default. You can click the drop-down menu to choose one of the power plans to replace the high performance power plan based on your needs.

Method 2: Run the Power Troubleshooter
The “Windows 11 high performance power plan missing” issue can be caused by a messed power plan. Fortunately, you can simply run the Windows built-in Power Troubleshooter to fix it. Here’s how to do that.
Step 1: Press the Windows and I keys to open Settings.
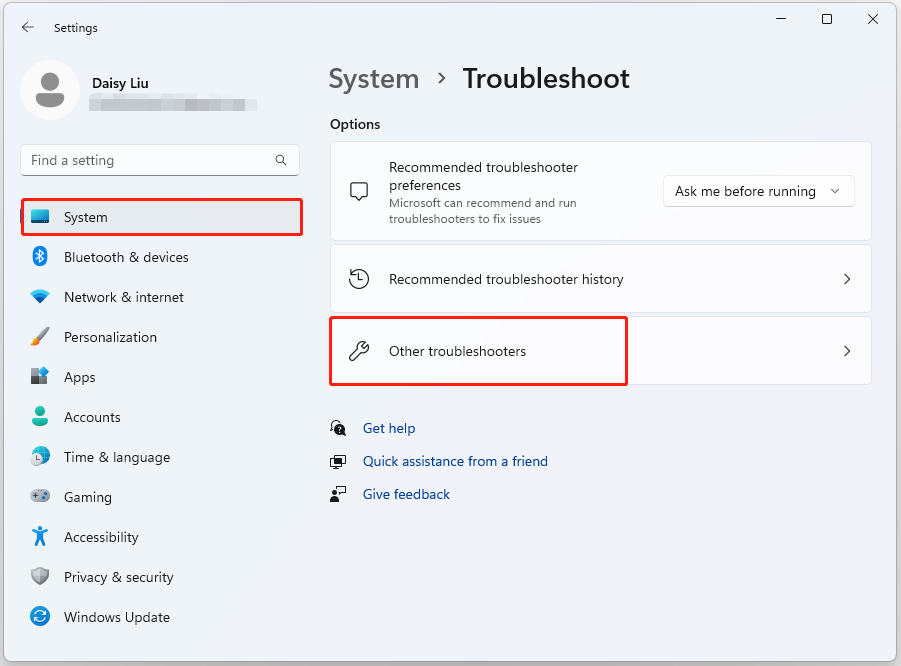
Step 2: Click on the System tab and then scroll down and click Troubleshoot on the right side of the window.
Step 3: Then click on Other troubleshooters.
Step 4: Find the Power option and click the Run button.
Step 5: Wait for the finish of the process and follow the on-screen instructions to apply the fixes.
Method 3: Create a High Performance Power Plan
If you want to restore high performance power plan on Windows 11, you can choose to create it on Control Panel. Follow the step-by-step instructions below:
Step 1: Open Control Panel by typing it in the Search box and choosing the first result.
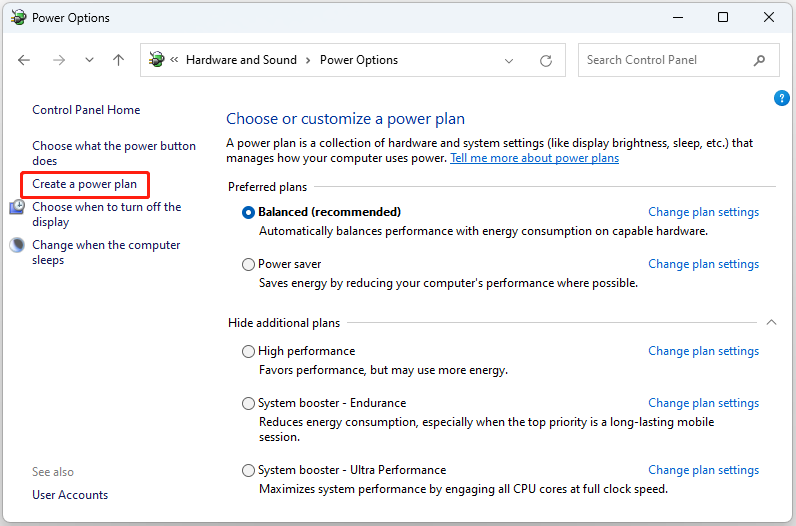
Step 2: Go to Hardware and Sound > Power Options.
Step 3: In the panel on the left-hand side of the window, click Create a power plan.
Step 4: Check the High Performance box and give your new plan a name. Then, click Next.

Step 5: After this, you will notice the Turn off the display and Put the computer to sleep settings. You can tweak them now or later.
Step 6: At last, click Create to create the High Performance power plan.
Also see: 6 Ways to Open the Windows 10 Power Settings (Step by Step)
Method 4: Use Windows PowerShell
You can also try to use the Windows PowerShell command to fix the Windows 11 high performance power plan missing issue.
Step 1: Type Windows PowerShell in the Search box and choose Run as administrator.
Step 2: Copy and paste the below command and press Enter.
powercfg -duplicatescheme 8c5e7fda-e8bf-4a96-9a85-a6e23a8c635c
Method 5: Use Registry Editor
Sometimes Windows can hide this high performance power plan and you can recover it via Registry Editor.
Step 1: Press the Windows + R keys together to open the Run dialogue box. Type regedit in it to open Registry Editor.
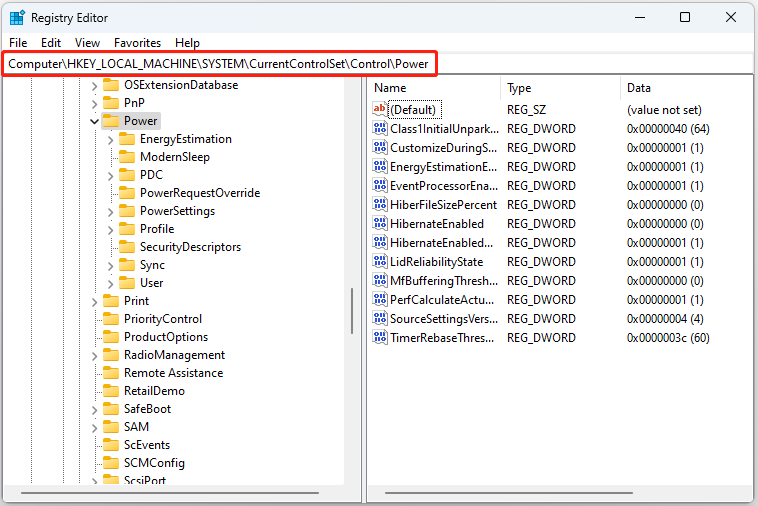
Step 2: Then, go to the following path:
Computer\HKEY_LOCAL_MACHINE\SYSTEM\CurrentControlSet\Control\Power
Step 3: Check if there is a key called CsEnabled on the right-hand side of the screen. If there is no CsEnabled key, right-click the area, and choose New > DWORD (32-bit) Value. Name the new key as CsEnabled.
Step 4: Then, double-click the CsEnabled key to modify it. Set the value of the key to 0 and click OK to save the change.
Step 5: Close Registry Editor. Restart your PC and check if you can find the high performance power plan.
If this doesn’t work out, you have to further modify the Registry Editor.
Step 1: Open Registry Editor again.
Step 2: Go to the below path:
HKEY_LOCAL_MACHINE\SYSTEM\CurrentControlSet\Control\Power\PowerSettings
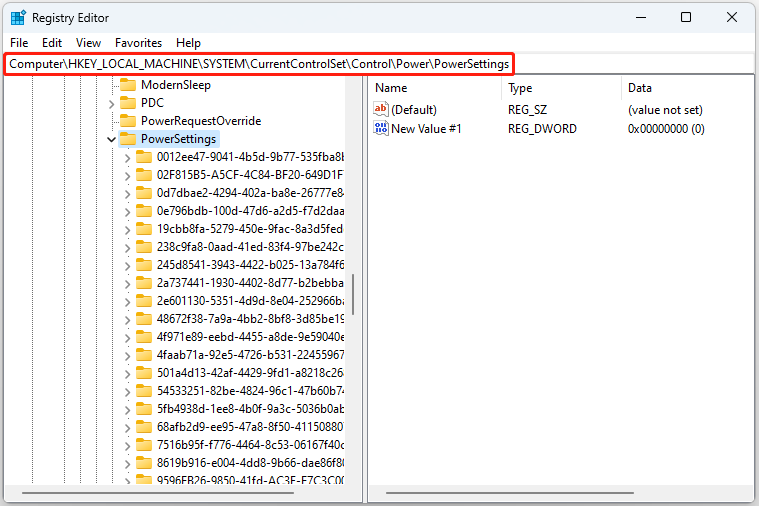
Step 3: After that, right-click the blank space and click New > DWORD (32-bit) Value.
Step 4: Name the new key as Attributes. Double-click the key to modify it.
Step 5: After that, click Hexadecimal. Change the value data to 2 and click OK.
Final Words
These are common fixes to solve the “Windows 11 high performance power plan missing” error code. If you are bothered by this error, go to follow these methods to get rid of the trouble. It’s highly recommended to use MiniTool System Booster.