What Is Bandwidth Hog?
Network bandwidth refers to the maximum capacity of a wired or wireless communications linked to transmit data over a network connection in a given amount of time. Usually, the more bandwidth data connection has, the more data it can transfer at one time.
Bandwidth hog is used to describe a user, device, or application that consumes an excessive amount of internet bandwidth. If your Windows 10/11 is wasting your bandwidth, it will influence negatively on the network speed. Take it easy! In this post, we have gathered 6 ways on how to stop bandwidth hogging Windows 10/11 for you.
How to Stop Bandwidth Hogging Windows 10/11?
Fix 1: Terminate Resource-Intensive Processes
Some unnecessary processes might waste your bandwidth. They might demand a large amount of CPU, memory, disk, and network usage. To stop bandwidth hogging, you need to terminate them. Here, it is strongly recommended to try MiniTool System Booster. It is designed to optimize your system to its full potential from all aspects.
This free PC tune-up software supports optimizing processing power, freeing up memory, deleting Windows & internet junk files, increasing internet speed, and more. The Process Scanner tool can check for processes that are using unnecessary system resources. Here’s how to stop bandwidth by ending these processes:
Step 1. Download, install, and launch MiniTool System Booster Trial Edition for free.
MiniTool System Booster TrialClick to Download100%Clean & Safe
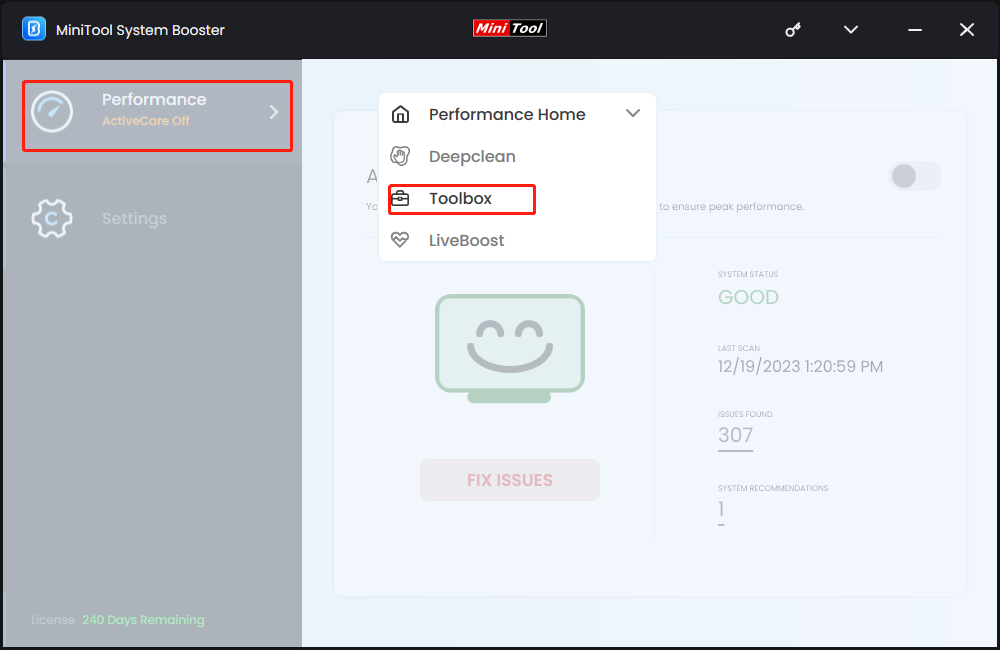
Step 2. Click on Performance Home and select Toolbox from the context menu.
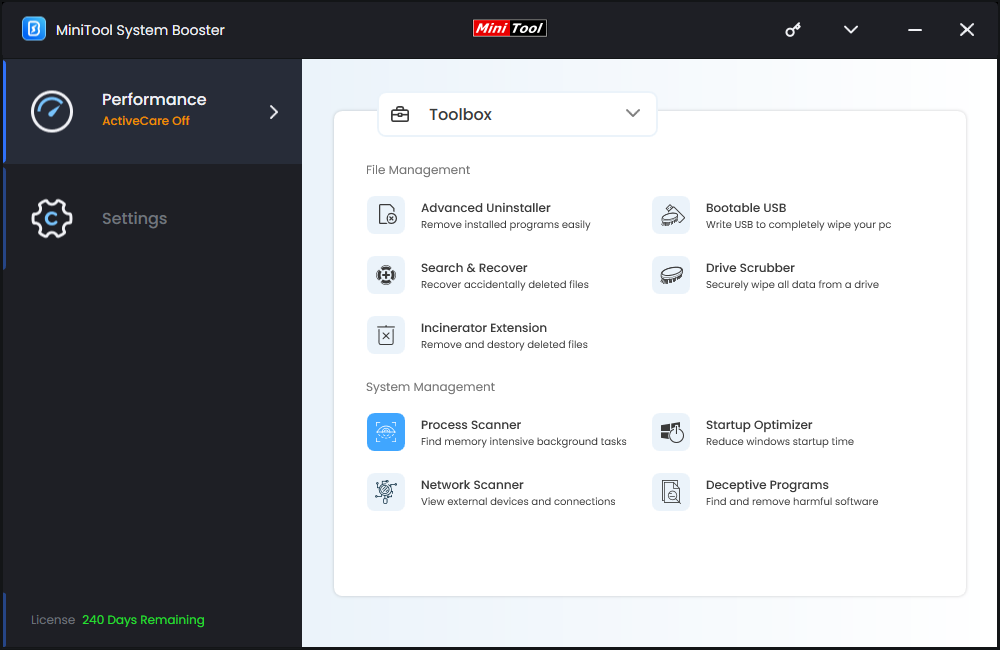
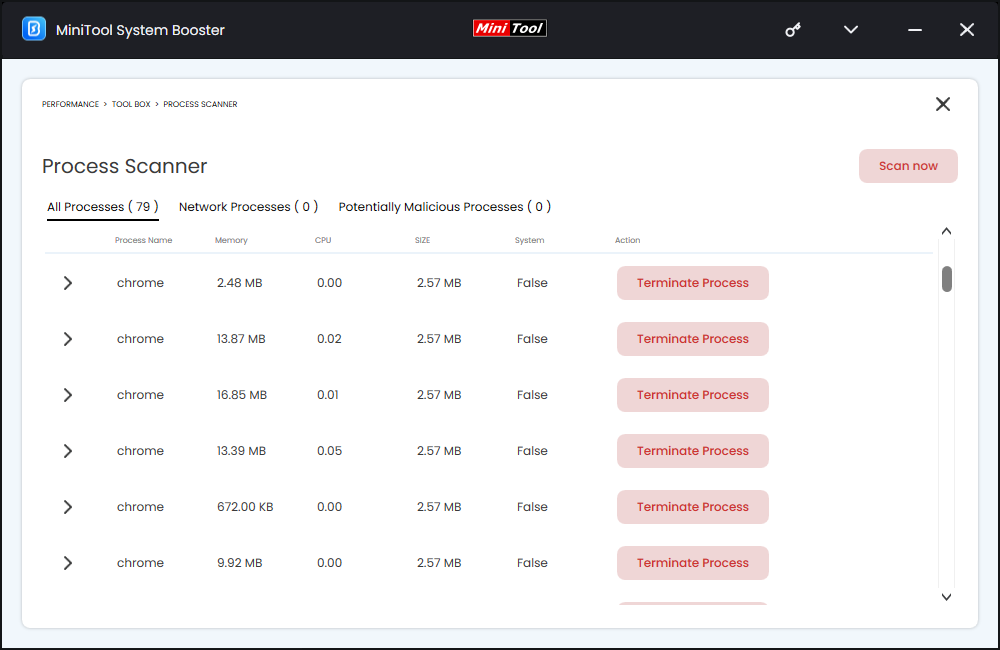
Step 3. In the Toolbox page, click on Process Scanner and then hit Scan now.
Step 4. After scanning, you can go to the Network Processes section to terminate bandwidth-hogging processes.
Fix 2: Modify OneDrive Download & Upload Rate
OneDrive allows you to store and access your files from any compatible device. Files in specific folders will be uploaded to OneDrive and files stored online will also download automatically. This can occupy your bandwidth easily. In this case, you need to follow these steps to modify the download and upload rate in OneDrive:
Step 1. Launch OneDrive from your system tray and click on the gear icon in the top right to open Settings.
Step 2. In the Network tab, tick Limited to under both Upload rate and Download rate. Then, specify a maximum rate and the exact figure depends on the bandwidth available to you. You might need to switch to a different figure to find a suitable rate.
Fix 3: Stop Delivery Optimization
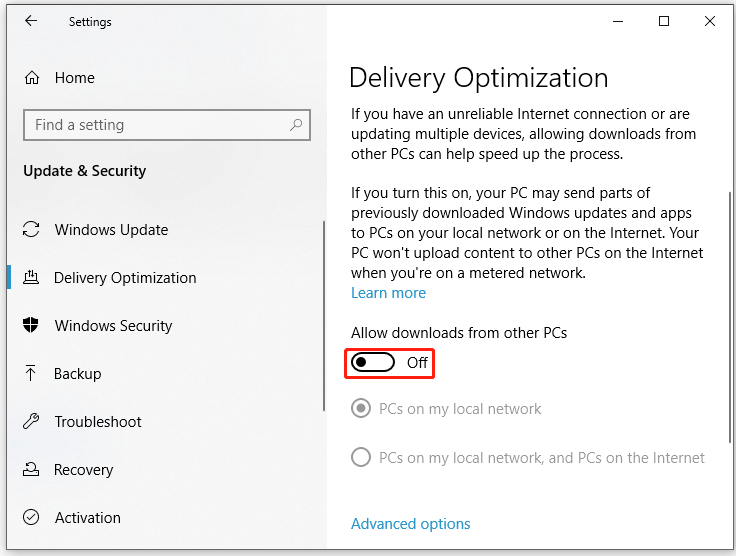
Windows Update Delivery Optimization has been introduced since Windows 10. This feature allows you to send Windows updates to or get Windows updates from neighboring computers or devices on the same network. If your computer is distributing updates to others, you will find that your bandwidth will become limited. Here’s how to stop bandwidth by disabling Delivery Optimization:
Step 1. Press Win + I to open Windows Settings.
Step 2. Go to Update & Security > Windows Update > Advanced options.
Step 3. Click on Delivery optimization and then toggle off Allow downloads from other PCs.
Fix 4: Disable Sync Settings
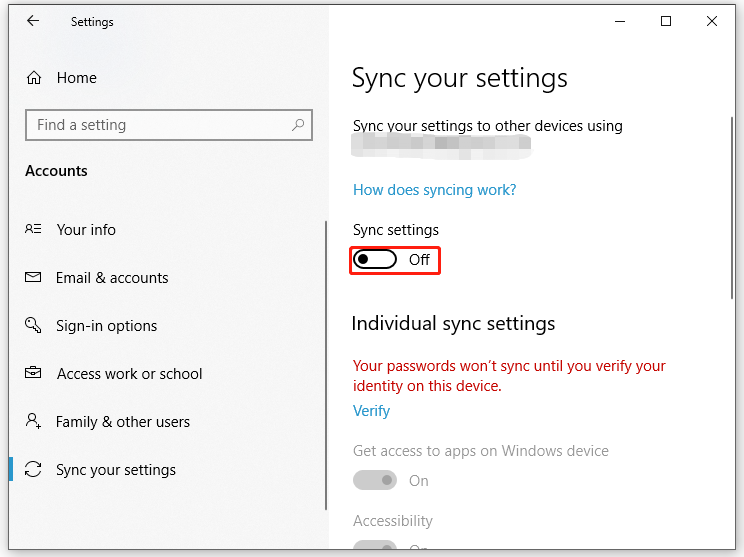
Your Windows settings like themes, language, passwords and more are uploaded into your Microsoft account. If you choose to sync these settings, Windows will import your account settings when you log into a different device. To save some internet bandwidth, consider turning off sync settings. To do so:
Step 1. Open Windows Settings.
Step 2. Head to Accounts > Sync your settings > toggle off Sync settings.
Also see: How to Sync Settings Across Multiple PCs (Windows 10/11)
Fix 5: Disable BITS
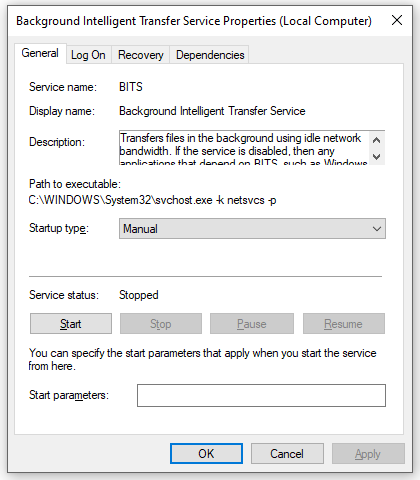
Background Intelligence Transfer Service (BITS) takes unused or idle network bandwidth to transfer, download, or upload files between a client and a server. Disabling this service will prevent all applications that depend on BITS from downloading programs and other important information automatically. Here’s how to do it:
Step 1. Press Win + R to open the Run dialog.
Step 2. Type services.msc and hit Enter.
Step 3. Scroll down to find Background Intelligence Transfer Service and double-click on it.
Step 4. Stop this service and save the change.
Also see: Fix – Background Intelligent Transfer Service Issue on Windows 10
Fix 6: Perform a Full Scan
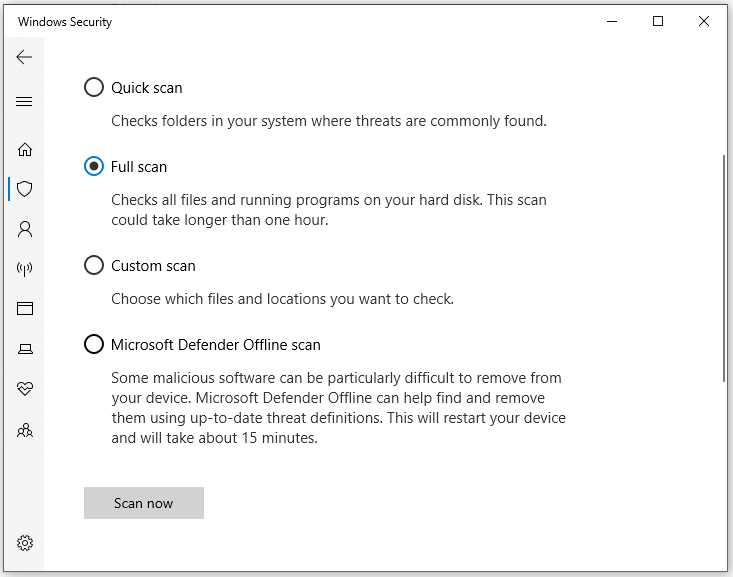
Virus and malware can also hog your bandwidth and slow down your internet connection. Therefore, it is a good idea to perform a scan of your computer to remove any bandwidth-hogging threats. To do so:
Step 1. Open Windows Settings.
Step 2. Go to Update & Security > Windows Security > Virus & threat protection > Scan options.
Step 3. Check Full scan and click on Scan now to start the scanning.
Related article: How to Run Windows Defender Full/Quick/Custom/Offline Scan
Final Words
This post demonstrates how to stop bandwidth hogging in 6 ways. If you want to speed up your internet connection and system performance, MiniTool System Booster is the top recommendation. For any problems with MiniTool System Booster, feel free to contact us directly via [email protected].


