Are you looking for a power plan to boost your PC performance? If so, you can consider enabling Ultimate Performance Power Plan in Windows 10/11. This post will explain how this power plan works and 2 ways to enable it on your computer.
What Is Ultimate Performance Power Plan?
Windows comes with different power plans such as Balanced, Power Saver, High Performance, and Ultimate Performance Power Plan to manage your power usage and boost system performance. What are their differences?
- Balanced – increases the speed of your CPU when in need and reduces the speed when your system is idle.
- Power Saver – saves power usage by lowering the screen brightness and other similar settings.
- High Performance – doesn’t lower your CPU’s speed when it is idle. It will run your CPU at higher speeds most of the time.
- Ultimate Performance – sets Minimum Processor State to 100% to squeeze performance out of your machine.
By default, Windows sets all computers to a balanced power plan to automatically balance performance with energy consumption on capable hardware. However, if you prioritize performance over energy efficiency, Ultimate Performance Power Plan might be the best choice for you.
This power plan builds on High Performance Power Plan and it eliminates the micro-latency associated with fine-grained power management techniques. Once this power option is enabled, your processor will operate at its highest frequency.
On the other hand, it will disable all the power-saving features. For example, it will prevent the operating system from hibernating, modify the wireless display settings to prompt graphic hardware to work faster, and more. Now, we will show you how to enable Ultimate Performance Power Plan on your computer.
How to Enable Ultimate Performance Power Plan on Windows 10/11?
Way 1: via Control Panel
Control Panel is a component of Microsoft Windows that allows you to perform administrative and operating system management tasks and provides access to specific features. You can enable Ultimate Performance Power Plan via it. To do so:
Step 1. Type control panel in the search bar and hit Enter.
Step 2. Expand the drop-down menu beside View by in the top right and select Category.
Step 3. Click on Hardware and Sound and select Power Options.
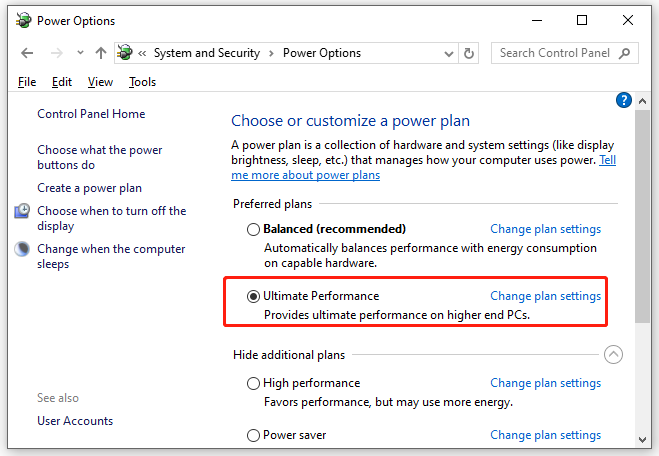
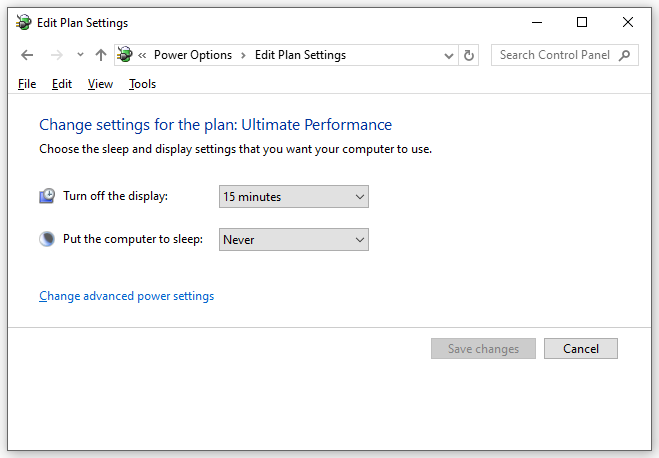
Step 3. In the right pane, you can see some power plans on your computer. If you don’t see the Ultimate Performance option, click on Show additional plans and then tick Ultimate Performance.
Way 2: via Windows PowerShell
Another is to activate Ultimate Performance Power Plan via Command Prompt or Windows PowerShell. Here’s how to do it:
Step 1. Right-click on the Start icon and select Windows PowerShell (Admin) from the quick menu.
Step 2. Type the following command and hit Enter.
powercfg -duplicatescheme e9a42b02-d5df-448d-aa00-03f14749eb61
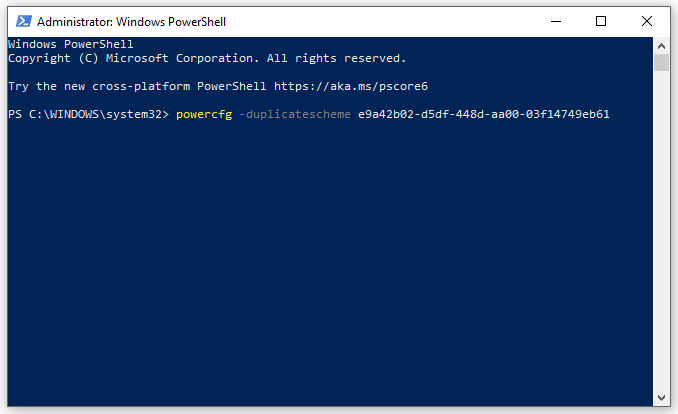
If Ultimate Performance Power Plan fails to appear in the Power Options window, follow these prompts:
Step 1. Run the following command to disable Modern Standby on your computer:
reg add HKLM\System\CurrentControlSet\Control\Power /v PlatformAoAcOverride /t REG_DWORD /d 0
Step 2. After that, run the activation command of Ultimate Performance Power Plan again:
powercfg –duplicatescheme e9a42b02-d5df-448d-aa00-03f14749eb61
Step 3. Restart your computer to see if Ultimate Performance Power Plan is present in Power Options.
Also see:
3 Ways to Restore Power Plans Settings to Default on Windows 10/11
Cannot Change Power Plan on PC? Here’re Available Solutions
Another Tool to Speed up Your Computer – MiniTool System Booster
Speaking of computer performance, some third-party tools like MiniTool System Booster can also meet your demands. This free PC tune-up software is compatible with Windows 11/10/8.1/8/7.
It is designed to maximize your system performance by increasing the speed and availability of your CPU, RAM, and hard drive resources. What’s more, it can find and remove any junk files that slow down your system.
MiniTool System Booster also provides some power plans to make your system run optimally. No matter whether you are editing videos, browsing web pages, gaming, programming, drawing a CAD diagram, and more, you can switch to the corresponding power plans to maximize your productivity.
Now, follow our lead to select a proper power plan for your computer with this tool:
Step 1. Launch MiniTool System Booster Trial Edition for free.
MiniTool System Booster TrialClick to Download100%Clean & Safe
Step 2. Expand the drop-down menu of Performance Home and select LiveBoost.
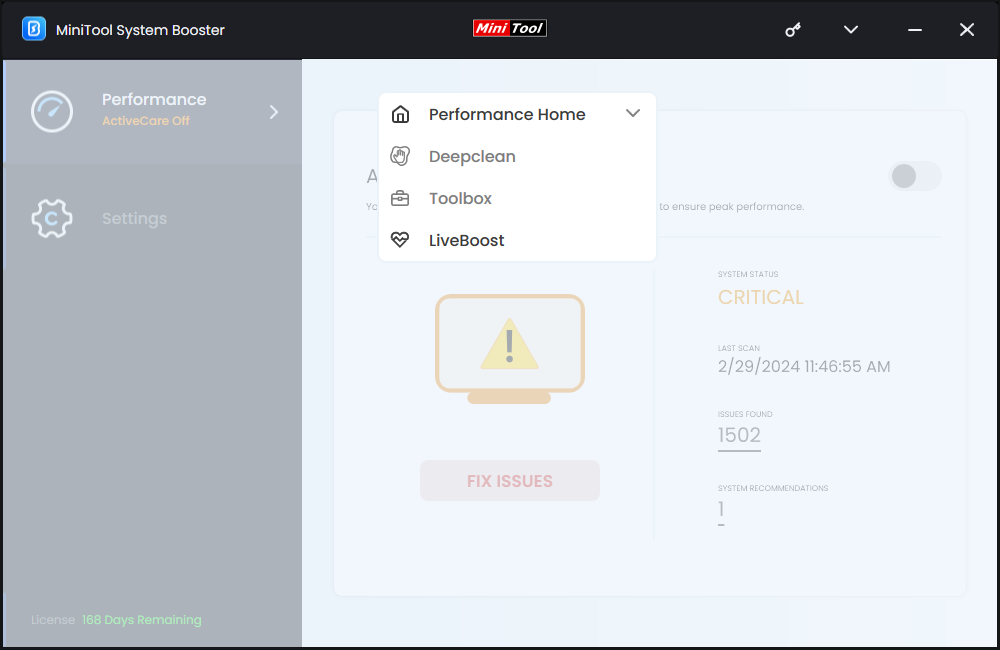
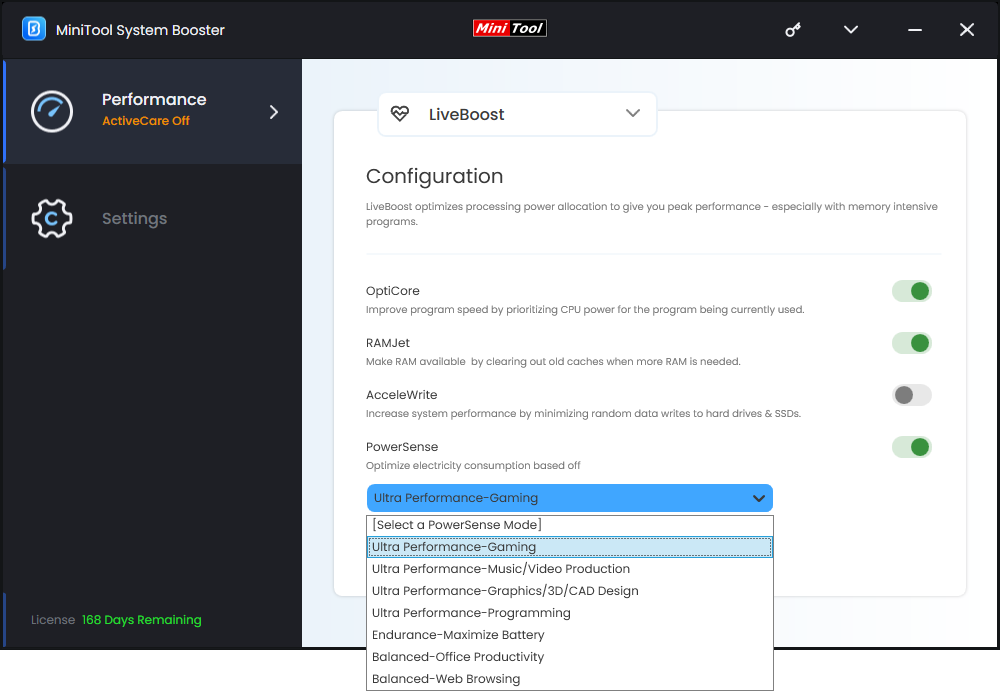
Step 3. Under PowerSense, there are the following 7 power plans available for you. You can select a power plan according to your online activity.
- Ultra Performance-Gaming
- Ultra Performance-Music/Video Production
- Ultra Performance-Graphics/3D/CAD Design
- Ultra Performance-Programming
- Endurance-Maximize Battery
- Balanced-Office Productivity
- Balanced-Web Browsing
In addition, MiniTool System Booster also provides you with some advanced tools to manage your files and systems in the Toolbox page:
- Advanced Uninstaller – uninstall programs on your computers easily.
- Process Scanner – find and terminate memory-intensive tasks.
- Incinerator Extension – remove and destroy deleted files.
- Drive Scrubber – securely wipe all data from a drive.
- Startup Optimizer – disable some programs from startup to make your computer boot faster.
Final Words
This post illustrates how to switch to Ultimate Performance Power Plan to squeeze every last bit out of your system in 2 ways. Apart from basic power plans in Windows, MiniTool System Booster offers you more advanced and flexible options to optimize your system performance and power for free.
MiniTool System Booster TrialClick to Download100%Clean & Safe
For more ways to optimize power settings for higher performance or more features about MiniTool System Booster, don’t hesitate to directly contact us via [email protected]. We will reply to you as soon as possible.


