You may encounter some OneDrive issues that require you to uninstall and reinstall the program, such as OneDrive not starting. So, how to uninstall OneDrive easily and safely?
There are some methods to help you and you can choose them when facing different situations. Among them, MiniTool System Booster is what we recommend because it has an intuitive interface and concise procedures. Then, let’s see how to finish the work.
Uninstall OneDrive via MiniTool System Booster
MiniTool System Booster is an all-in-one comprehensive PC tune-up software. This software has many wonderful features which include Deepclean (get rid of the useless clutters) and various tools for file & system management.
Advanced Uninstaller is the one that can help you easily and safely remove OneDrive. After a full scan, you will see all the installed programs listed on the interface, including Microsoft OneDrive. It is easy to remove with one click.
Now, a detailed guide is as follows and you need to download and install the program first for a 15-day trial version.
MiniTool System Booster TrialClick to Download100%Clean & Safe
Step 1: Launch the installed program and in the Performance tab, expand the Performance Home menu to choose Toolbox.
Step 2: Click Advanced Uninstaller under File Management and wait for it to load programs.
Step 3: Scroll down to locate Microsoft OneDrive and click UNINSTALL next to it.
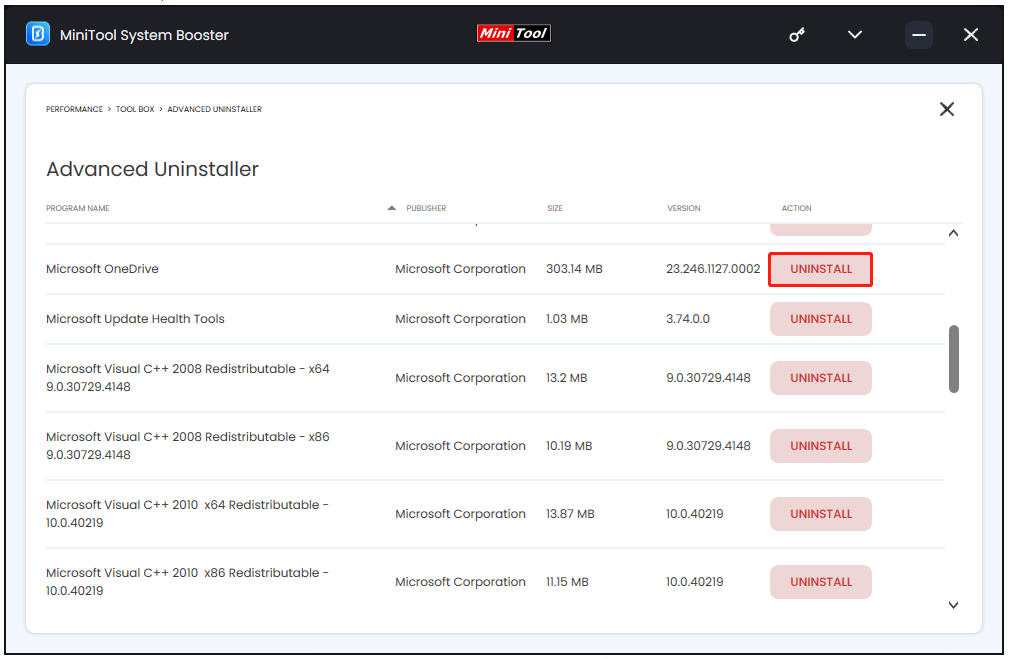
Then you can follow the next on-screen steps to delete OneDrive.
After uninstalling OneDrive, you can also use this program to clean up your device or tune up your PC for better performance. MiniTool System Booster can satisfy various demands with its comprehensive features.
Uninstall OneDrive via Settings
You can remove OneDrive from its Settings app.
Step 1: Open Settings by pressing Win + I and click Apps.
Step 2: In the Apps & features tab, scroll down to locate Microsoft OneDrive.
Step 3: Click on it to choose Uninstall and choose Uninstall again to confirm your choice.
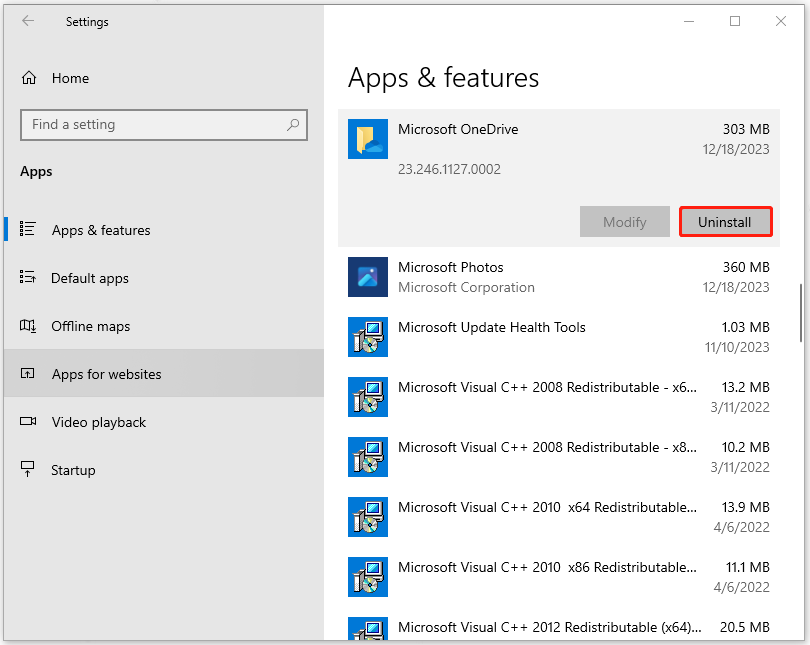
Then you can follow the on-screen prompts to completely uninstall OneDrive.
Uninstall OneDrive via Control Panel
Control Panel will list all the apps that you have installed and you can find the location of OneDrive to delete it.
Step 1: Type Control Panel in Search and open it.
Step 2: Click Uninstall a program under Programs and locate Microsoft OneDrive.
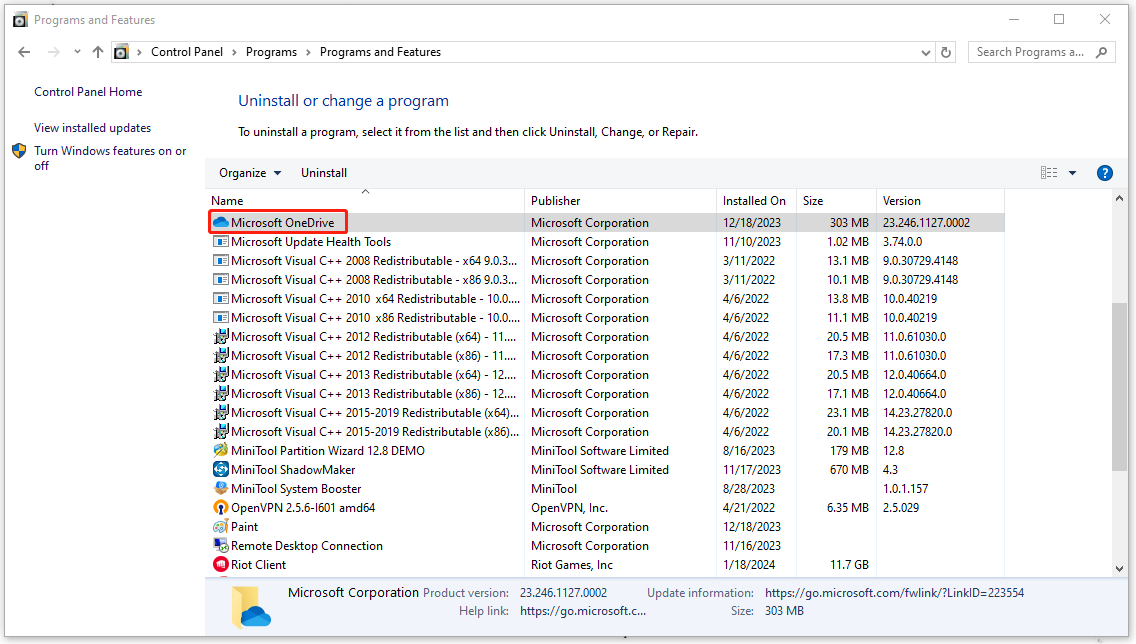
Step 3: Right-click on it to choose Uninstall from the context menu to remove it.
Uninstall OneDrive via Command Prompt
Apart from these methods, you can uninstall OneDrive by executing some commands.
Step 1: Type Command Prompt in Search and choose Run as administrator.
Step 2: Please type this command – taskkill /f /im OneDrive.exe and press Enter to terminate any OneDrive processes.
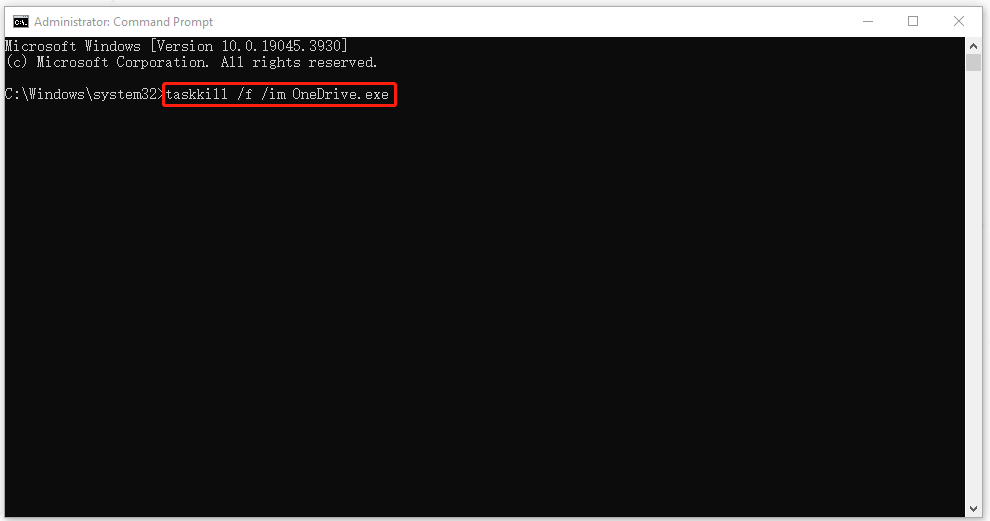
Step 3: When the last command finishes running, you can run one of the following commands to uninstall OneDrive.
- %SystemRoot%\System32\OneDriveSetup.exe /uninstall (for 32-bit Windows 10)
- %SystemRoot%\SysWOW64\OneDriveSetup.exe /uninstall (for 64-bit Windows 10)
Uninstall OneDrive via WinGet
WinGet is a command-line tool to help make it easier to install, uninstall, validate, and obtain detailed information about an app. You can run PowerShell or Command Prompt to use the command related to WinGet. For detailed steps, please keep reading.
To uninstall OneDrive with WinGet via PowerShell, the steps are as follows.
Step 1: Type PowerShell in Search and run it as an administrator.
Step 2: Type winget uninstall onedrive and press Enter to execute the command.
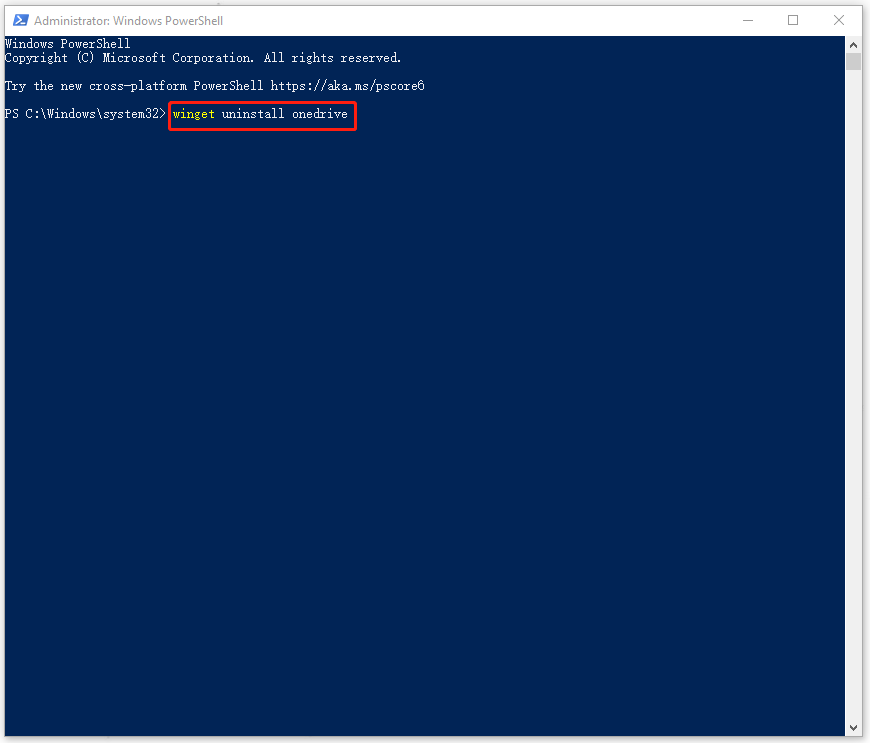
Then the tool will start locating OneDrive and uninstall it automatically. When it finishes, you can check if the program has been removed.
To uninstall OneDrive with WinGet via Command Prompt, the steps are as follows.
Step 1: Run Command Prompt as an administrator and type winget uninstall to execute this command. It will list all the apps that you can uninstall with WinGet.
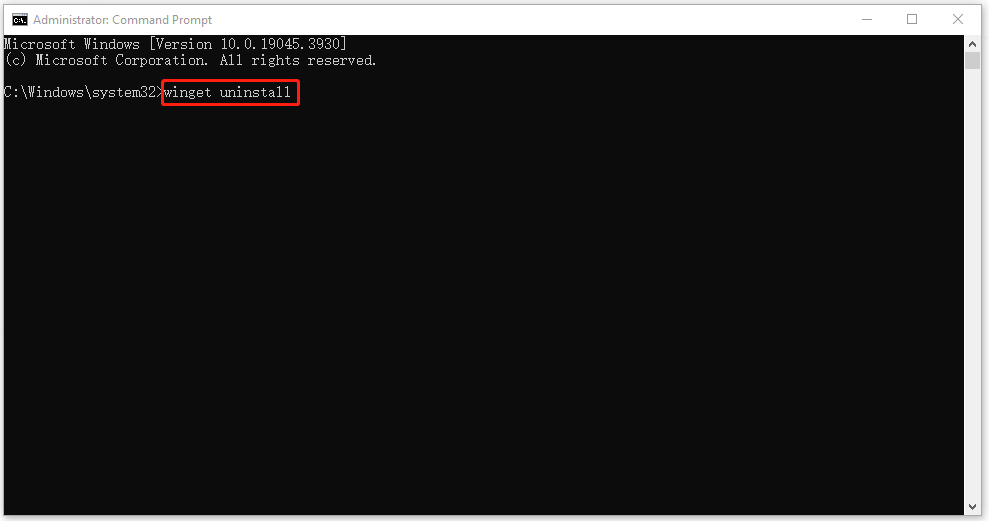
Step 2: Then you can input winget uninstall Microsoft.OneDrive and press Enter to uninstall OneDrive.
What Happens After Uninstalling OneDrive?
Some people may wonder if the data in OneDrive will be affected after uninstalling OneDrive. There is no need to worry about data loss because any files or data you have in OneDrive will still be available as long as you sign into the OneDrive account from the website.
When you uninstall OneDrive, the folders and files stored in the OneDrive folder will stop automatically syncing or backing up to the cloud. If you are collaborating with others in OneDrive for document sharing, the seamless process may get affected or interrupted.
In general, no data will get lost; if you still worry about that, you can choose to disable OneDrive instead of uninstalling it.
How to Disable OneDrive?
There are many methods to turn off OneDrive. We will give you easy ways to do that.
Step 1: Right-click on the OneDrive icon from the taskbar and choose Settings.
Step 2: In the Account tab, click Unlink this PC and then click Unlink account to continue the move.
Then a pop-up window may jump out to require you to enter your email address and some other information. It may take some time to disable OneDrive and after that, you can completely log out of it.
Alternatively, you can configure Group Policy to disable OneDrive.
Step 1: Open the Run dialog box by pressing Win + R and type gpedit.msc to enter.
Step 2: Follow this path to locate OneDrive.
Computer Configuration > Administrative Templates > Windows Components > OneDrive
Step 3: From the right panel, double-click on Prevent the usage of OneDrive for file storage and choose Enabled.
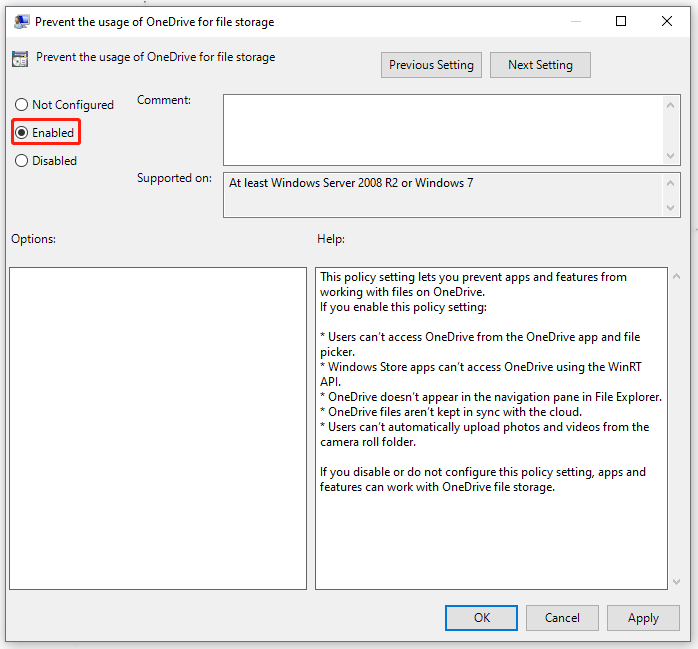
Step 4: Then click Apply > OK to save the choices.
Bottom Line:
How to uninstall OneDrive? There are some ways available to choose. What we recommend is to use MiniTool System Booster, which is easier and quicker to finish the uninstallation.

