Windows High Disk Usage Windows 11/10
Sometimes, your computer seems unusually busy with high disk usage or even 100% disk usage. This means your computer’s disk usage is nearly maxed out and your system performance will also be degraded. This guide can help you to solve this problem without any technical skills. Now, let’s get started!
How to Fix High Disk Usage Windows 10/11?
Fix 1: Scan with MiniTool System Booster
Since Windows high disk usage can slow down your system performance, we recommend you fix this issue with a PC tune-up tool – MiniTool System Booster. It not only gets you free from Windows disk usage but also improves your system performance in different aspects.
This tool supports fixing computer issues, cleaning up your device, and freeing up CPU, RAM, and disk resources on Windows systems. To fix Windows high disk usage, you can try the options below:
MiniTool System Booster TrialClick to Download100%Clean & Safe
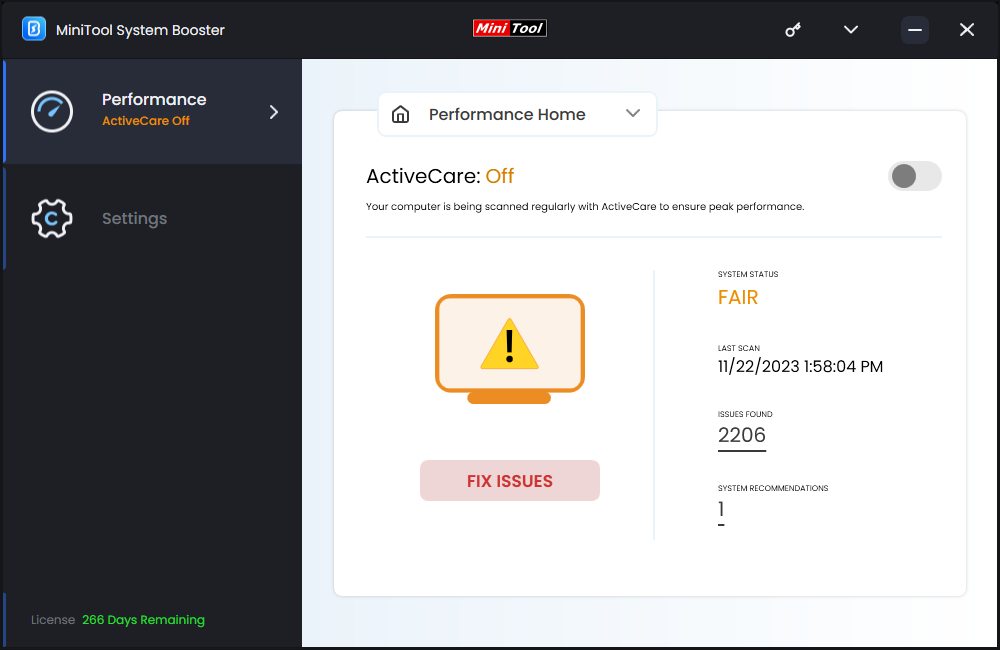
# Option 1: Run ActiveCare
When encountering Windows high disk usage, you can consider running ActiveCare in MiniTool System Booster to monitor your computer and find issues. It can delete internet junk files & Windows junk files, fix registry issues, and find available memory for you. Follow these steps:
Step 1. In the Performance Home page, click on RUN SCAN to start the scanning process.
Step 2. After completion, click on FIX ISSUES to start solving the detected issues.
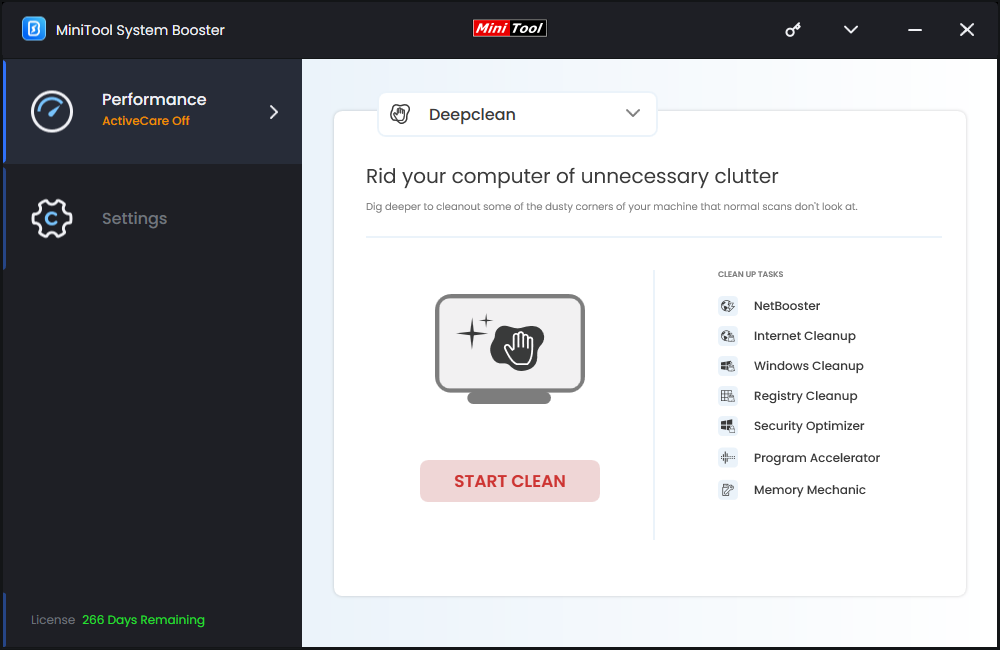
# Option 2: Perform a Deep Clean
The Deepclean feature in MiniTool System Booster can help you maximize the performance of your computer by executing tasks including NetBooster, Internet Cleanup, Windows Cleanup, Registry Cleanup, Security Optimizer, Program Accelerator, and Memory Mechanic.
If you need to boost internet speed, clear junk files, release more memory, and so on, please: go to the Deepclean page and hit START CLEAN and then it will run these tasks for you. You can choose to run them in sequence or to skip some tasks.
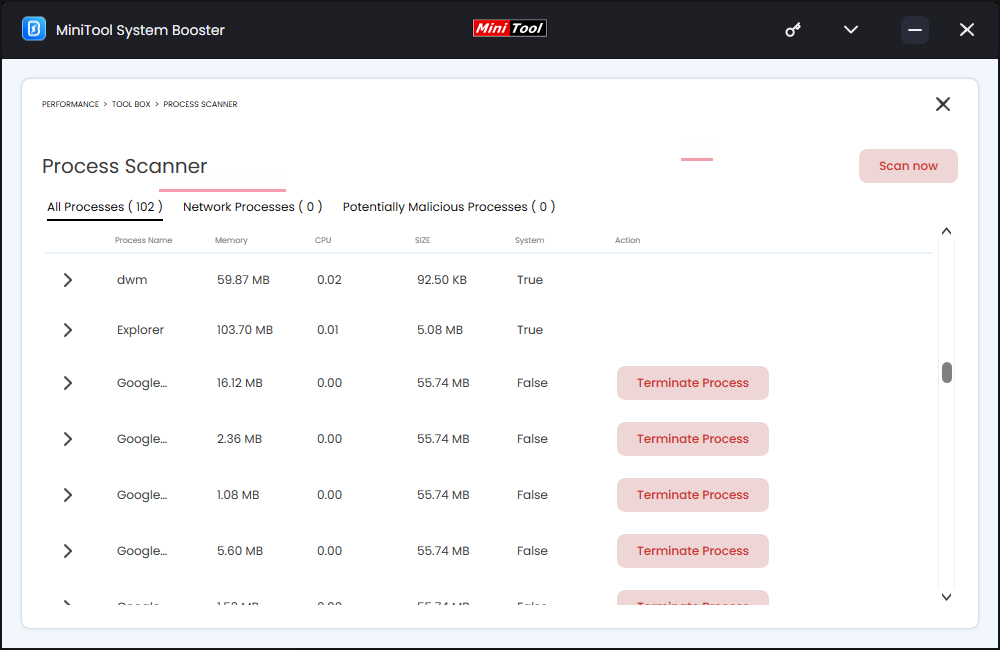
# Option 3: Disable Intensive Background Applications
Running intensive tasks in the background can often trigger issues like Windows high disk usage or even 100% disk usage. The Process Scanner utility allows you to find these tasks and terminate them. To do so:
Step 1. Launch MiniTool System Booster.
Step 2. In the Toolbox page, click on Process Scanner and then hit Scan now to find memory intensive background tasks.
Step 3. After scanning, you can hit Terminate Process beside the task you want to disable.
# Option 4: Change a Power Plan
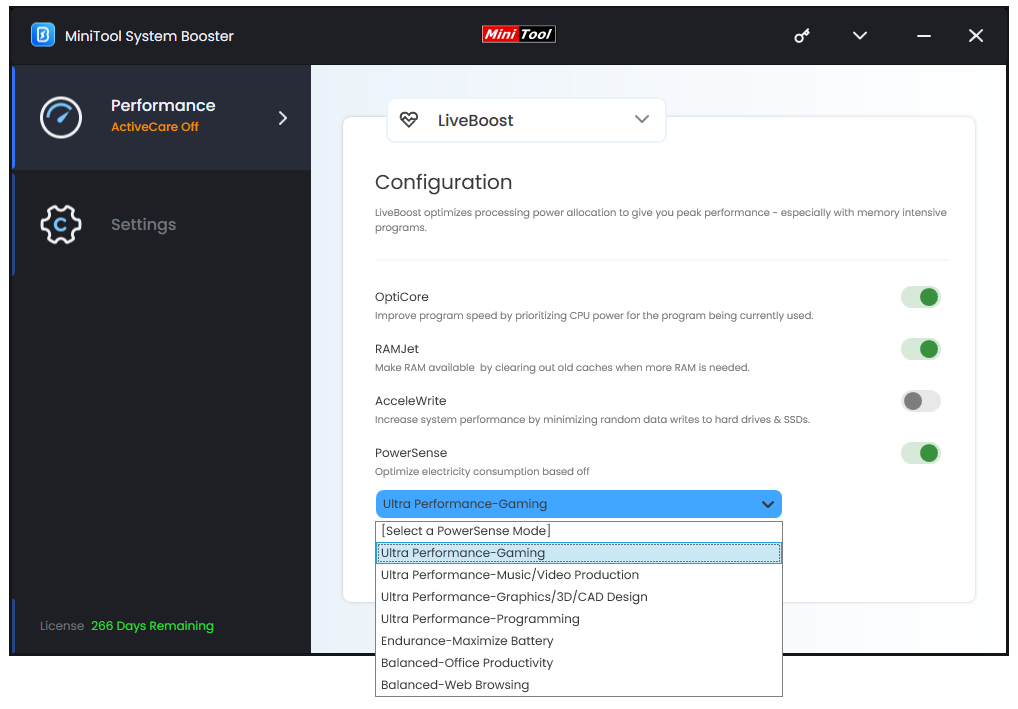
MiniTool System Booster comes with a feature called PowerSense that provides 7 types of power options for you. When you are playing games, browsing web pages, watching videos, and more, you can choose the corresponding mode to optimize electricity consumption. To do so, you can: go to the LiveBoost page and then select a suitable mode under PowerSense according to your needs.

Fix 2: Reset Virtual Memory
Windows high disk usage can also be caused by an unreasonable virtual memory. Virtual memory is an extension of your computer’s physical memory. When the RAM runs out, Windows will temporarily store files in virtual memory. Follow these steps to reset your virtual memory:
Step 1. Press Win + R to open the Run box.
Step 2. Type sysdm.cpl and hit Enter to open System Properties.
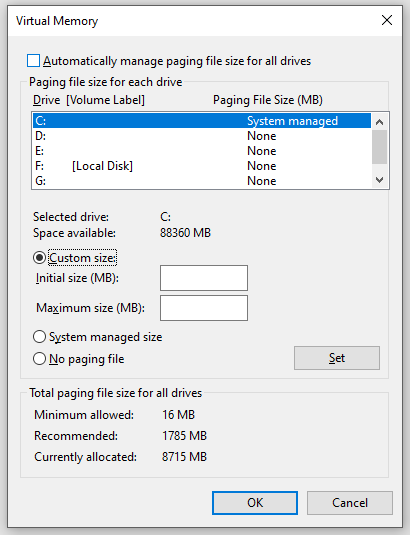
Step 3. Go to the Advanced tab > click on Settings under Performance > hit Advanced > hit Change.
Step 4. Untick Automatically manage paging file size for all drives > select the drive you want to change > check Custom size > customize Initial size and Maximum size > hit Set & OK.
Fix 3: Rebuild Windows Search Index
Windows keeps an index of all your searches so that you can find your files, folders, emails, and so on instantly. However, this feature might lose control and lead to Windows high disk usage. In this case, it is time to rebuild your search index. To do so:
Step 1. Type control panel in the search bar and hit Enter.
Step 2. Expand the dropdown menu beside View by and hit Small icons.
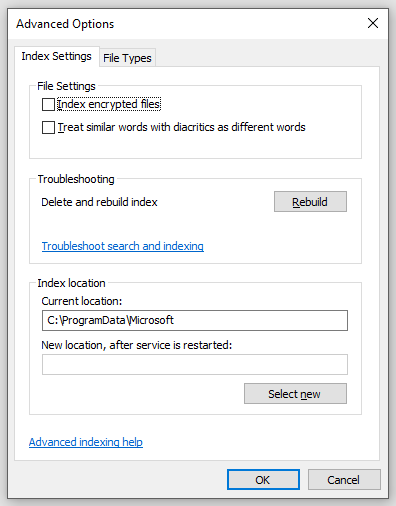
Step 3. Click on Indexing Options > Advanced > Rebuild to start to erase and rebuild the index for you.
Fix 4: Update Windows
Microsoft regularly rolls out new Windows 10/11 updates to improve the overall performance of your system, so updating your Windows might also help to address Windows high disk usage. Here’s how to update Windows 10:
Step 1. Press Win + I to open Windows Settings.
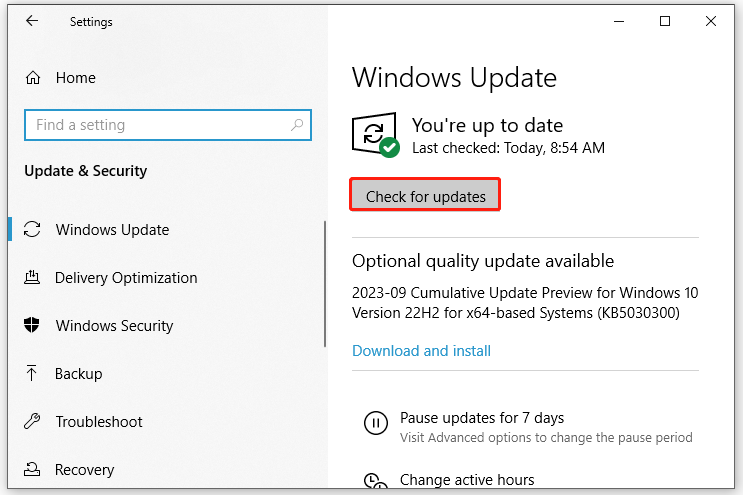
Step 2. Go to Update & Security > Windows Update > Check for updates and then wait for Windows to find any updates available for you.
Fix 5: Disable SuperFetch
SuperFetch, also known as SysMain, preloads applications into memory to make them launch faster. It is also identified as a potential cause of high disk usage Windows 10/11. If this service constantly reads data from your disk and makes your hard disk spike, follow these guidelines to disable it:
Step 1. Type service.msc in the Run box and hit Enter.
Step 2. Scroll down in the services list to find SysMain and right-click on it to choose Properties.
Step 3. Under the General tab, set the Startup type to Disabled and hit Stop.
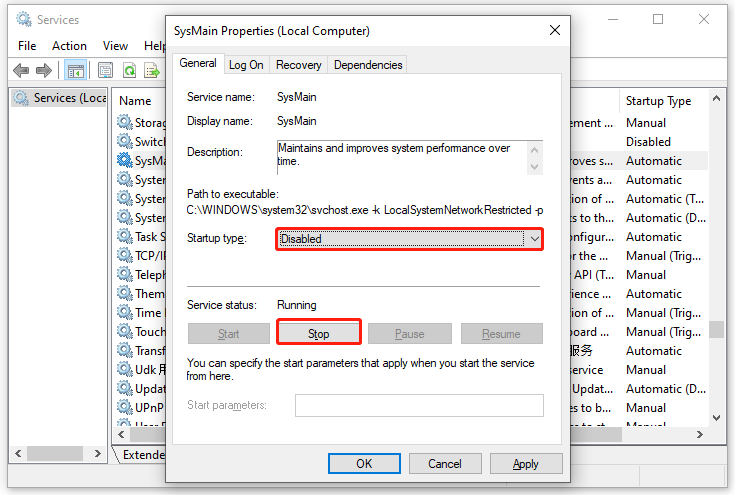
Step 4. Click on Apply & OK to save the changes.
Final Words
In summary, it is easy to fix high disk usage on Windows machines. As long as you work your way down the guidelines listed above, you can find the one that works for you. Have a nice day!