Every time you install apps or hardware on your Windows device, new registry entries are created. Even if you uninstall them, the corresponding registry entries are not always removed completely. Over time, you will get thousands of useless registry entries.
Although they only occupy a little disk space, your operating system has to run all of them, which will slow down your computer in the long run. Things will get worse if your device is attacked by malware. Malware will mess up the registry and make your computer vulnerable.
Therefore, you need to clean your registry every few weeks to prevent some possible issues and boost your system performance. Since most of you are not familiar with Registry Editor, you might have no idea about how to clean registry Windows 10/11. In this guide, we highlight 4 ways to clean Windows registry for you.
How to Clean Windows Registry Windows 10/11?
Preparation: Back up Registry Files
Before cleaning your registry, it is advised to back it up because deleting certain entries from the registry might cause some severe problems. To do so:
Step 1. Press Win + R to open the Run dialog.
Step 2. Type regedit and hit Enter.
Step 3. In Registry Editor, click on File in the upper left corner and select Export from the context menu.
Step 4. Select All as Export range > enter the name of the file > choose a safe location > hit Save.
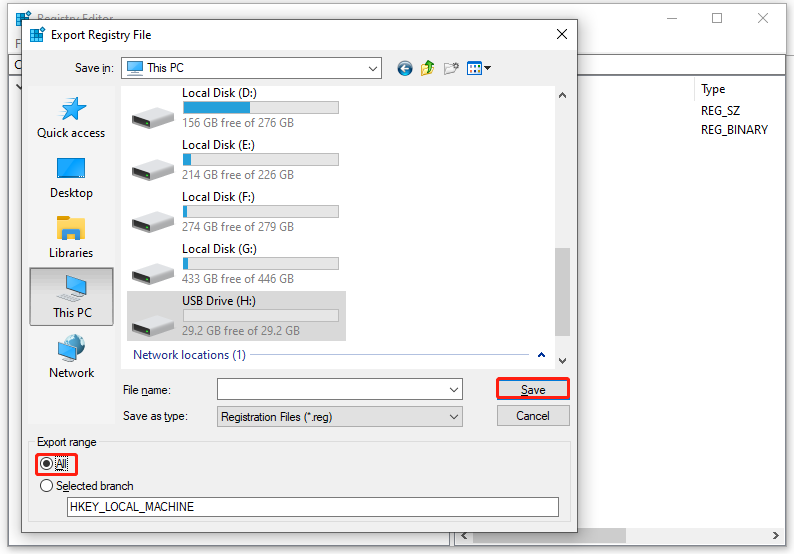
It is advisable to save the registry backup to a USB flash drive or external hard drive in case that you need to restore it after a system crash.
Also see: How to Backup and Restore Registry in Windows 10
How to Clean Windows Registry via MiniTool System Booster
Speaking of cleaning registry and improving system performance, MiniTool System Booster is an optimal choice for you. It is one of the most reliable free registry cleaners that help you to clean Windows registry safely with simple steps.
In addition, this tool can speed up your PC by deleting junk files, erasing browsing history, removing deceptive & unwanted programs, and more. Now, let’s see how to clean registry files via this tool:
Step 1. Launch MiniTool System Booster.
MiniTool System Booster TrialClick to Download100%Clean & Safe
Step 2. In the main page, toggle on ActiveCare and hit RUN SCAN to start scanning your computer for issues.
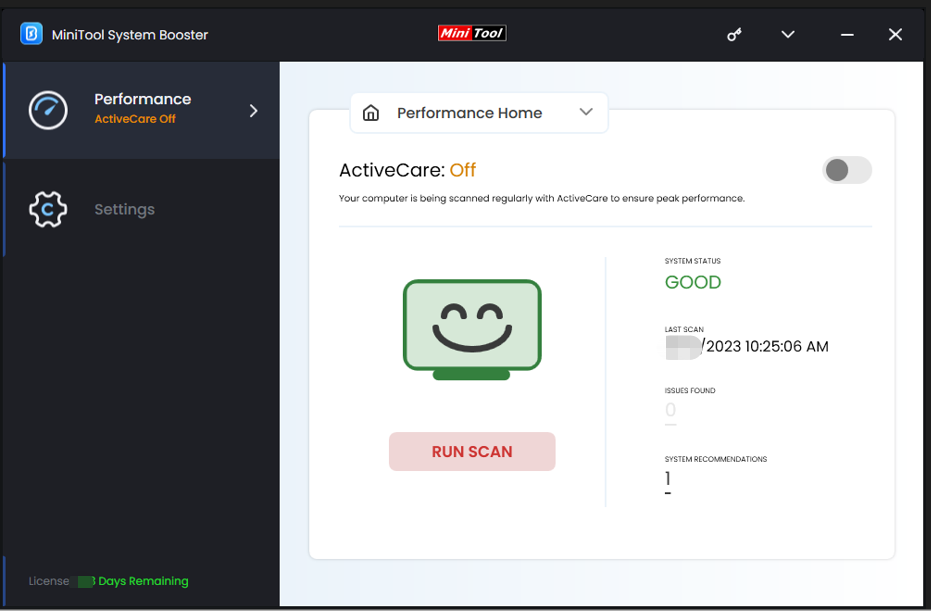
Step 3. After scanning, hit FIX ISSUES to solve all the found problems.
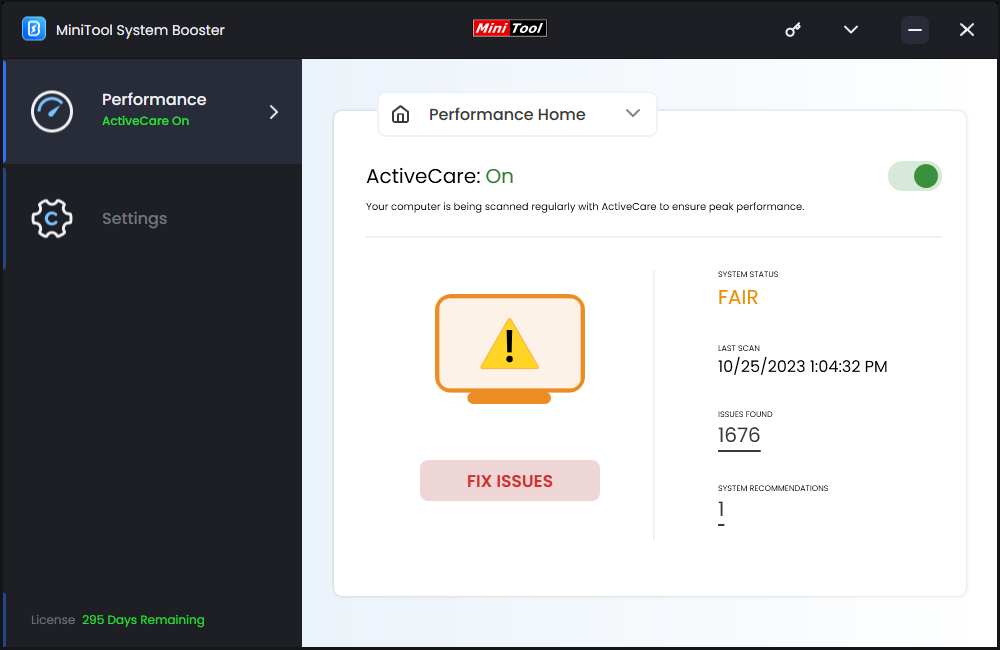
In addition, you can hit the number under ISSUES FOUND to view the details and choose what to clean up. As you can see, MiniTool System Booster will detect Internet junk files, Windows junk files, registry issues, and available memory for you.
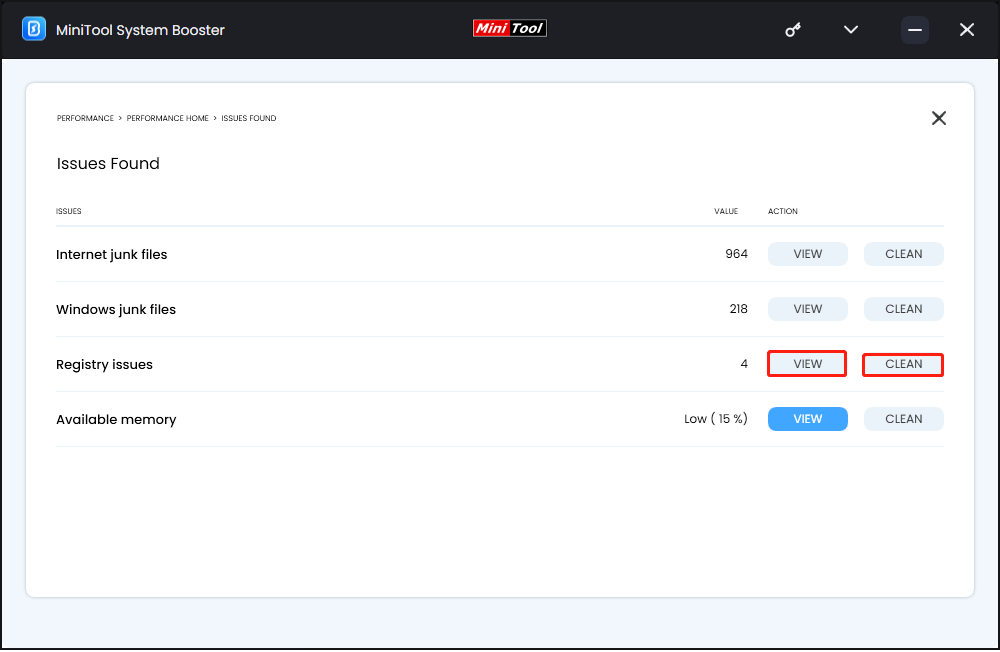
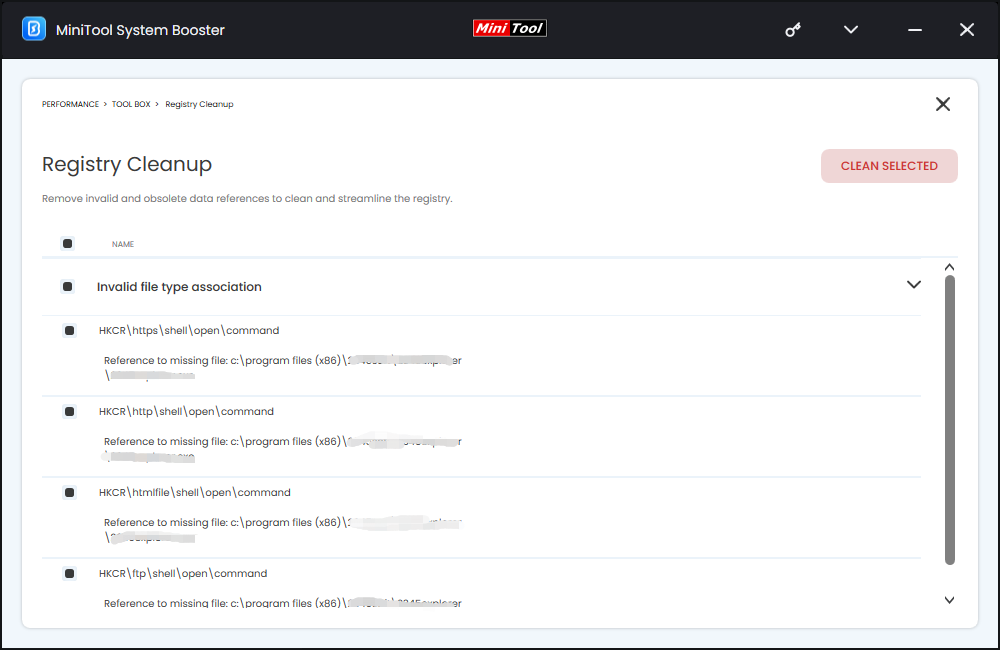
If you hit VIEW, you can view all the problematic registry entries. Tick the items you want to clean and hit CLEAN SELECTED to delete them.
How to Clean Windows Registry via Disk Cleanup
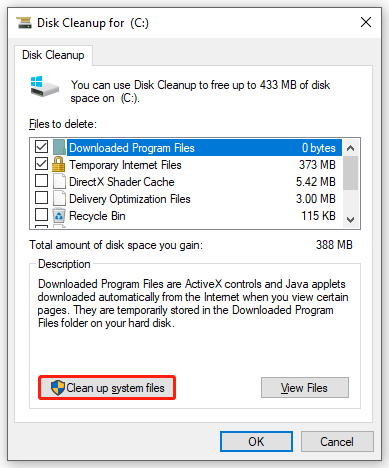
Disk Cleanup is one of the most effective inbuilt tools that manage disk space on your PC. Although it doesn’t clean the Windows registry directly, it will cleanup and remove files that contain data in the registry. Once these data is deleted, the corresponding registry entries will also be deleted. Follow these guidelines:
Step 1. Press Win + S to evoke the search bar.
Step 2. Type disk cleanup and hit Enter.
Step 3. Select the system drive and hit OK.
Step 4. Click on Clean up system files and select the files you want to delete.
How to Clean Windows Registry via Command Prompt
Deployment Imaging Serving and Management, also known as DISM, is another core Windows tool that can scan system files and images for corruption or any other changes. At the same time, you can also use it to clean registry to some extent. Here’s how to clean registry Windows 10 via CMD:
Step 1. Run Command Prompt with administrative rights.
Step 2. In the command window, type DISM /Online /Cleanup-Image /CheckHealth and hit Enter to scan the system image for corruption.
Step 3. Run DISM /Online /Cleanup-Image /ScanHealth to perform a more advanced scan to determine whether the image has any problem.
Step 4. Run DISM /Online /Cleanup-Image /RestoreHealth to repair any issues that DISM detects.
Also see: Best Fixes: DISM /online /cleanup-image /restorehealth Is Stuck
How to Clean Windows Registry via Registry Editor
If you know the exact paths of the registry entries you need to remove, you can choose to remove them manually in Registry Editor. In this process, you can’t be too careful as you are likely to delete something crucial by mistake. Here’s how to clean registry Windows 10 manually:
Step 1. Press Win + R to open the Run box.
Step 2. Type regedit and hit Enter to open Registry Editor.
Step 3. Navigate to the key you want to remove or press Ctrl + F to find it. If you want to find keys about apps and programs, you can expand the HKEY_LOCAL_MACHINE, HKEY_CURRENT_USER, and HKEY_USERS folders.
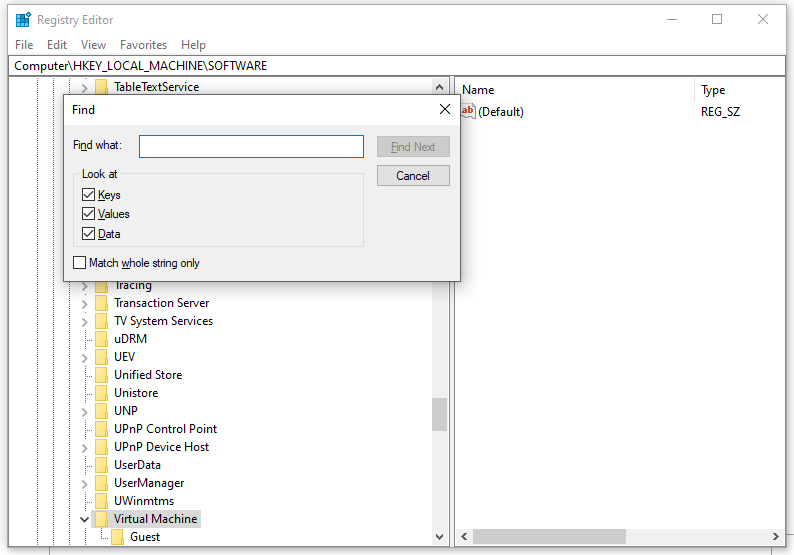
Step 4. Right-click on any key or folder you want to get rid of and select Delete from the context menu.
Also see: How to Fix: Error While Deleting Key on Windows 10/11/8/7
Final Words
By following the steps outlined in this guide, you can clean Windows registry safely and easily. Also, don’t forget to create a backup of your registry files before proceeding. Once you delete some essential entries mistakenly, you can import the backup and restore your registry data. Hope you can keep running your PC smoothly via regular registry cleaning tasks.


