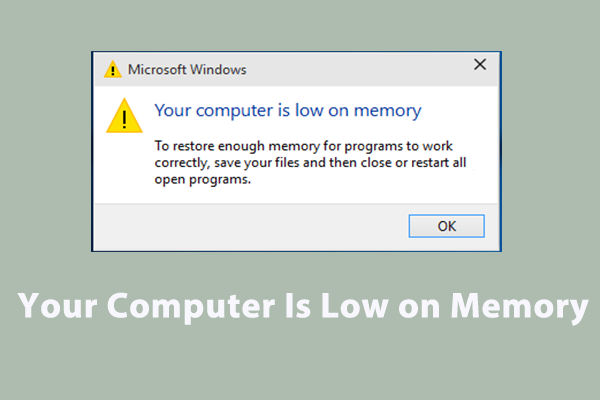
Why Is My RAM Usage so High When Nothing is Running?
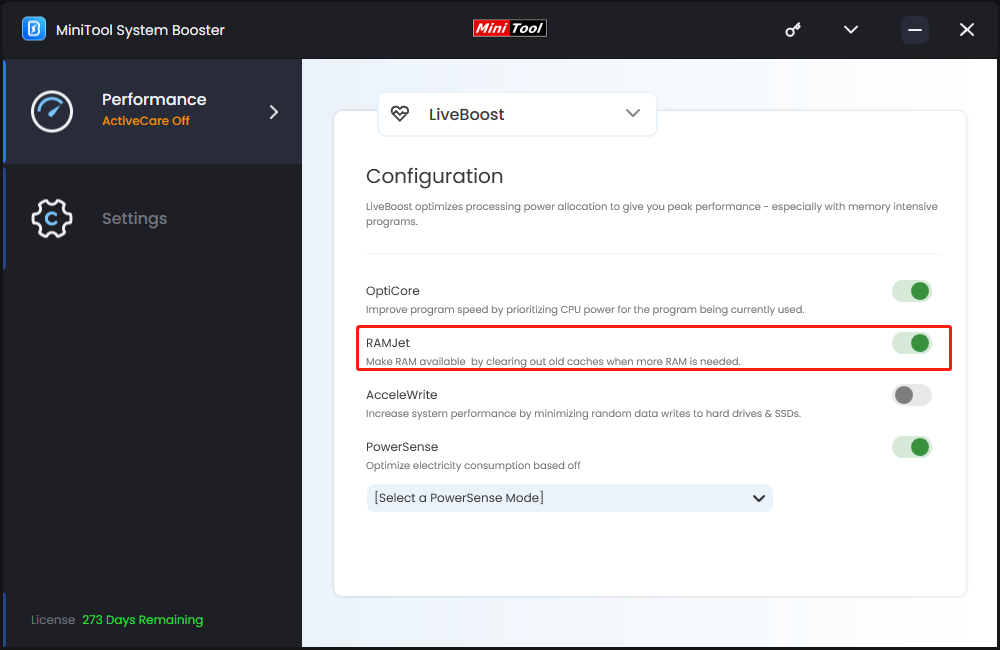
Random Access Memory (RAM) can be used for storing and retrieving program data. With it, your computer can instantly read and analyze information, which is much faster than loading data directly from a hard drive. The more RAM your computer has, the more programs you will be allowed to run simultaneously.
Some of you might notice that the RAM usage is very high even when your computer is inactive. Why does it occur? Although it appears that you don’t run any app, many processes such as antivirus software, online file sync tools and more are running in the background without your knowledge. How to limit RAM usage for these processes to boost your system performance? In this guide, we will take a closer look at this issue and help you to find some solutions.
How to Limit RAM Usage via MiniTool System Booster?
To lower RAM usage for better system performance, a free RAM limiter called MiniTool System Booster comes in handy. This all-in-one tool is designed to remove junk files, release more memory, defragment a hard drive, clean registries, as well as find and solve some common system issues on your computer.
Click on the button below to download MiniTool System Booster Trial Edition and see how to limit RAM usage via this tool:
MiniTool System Booster TrialClick to Download100%Clean & Safe
# Run Memory Mechanic
At first, you can run Memory Mechanic to free up more memory. Here’s how to do it:
Step 1. Launch the program to enter its main interface.
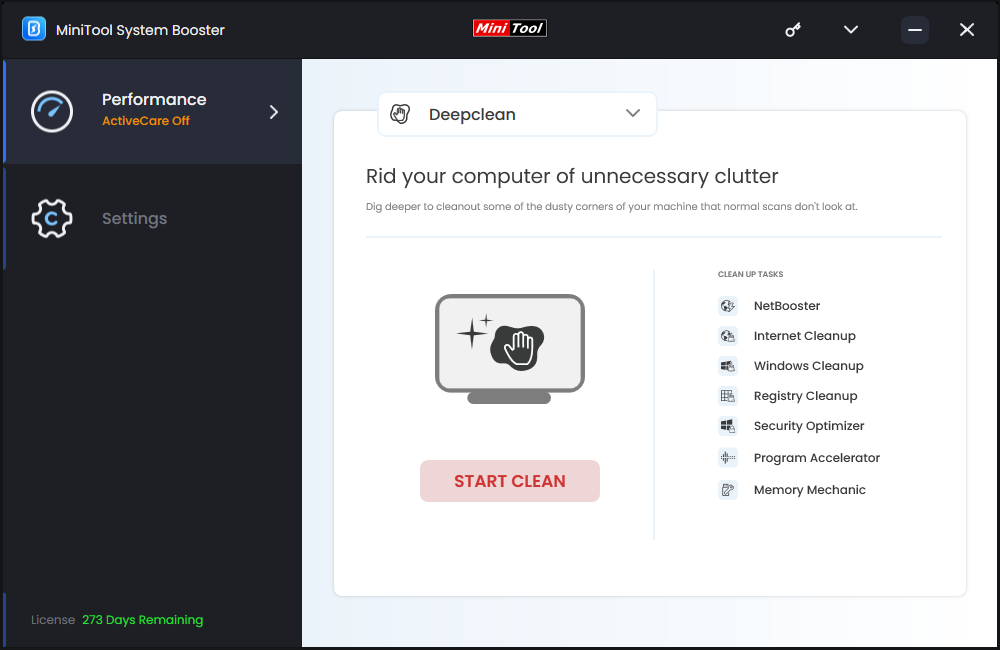
Step 2. Click on Performance Home and select Deepclean from the drop-down menu.
Step 3. Then, click on START CLEAN to run the following 7 tasks in order to deeply clean up your computer. You can choose to run them one after another or skip some of them according to your needs.
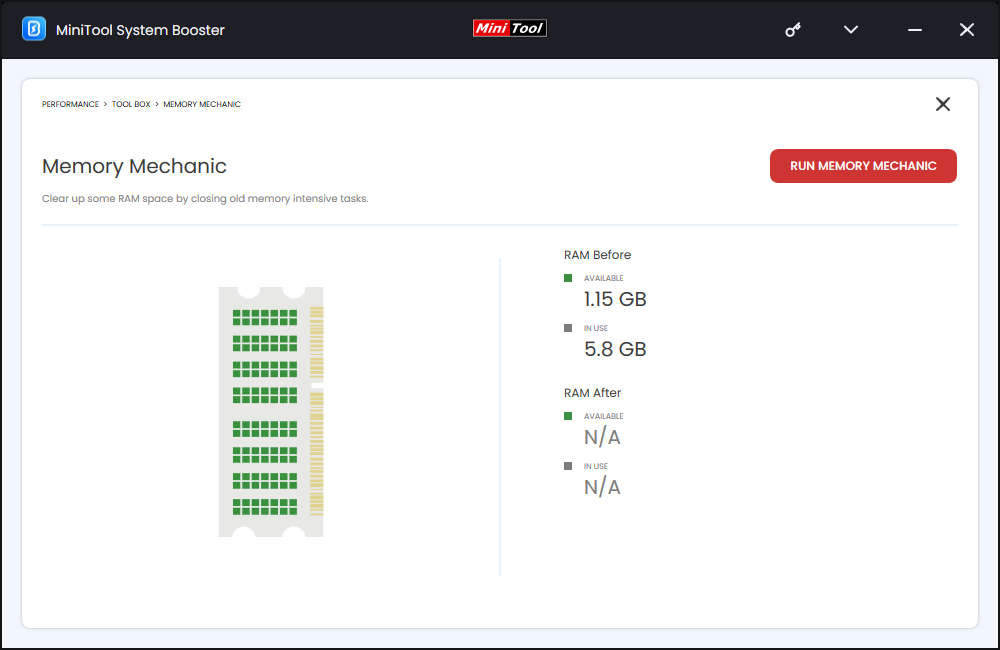
The Memory Mechanic task will show the available and used RAM for you. Click on RUN MEMORY MECHANIC and then it will reduce RAM usage by closing old memory-intensive tasks.
# Terminate Memory-Hogging Process
Another way is to detect the memory-intensive programs and end them via Process Scanner. Here’s how to do it:
Step 1. Head to the Toolbox page and select Process Scanner.
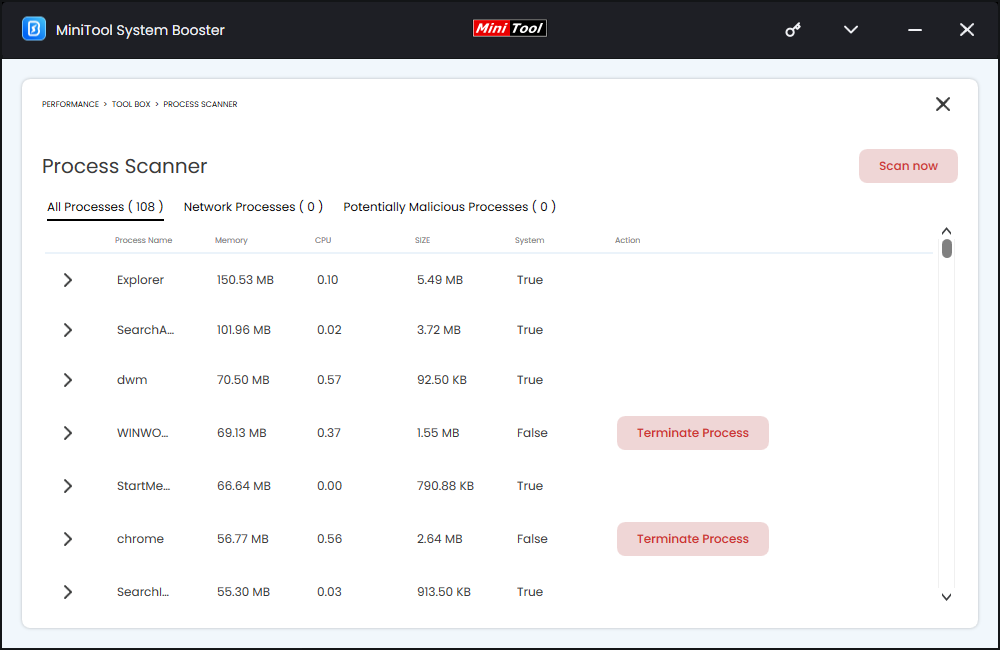
Step 2. After hitting Scan now, you will see a list of programs running on your computer and the memory & CPU they occupy. Then, click on the Terminate Process button beside the memory-intensive programs to end these processes.
# Disable Startups
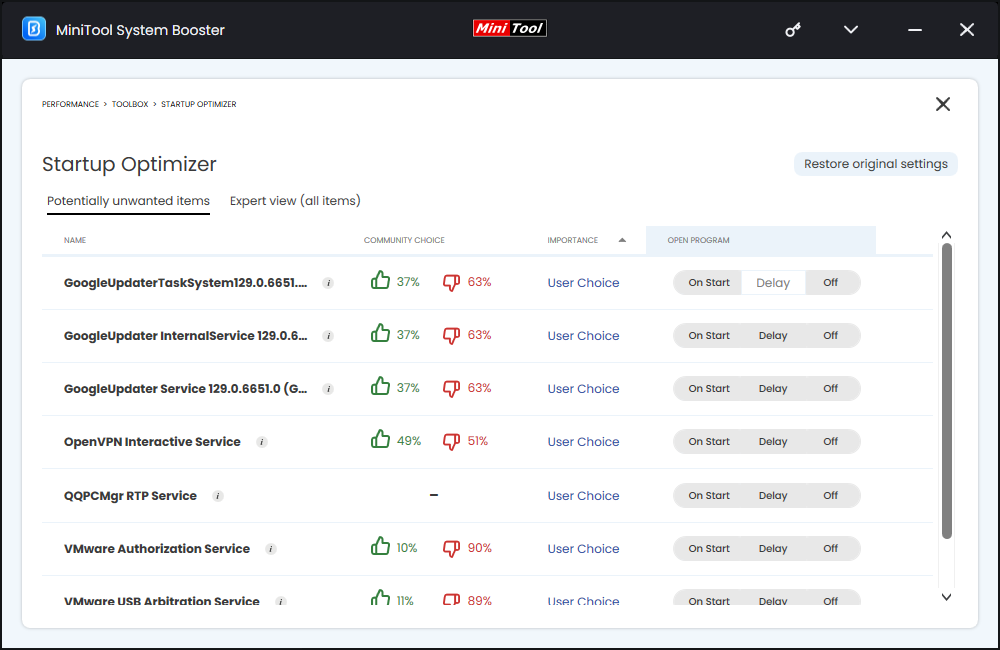
Every time the system boots up, it assigns some unnecessary system resources to some programs that start up automatically. To limit their RAM usage, it’s a good idea to run Startup Optimizer to minimize the number of startup programs. Follow these steps:
Step 1. In the Toolbox page, click on Startup Optimizer.
Step 2. After scanning, this tool will list some potentially unwanted processes and then you can choose to delay or disable them.
How to Limit RAM Usage via Windows Inbuilt Features?
Fix 1: Set Application Priority
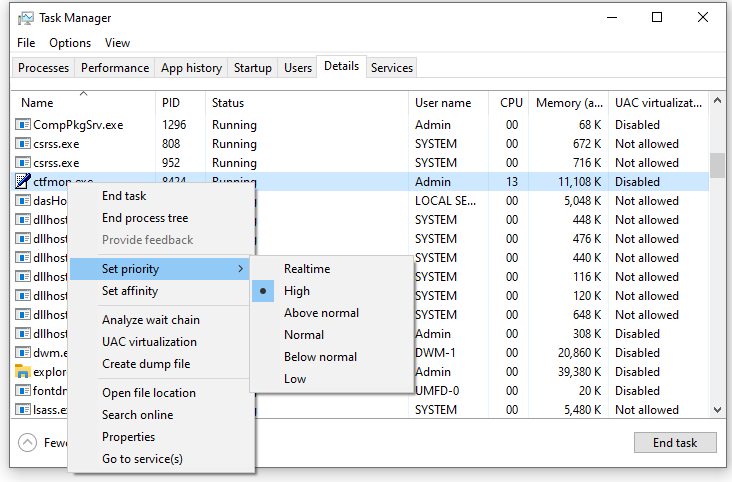
Windows Task Manager allows you to set 6 priority levels for different processes – Realtime, High, Above normal, Normal, Below normal, and Low. After changing the priority, the system will assign CPU and RAM according to the priority level you set. Here’s how to set priority for certain processes:
Step 1. Right-click on taskbar and select Task Manager from the context menu.
Step 2. In the Details tab, right-click on the application for which you want to change the priority > select Set priority > select a desired priority level.
Fix 2: Reduce Visual Effects
Although the visual effects can make your experience more user-friendly with animations, shadows, translucent effects, and more, they can also slow down your computer because they might consume a lot of CPU, RAM, or disk usage. Therefore, disabling visual effects is another way to limit RAM usage. To do so:
Step 1. Right-click on the Start menu and select Run.
Step 2. Type sysdm.cpl and hit Enter to launch System Properties.
Step 3. Head to the Advanced tab and hit Settings under Performance.
Step 4. In the Visual Effects tab, tick Adjust for best performance.
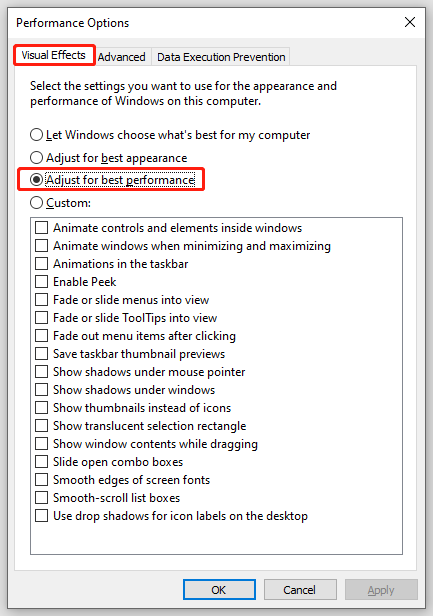
Step 5. Click on Apply & OK to save the change.
Fix 3: Enable Memory Saver on Google Chrome
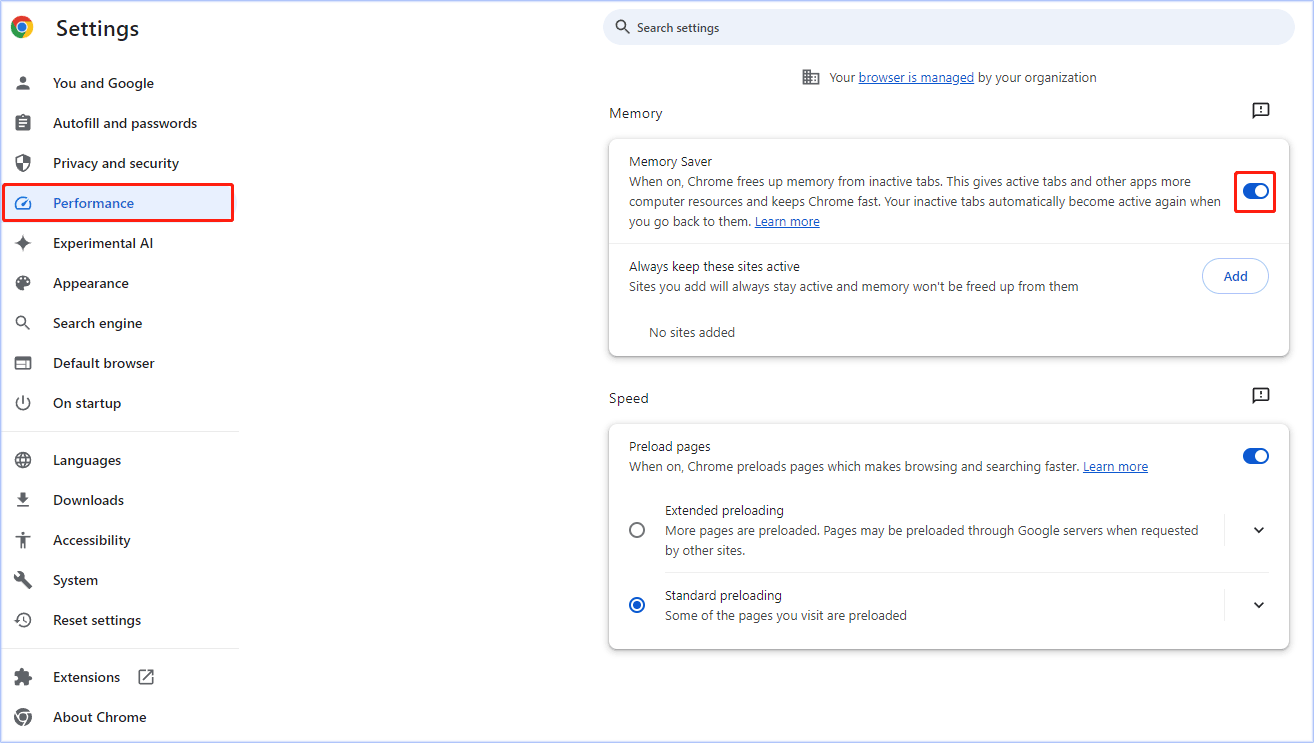
As is known to all, some browsers like Google Chrome can use up a lot of RAM and slow down your computer. Luckily, they released some features to reduce memory usage for certain tabs. For example, the Memory Saver feature in Google Chrome allows you to free up memory from inactive tabs. Here’s how to limit RAM usage for Chrome:
Step 1. Launch Google Chrome and open Settings.
Step 2. In the Performance tab, toggle on Memory Saver.
Fix 4: Set a Limit for the Maximum Used Memory
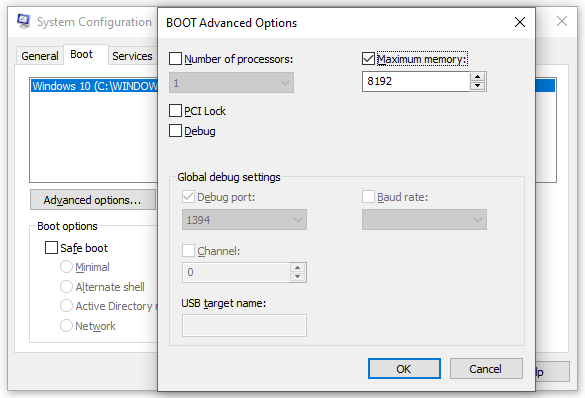
When there is a problem with the performance and stability of your computer due to memory, you need to check the maximum memory limit. Most of the time, setting a maximum RAM limit to the size of the physical RAM can help enhance the performance of your computer significantly. Here’s how to do it:
Step 1. Press Win + R to open the Run box.
Step 2. Type msconfig and click on OK to launch System Configuration.
Step 3. Go to the Boot tab > select the operating system > hit Advanced options.
Step 4. Tick Maximum memory > type a value for the amount of Maximum memory > hit OK > restart the computer to make the change effective.
Final Words
This guide demonstrates how to limit RAM usage via a third-party RAM limiter called MiniTool System Booster and Windows inbuilt utilities. Obviously, the former is much easier to follow and understand. Furthermore, with the help of MiniTool System Booster, you can always run your computer at its full potential because this tool can maximize its overall performance.
MiniTool System Booster TrialClick to Download100%Clean & Safe
Do you have any problems while using our product? If yes, don’t hesitate to contact our support team via [email protected]. We will spare no effort to further your interests.


