Is Steam slow to unpack games on your PC? Some Steam users have reported that the game's unpacking process is too slow or stuck on their computers. This post introduces how to fix the “Steam unpacking slow” issue.
Many Steam users may encounter the “Steam unpacking slow” issue when preloading the mage. It is not limited to specific scenarios and may occur in different environments. The following are the details:
1. When installing the pre-installed games, you may encounter the issue. Steam allows you to pre-install encrypted versions of games that haven’t been released yet. You can later obtain the decrypted files when the game is released and the Steam client decompresses the game files.
2. You may encounter this issue when updating your game. Some users have reported that unpacking game updates on Steam is taking longer than usual.
Related posts:
- How to Uninstall Steam/a Steam Game? Follow the Guide!
- Is Steam Download Speed Slow? Here Is the Way to Fix It!
Many factors can cause the “Steam preload unpacking slow” issue including network speed, game size, disk speed, system resources, remaining space on the drive, hard drive errors, etc. Next, we will talk about how to speed up unpacking Steam games.
Method 1. Pause the Unpack or Restart Steam
Before trying the following advanced solutions, it’s recommended to fix slow Steam decompression issues with simple actions. Some people have reported success by pausing and unpausing the unpacking process. Besides, restarting Steam has also proven helpful.
Method 2. Use the Professional Optimize Tool
How to speed up unpacking Steam games? To complete the unpacking smoothly, it is crucial to ensure that the drive where Steam is installed has enough free space. Besides, if you use the HDD, you should deal with the file system fragmentation issue. Thus, you need to free up the space and defragment the HDD.
Is there a tool that supports doing these tasks at the same time? Here, you come to the right place. MiniTool develops an all-in-one PC optimizer – MiniTool System Booster. This tool offers a feature called Deepclean that enables you to deep clean up the PC and defragment your hard drive.
The main interface of MiniTool System Booster is simple and user-friendly. Now, download and install it.
MiniTool System Booster TrialClick to Download100%Clean & Safe
1. Launch MiniTool System Booster and click Deepclean from the drop-down menu in the Performance Home tab.
2. Just click the START CLEAN button. Then, it will begin the scan and the cleanup tasks. To free up space and defragment your hard drive, you need to pay attention to task 3 and task 6.
#1. NetBooster
#2. Internet Cleanup
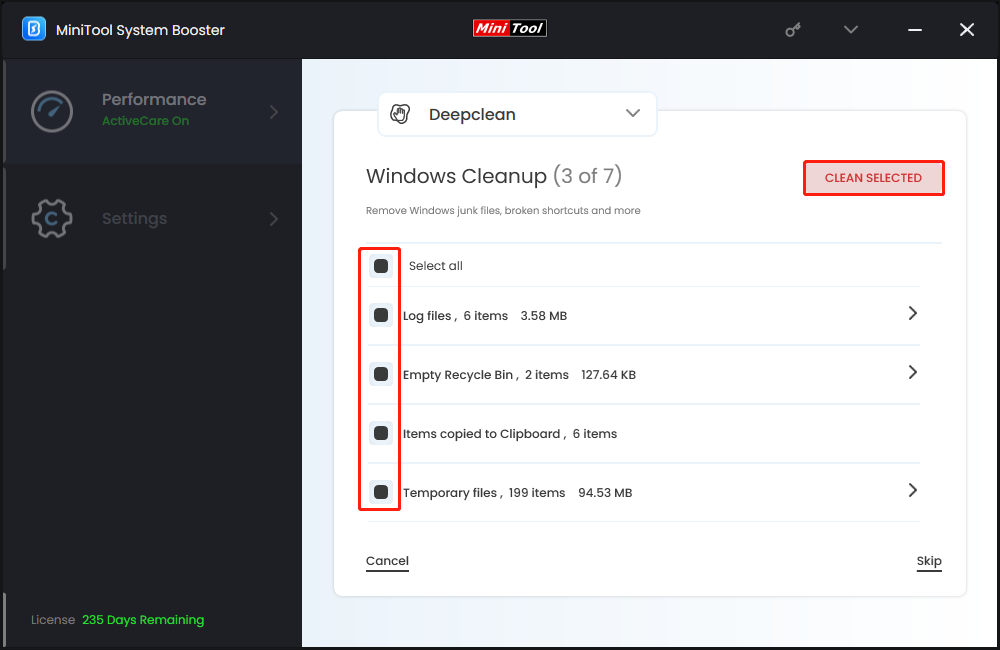
#3. Windows Cleanup
To clean up your computer, Windows cleanup is necessary and here MiniTool System Booster can remove Windows junk files, broken shortcuts, temporary files, etc. Check the found items and click CLEAN SELECTED. After the cleanup, another task starts.
#4. Registry Cleanup
#5. Security Optimizer
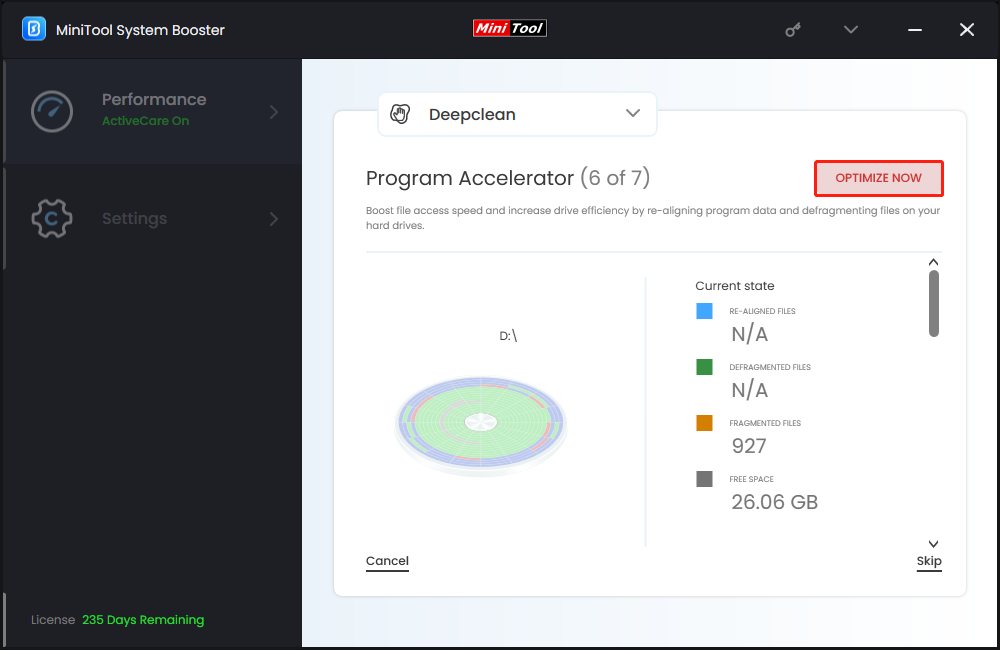
#6. Program Accelerator
This task can defragment the hard drive. It speeds up file access and improves drive efficiency by realigning program data and defragmenting files on your hard drive. After scanning, click OPTIMIZE NOW to start the process.
#7. Memory Mechanic
Method 3. Set Steam’s Priority to High
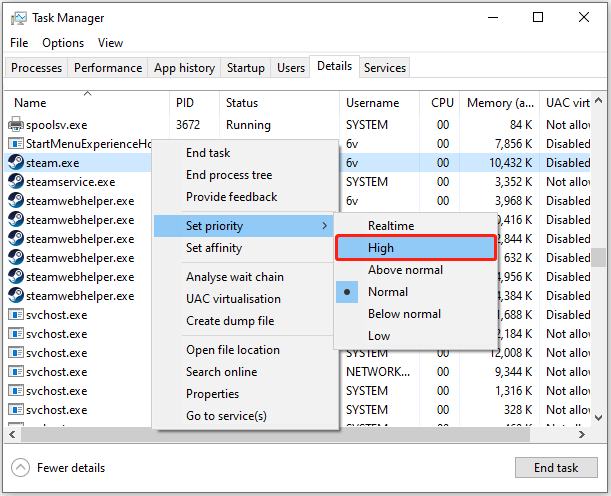
If you are running multiple programs at the same time, or you have many boot startup programs, you can set Steam’s priority to high to fix the “Steam preload unpacking slow” issue. Here is how to do that:
1. Type Task Manager in the Search box to open it.
2. Go to the Details tab andscroll down the page to find steam.exe. Right-click it to choose Set priority > High.
Method 4. Clear Files in the Depotcache Folder
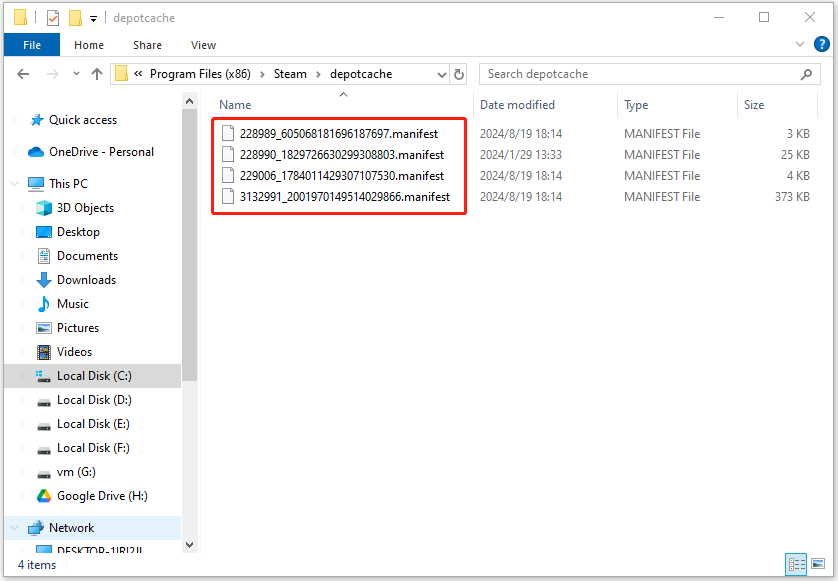
Steam depotcache folder stores excess, temporary data on your computer that can take up the PC’s space. It also stores private data such as passwords or browsing history. It’s recommended to clear files in the depotcache folder to fix the “Steam unpacking slow” issue.
1. Close Steam. Press the Windows + E keys together to open File Explorer.
2. Go to C:\Program Files (x86)\Steam\depotcache. The path varies depending on where your steam is installed.
3. Select all files in the depotcache folder and delete them.
Method 5. Check for the Hard Drive Errors
The “Steam unpacking slow” issue could be caused by corrupted file systems or drive errors. Thus, you can run the Windows built-in disk error-checking tool to fix it. Here are the instructions to follow:
1. Press the Windows + E keys together to open File Explorer.
2. Now, locate the drive where you have installed Steam (C drive by default).
3. Next, right-click the drive and select the Properties option.
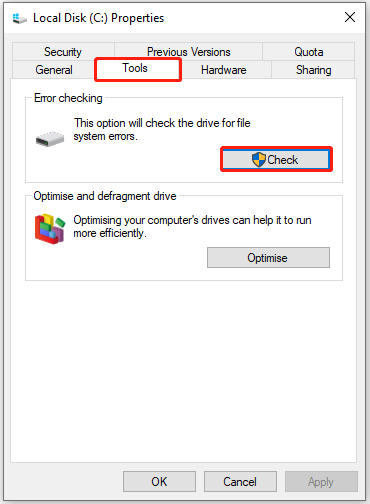
4. After that, go to the Tools tab and click the Check button under the Error checking section.
5. Once the process is finished, open Steam and see if the problem is gone.
Method 6. Upgrade to SSD
If your PC still uses a traditional hard drive, upgrading to a solid-state drive (SSD) can greatly enhance performance. SSDs are faster, more reliable, and provide faster data access times than traditional hard drives. For more details, refer to this post – How to Upgrade Laptop from HDD to SSD Without Reinstalling OS.
Final Words
After reading this post, you may have known how to fix the “Steam unpacking slow” issue. MiniTool System Booster can solve the issue and speed up the overall performance. It is worth trying!