Users always use a VPN, or virtual private network, to protect their online privacy. When running, the VPN will first establish a secure connection between your device and the private VPN server before forwarding your network traffic to the website or application you’re trying to reach.
By transmitting your traffic through a secure VPN server, it is possible to prevent third parties such as your Internet Service Provider (ISP) from tracking and recording your online activities. At the same time, this also helps to avoid hackers intercepting your network data transmission.
However, problems, like unstable networks, security flaws, extension interference, conflicts with antivirus or firewall, and more, may result in VPN connection issues. Focusing on VPN not working on Chrome, this post will demonstrate the corresponding fixes for you.
Solution 1. Check and Repair with MiniTool System Booster
Obsolete cache data, expired cookies, corrupted downloaded files, or internet connection issues could be the root cause of Chrome VPN issues. When it comes to tweaking system and browser performance, MiniTool System Booster stands out from similar products in the market.
It can easily solve internet connection issues and efficiently clean out temporary internet files, cache, browsing history, download images, and more on your browsers. Besides, this tool can improve your system performance by reducing boot time, freeing up more memory, CPU, and disk space, uninstalling deceptive software, defragging hard drives, etc.
Now, let’s see how to repair internet connection issues and clear cache on Google Chrome with this PC tune-up tool:
Step 1. Launch MiniTool System Booster.
MiniTool System Booster TrialClick to Download100%Clean & Safe
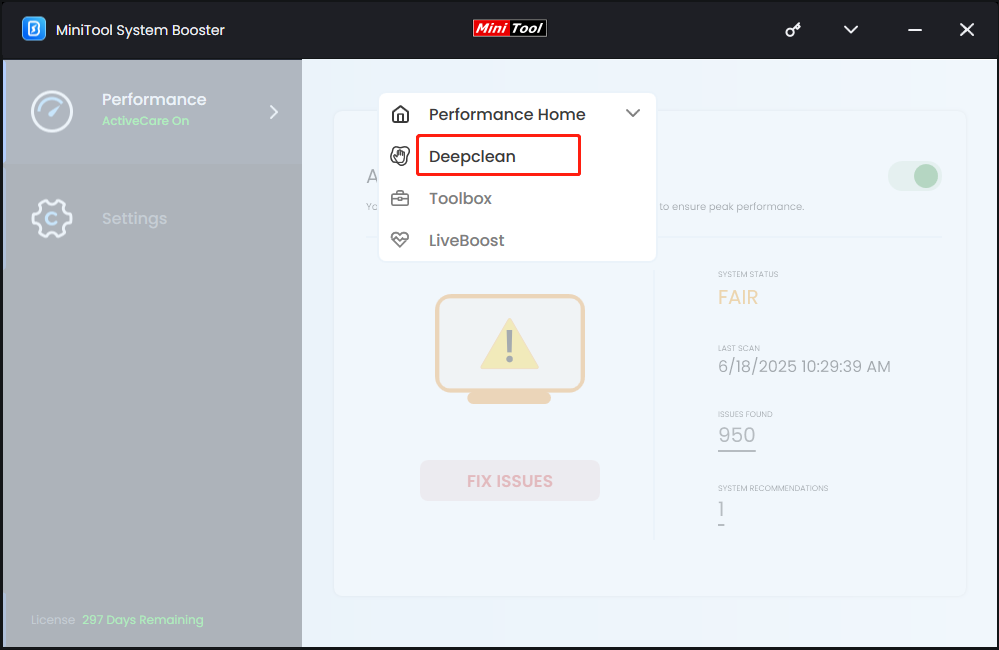
Step 2. In the main interface, choose Deepclean from the drop-down menu of Performance Home.
Step 3. Then click on START CLEAN to execute some tasks on your computer.
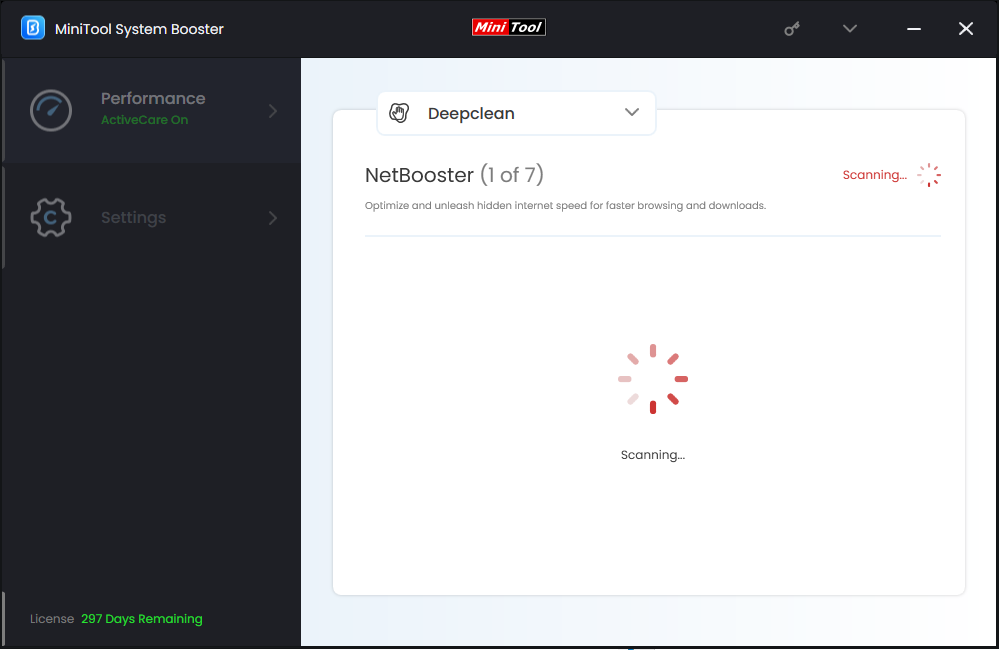
To fix VPN not working on Chrome, you need to run NetBooster to troubleshoot your internet connection and release hidden internet speed for faster browsing.
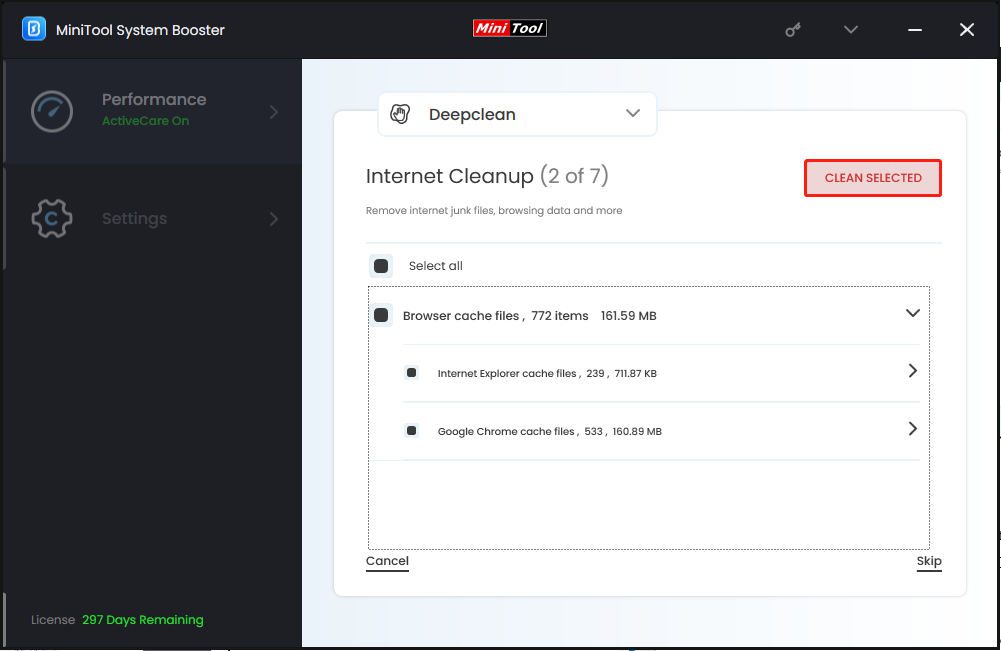
Next up, the Internet Cleanup task will begin automatically. Before that, you need to terminate running browsers according to the pop-up. After scanning, select the cache files you want to delete and hit CLEAN SELECTED.
When completing the first two tasks, you can either proceed with the remaining ones based on your PC status or skip them.

Solution 2. Disable or Remove Extensions on Chrome
You should also check if there are any suspicious extensions or add-ons installed on your Google Chrome before the appearance of the VPN connection issue. If so, disable or remove them immediately. Here’s how to find extensions on Chrome:
Step 1. Open Chrome and navigate to the three dots in the upper right corner to choose Extensions > Manage Extensions.
Step 2. It will lead you to the installed extensions page. Find and disable the problematic one.
After that, see if your Chrome can work with VPN correctly. If not, move on to the next solution.
Solution 3. Enable Cloudflare or Google DNS
If your browser is using the ISP DNS or your VPN’s DNS settings, it’s a good option to change that to Cloudflare or Google DNS to solve VPN not working on Chrome. Try it now:
Step 1. In Google Chrome, go to Settings by clicking the three dots on the upper right.
Step 2. Select Privacy and security > Security > scroll down to Select DNS provider > hit the down icon > choose Cloudflare (1.1.1.1).
Step 3. After setting it up, you need to relaunch the browser to become effective.
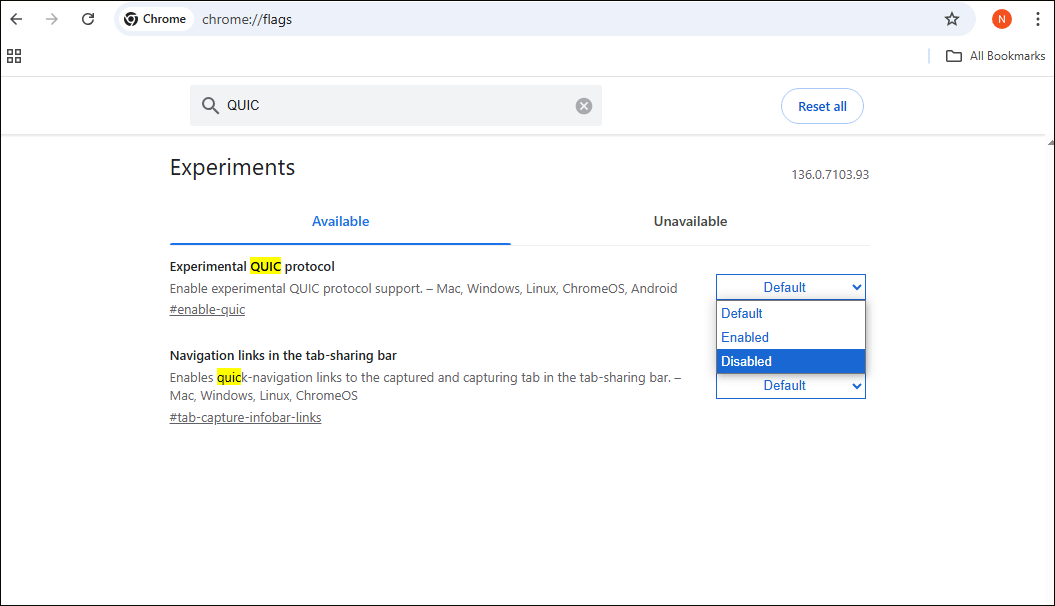
Solution 4. Disable QUIC Protocol in Chrome
QUIC (Quick UDP Internet Connection) is a relatively new protocol and it may not be fully compatible with all VPNs. It’s worth trying to disable it to see if it solves Google not working with VPN. Follow the steps:
Step 1. Go to Chrome, type chrome://flags into the navigation bar, and press Enter.
Step 2. In the Chrome flags page, search for QUIC > look for Experimental QUIC protocol from the result list > select Disabled from the drop-down menu.
Step 3. Then, reopen the browser to make the change take effect.
Solution 5. Turn off Firewall & Antivirus
Windows Defender and antivirus on your PC always protect your system security by blocking any suspicious access. In this case, they may misidentify your VPN as a threat, resulting in VPN not working on Chrome. Disabling them or adding the VPN as an exception may be helpful. To do that:
#Add the VPN to Exceptions
Step 1. Type Windows Security in the search bar and hit Enter.
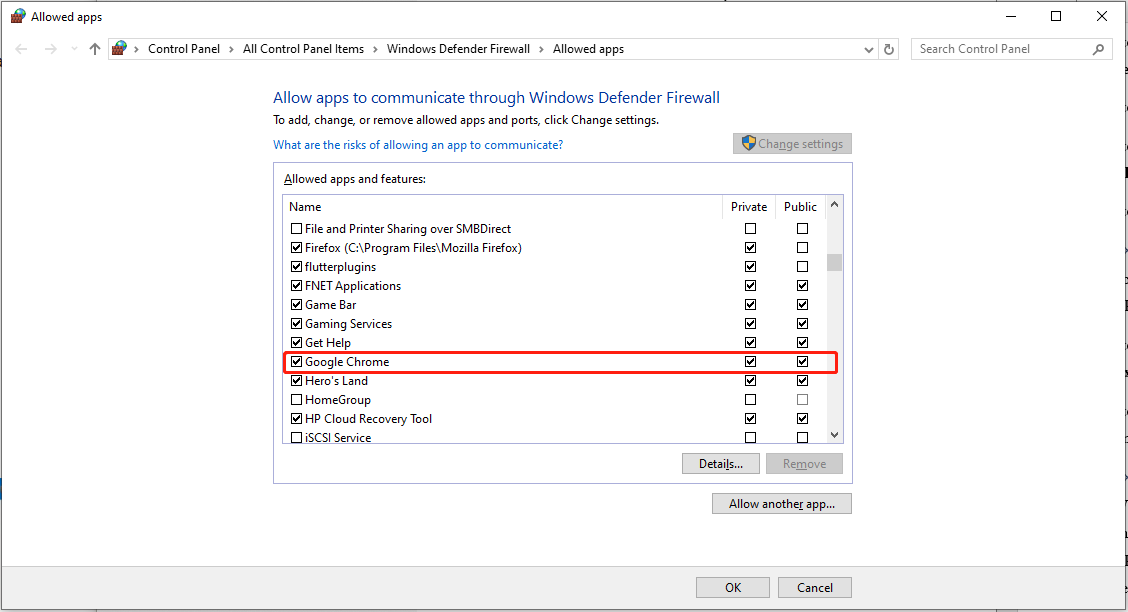
Step 2. Navigate to Firewall & network protection > Allow an app through firewall.
Step 3. Select Change settings, find Google Chrome, and check the boxes for Private and Public. Then hit OK to apply the changes.
#Temporarily Disable Windows Defender
Step 1. In the Windows Security window, choose Virus & threat protection and click Manage settings under Virus & threat protection settings.
Step 2. Turn off the switch under the Real-time protection section.
Don’t forget to enable it after using your VPN as Windows Defender is quite important for your system security.
Final Words
In this post, we walk you through how to fix VPN not working on Chrome in 5 ways. After trying them, your VPN connection issues should be resolved. It’s worth mentioning at this time is MiniTool System Booster can not only fix that issue but also boost your PC.
When encountering any issues during the use of this tool, please don’t hesitate to contact our support team via [email protected]. We will reply to you as soon as possible.