Windows automatically runs scheduled maintenance on a daily schedule when you are not using your computer. However, sometimes, Automatic Maintenance is unavailable. If your Windows is unable to run automatic maintenance at the moment, this guide on MiniTool System Booster might be helpful.
Windows Is Unable to Run Automatic Maintenance
Windows 10/11 comes with an inbuilt Automatic Maintenance feature that helps execute various PC tasks automatically such as Windows updates, disk defragmentation, disk volume errors, system diagnostics, and so on. This tool will start to run when your system is idle.
Sometimes, you might find Automatic Maintenance gets stuck with such an error message: Windows is unable to run automatic maintenance. The maintenance scheduler is unavailable. If you come across this issue, let’s take a closer look at how to fix it easily.
How to Fix Windows Is Unable to Run Automatic Maintenance?
Fix 1: Run MiniTool System Booster
When Windows Automatic Maintenance stops working, you can try another tool – MiniTool System Booster. It is designed to clean up system clutter, maintain system reliability & speed, repair system problems & prevent them from recurring and more.
Like Automatic Maintenance, there is a feature called ActiveCare that works silently in the background. When your computer runs slow, you can turn on this feature, monitor your device and find issues for you. ActiveCare is very powerful and it can execute tasks like cleaning up excessive system clutter, optimizing startup configurations, optimizing hard drives, correcting hard drive errors and more. Here’s how to run ActiveCare:
Step 1. Run MiniTool System Booster.
MiniTool System Booster TrialClick to Download100%Clean & Safe
Step 2. In the Performance Home page, toggle on ActiveCare and hit RUN SCAN to start scanning your Windows device for issues.
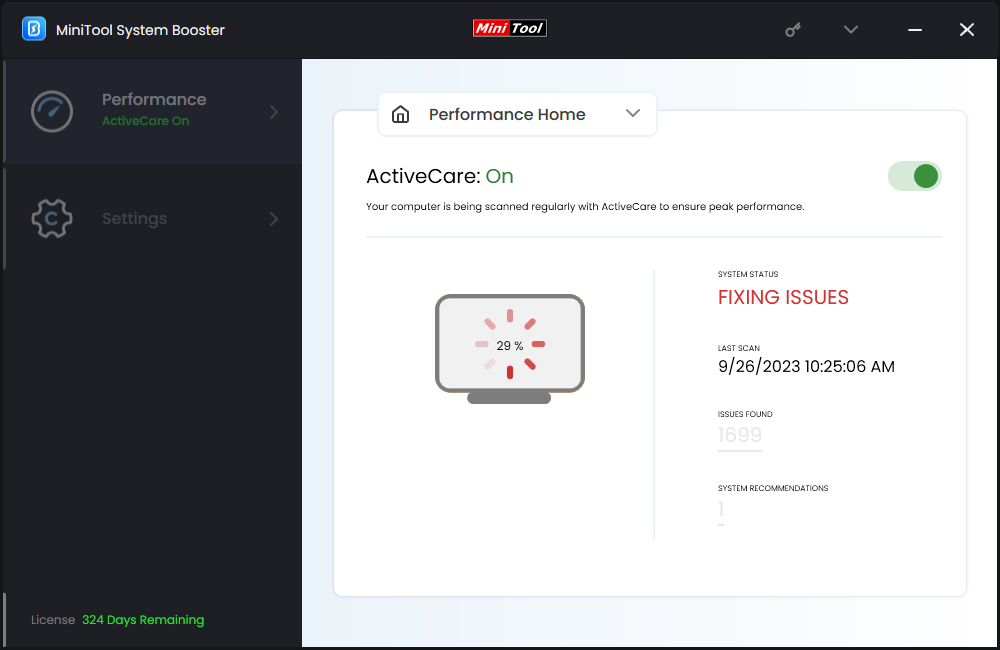
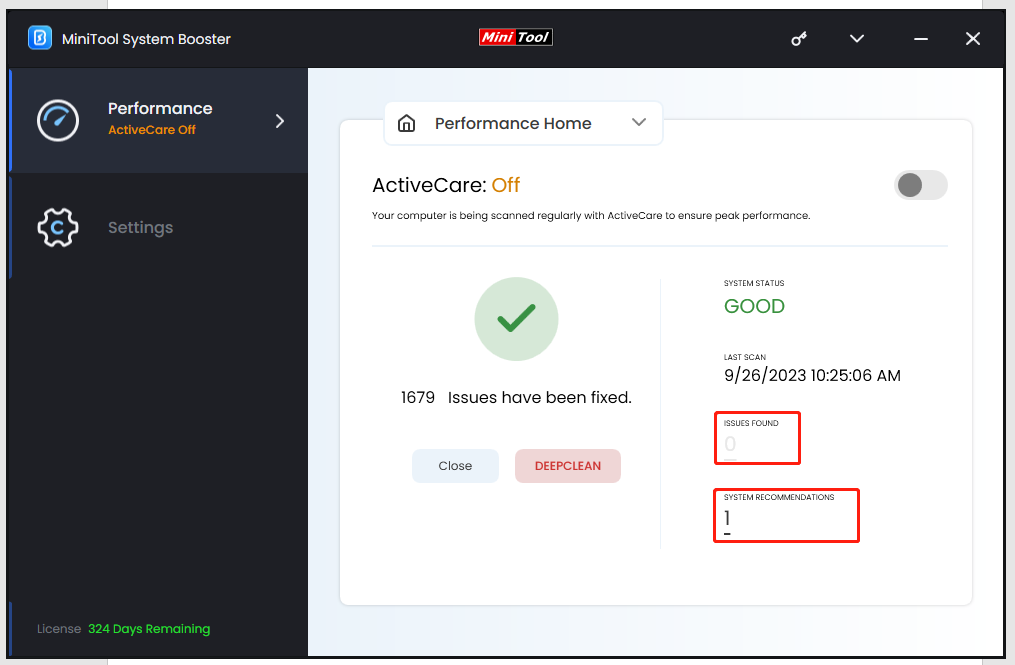
Step 3. After scanning, hit FIX ISSUES to start to fix all the found problems.
Fix 2: Enable Automatic Maintenance via Control Panel
Usually, Windows Automatic Maintenance is enabled by default. Sometimes, the settings can be modified due to some unknown reason. In this case, you can enable this feature manually via Control Panel. Follow these steps:
Step 1. Type control panel in the search bar and select the best match.
Step 2. Click on the View by drop-down menu and select Large icons.
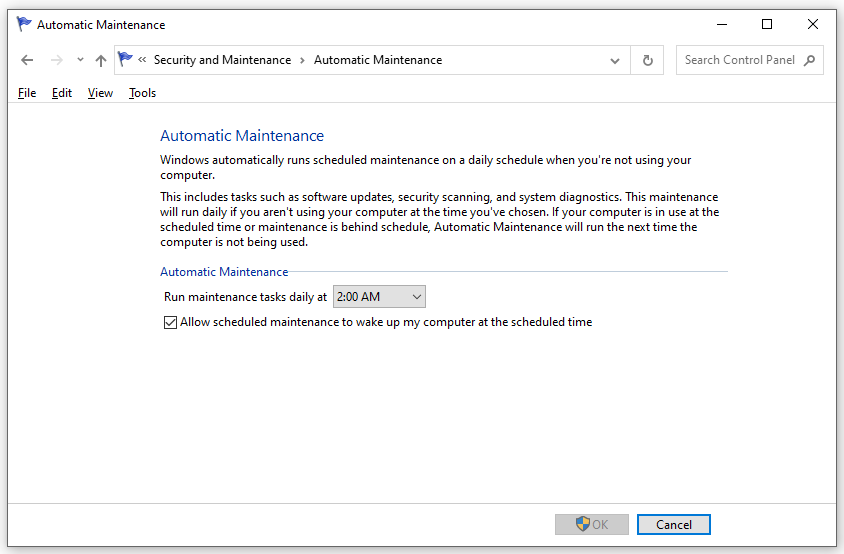
Step 3. Press Security and Maintenance and expand Maintenance in the right pane.
Step 4. Click on Change maintenance settings and check the time set for automatic maintenance. Make sure to check the Allow scheduled maintenance to wake up my computer at the scheduled time option and then hit OK to save the changes.
Fix 3: Enable Automatic Maintenance via Registry Editor
Every time you install a program, it will create a new registry for that specific app in Windows registry. Therefore, changing the value data of the specific registry is also a good way to enable Automatic Maintenance. To do so:
Step 1. Press Win + R to open the Run box.
Step 2. Type regedit and hit Enter to launch Registry Editor.
Step 3. Locate the path below:
Computer\HKEY_LOCAL_MACHINE\SOFTWARE\Microsoft\Windows NT\CurrentVersion\Schedule\Maintenance
Step 4. In the right pane, double-click on the MaintenanceDisabled value and set its value data to 0.
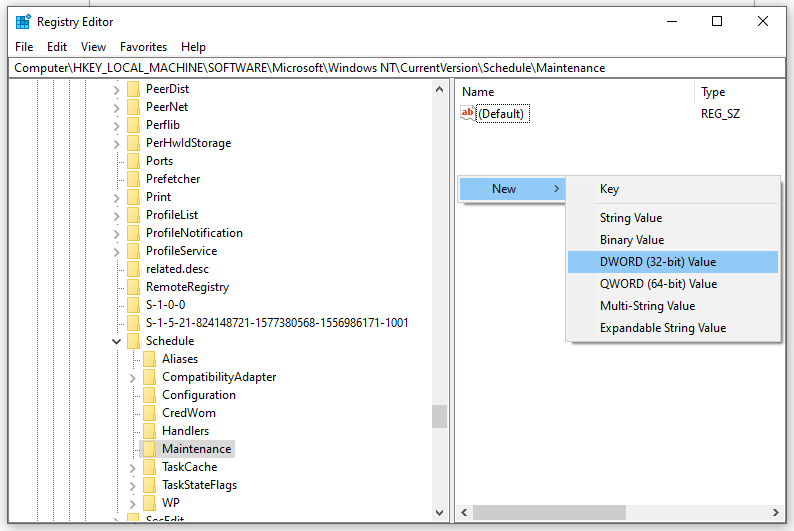
Step 5. Save the changes and restart your computer to see if Automatic Maintenance disappears.
Fix 4: Enable Automatic Maintenance via Command Prompt
The start command in Command Prompt allows to run some programs including Automatic Maintenance. Here’s how to run Automatic Maintenance via it:
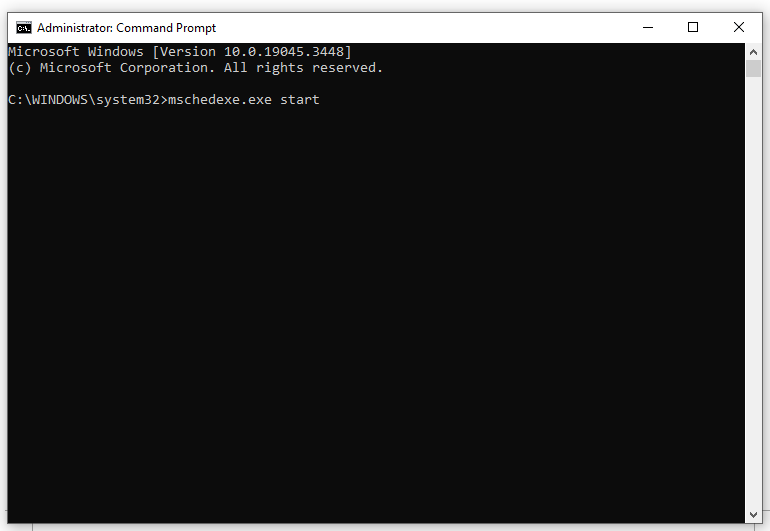
Step 1. Launch Command Prompt with administrative rights.
Step 2. In the command window, type mschedexe.exe start and hit Enter to start Automatic Maintenance. If Windows Automatic Maintenance stuck or unavailable is still there, please move to the next solution.
Also see: How to Customize Automatic Maintenance in Windows 11/10?
Fix 5: Check Task Scheduler Service Status
To run Windows Automatic Maintenance, you should make sure the associated services are running. Once these services are set to manual or have been stopped, the Windows is unable to run automatic maintenance error message will prompt.
Step 1. Type services.msc and hit Enter to launch Services.
Step 2. In the service list, scroll down to find Task Scheduler and right-click on it to choose Properties from the context menu.
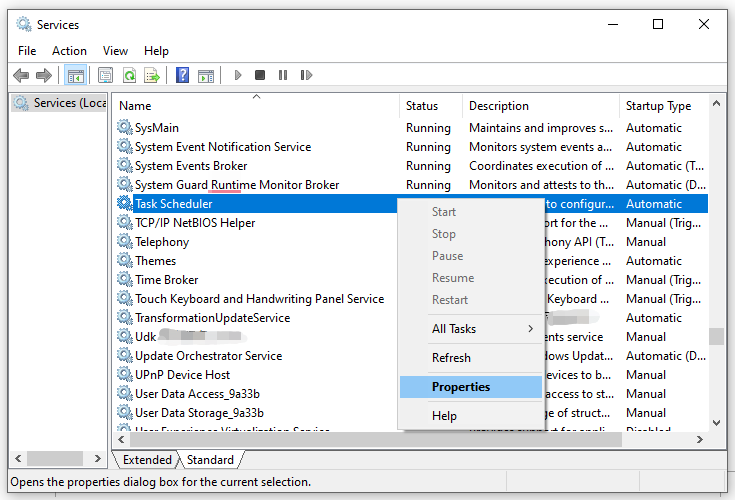
Step 3. If this service is already running, you can stop it and restart it. If it is not running, you need to change the startup type to Automatic and hit Start to run it.
Step 4. Save the changes and quit Services.
Fix 6: Run SFC & DISM Scan
Another primary cause for Automatic Maintenance unavailable is the existence of system file corruption. To scan and repair corrupted system files, you can make use of the combination of System File Checker (SFC) and Deployment Image Servicing and Management (DISM). Follow these steps:
Step 1. Type cmd in the search bar and right-click on Command Prompt to select Run as administrator.
Step 2. In the command window, type sfc /scannow and hit Enter.
Step 3. After the process is done, run the following commands one by one and don’t forget to hit Enter after each command.
DISM /Online /Cleanup-Image /CheckHealth
DISM /Online /Cleanup-Image /ScanHealth
DISM /Online /Cleanup-Image /RestoreHealth
We Need Your Voice
In summary, you can try MiniTool System Booster to make your system run smoothly when Windows is unable to run automatic maintenance. Meanwhile, other solutions to troubleshoot the Automatic Maintenance tool are also feasible. Hope this guide can do you a favor.

