What Is Windows Automatic Maintenance?
A Windows PC relies on running a series of maintenance tasks to maintain its health. Windows Automatic Maintenance can conduct these tasks to prevent system freezes, crashes, or other problems that can hinder your productivity. By default, this utility is scheduled to run at 2:00 AM every day (when your computer is idle or in sleep mode). During the process, Windows Automatic Maintenance might run the tasks below:
- System and software updates.
- Security scanning,
- System diagnostics.
- Disk optimization and defragmentation (for HDDs).
However, if your computer is active or not powered on at the scheduled time, all the maintenance tasks will be postponed. The delayed tasks will start during the next scheduled idle period. How to awake the system to run these tasks immediately? In the following paragraphs, we will give you 3 ways to initiate Windows Automatic Maintenance on your computer.
How to Enable Windows Automatic Maintenance on Windows 10/11?
Way 1: via Control Panel
Control Panel allows you to view and change system settings, so you can run Automatic Maintenance directly via it. Follow these steps:
Step 1. Open Control Panel.
Step 2. Click on the reversed triangle icon beside View by and select Category.
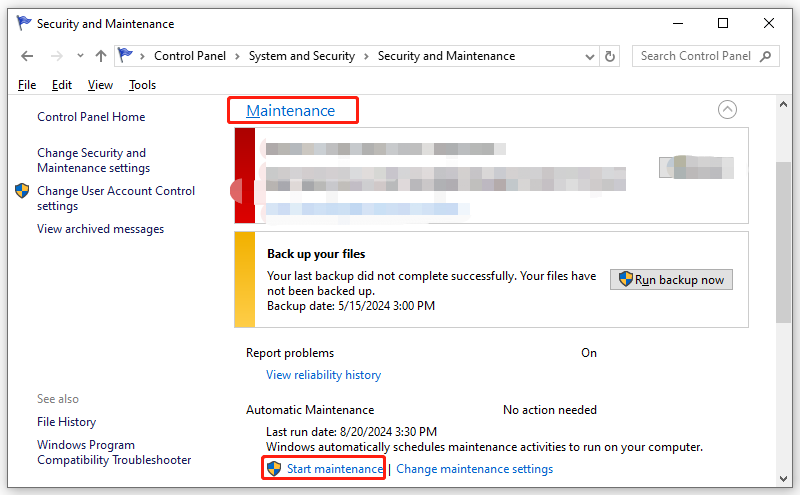
Step 3. Click on System and Security > Security and Maintenance > Expand Maintenance > hit Start maintenance.
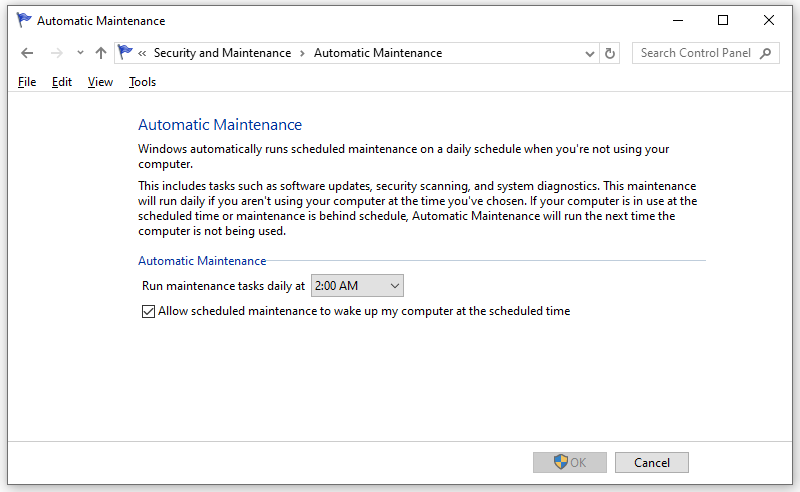
Step 4. To change automatic maintenance schedule, click on Change maintenance settings > check a time set for automatic maintenance > tick Allow scheduled maintenance to wake up my computer at the scheduled time > hit OK to save the change.
Way 2: via Registry Editor
Windows Registry provides a database of software and hardware information, settings, options, and more on your computer. If you want to enable some features like Windows Automatic Maintenance, it’s a good idea to modify the value data of the corresponding registry. Here’s how to do it:
Step 1. Press Win + R to open the Run box.
Step 2. Type regedit and hit Enter to launch Registry Editor.
Step 3. Navigate to the path below:
HKEY_LOCAL_MACHINE > SOFTWARE > Microsoft > Windows NT > CurrentVersion > Schedule > Maintenance
Step 4. In the right pane, right-click on any empty space > select New > DWORD (32-bit) value > rename it as MaintenanceDisabled.
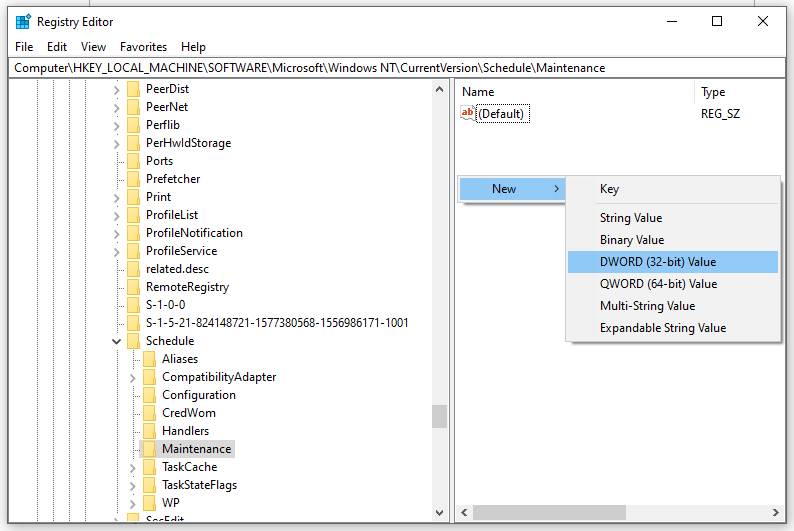
Step 5. Double-click on this newly created value > change its Value data to 0 > hit OK.
Step 6. Quit Registry Editor and restart your computer.
Way 3: via Command Prompt
The last method to enable Windows Automatic Maintenance is to run the start command in Command Prompt. To do so:
Step 1. Type cmd in the search bar to locate Command Prompt and run it as an administrator.
Step 2. In the command window, type the command below and don’t forget to hit Enter:
mschedexe.exe start
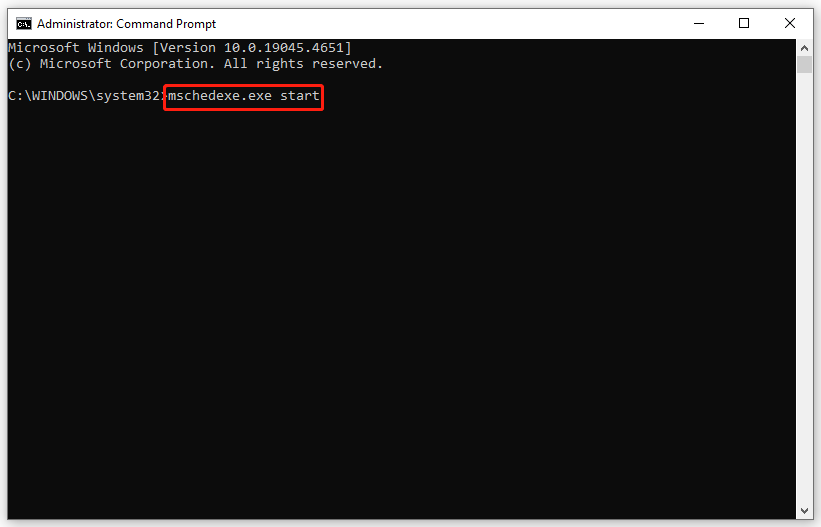
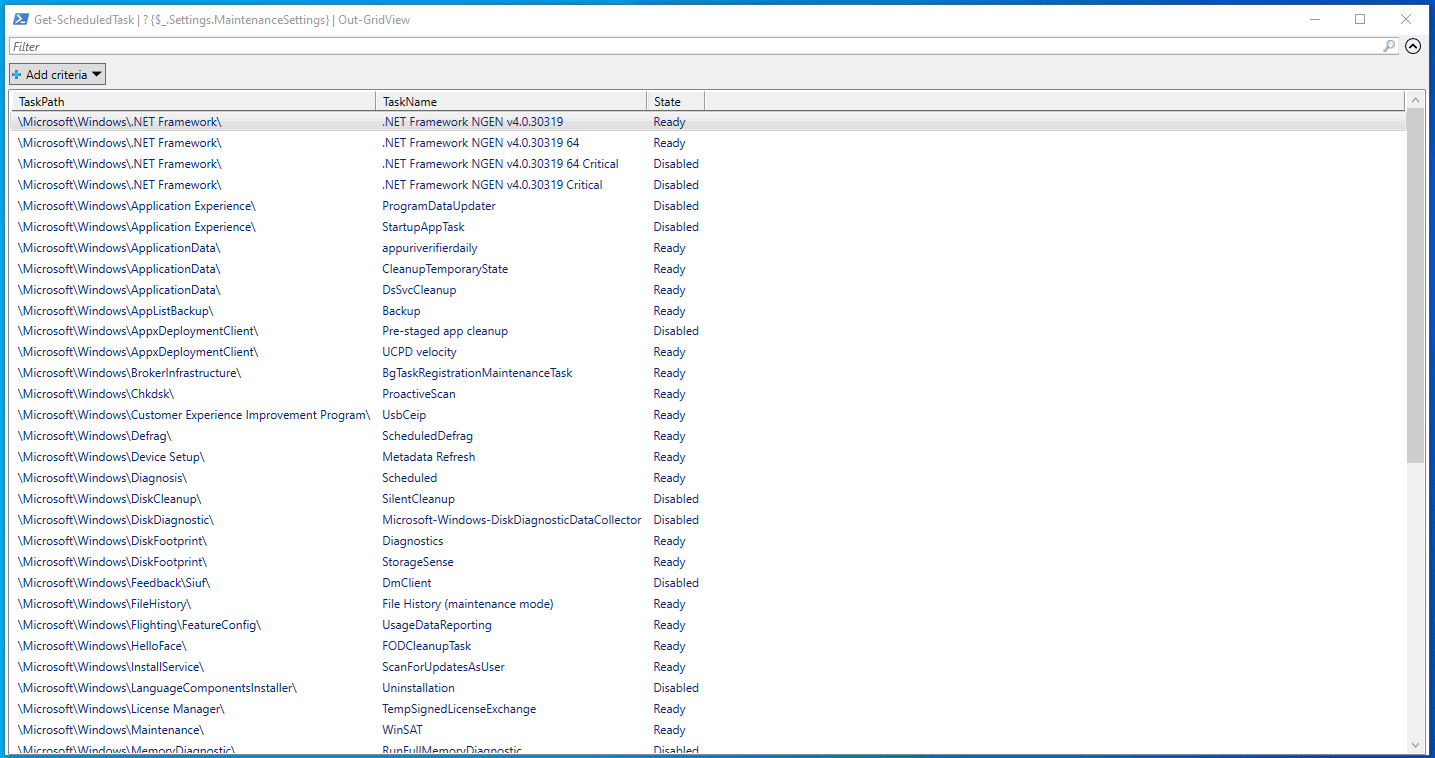
To see what tasks Windows Automatic Maintenance is running, input the following command in Windows PowerShell (Admin) and hit Enter:
Get-ScheduledTask | ? {$_.Settings.MaintenanceSettings} | Out-GridView
Then, you can get a list of tasks and their path, name, & state.
Another Way to Maintain Your Computer
As mentioned earlier, Windows Automatic Maintenance is designed to keep your computer in good health and performance by combining all the background maintenance tasks. In regard to computer system performance, a piece of free PC tune-up software – MiniTool System Booster is worth a try.
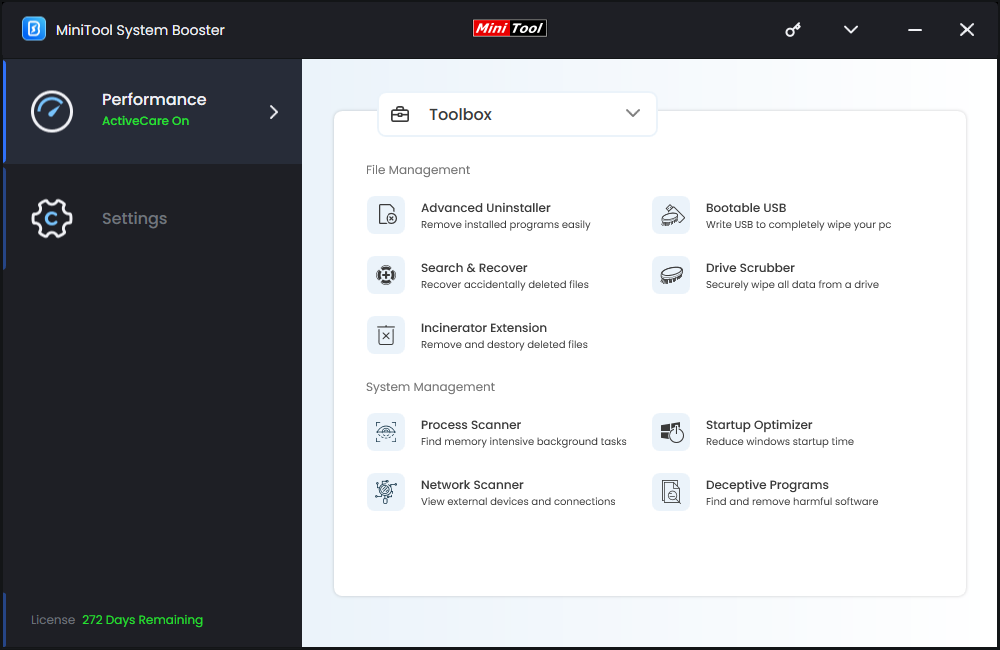
Compared with Windows Automatic Maintenance, this tool is easier and more flexible to operate. It serves as a PC cleaner, RAM limiter, app uninstaller, Registry cleaner, and so forth on your Windows machine. What’s more, MiniTool System Booster find and fix common system issues, defragment a hard drive, free up CPU, and more so that your computer can run faster and more responsively.
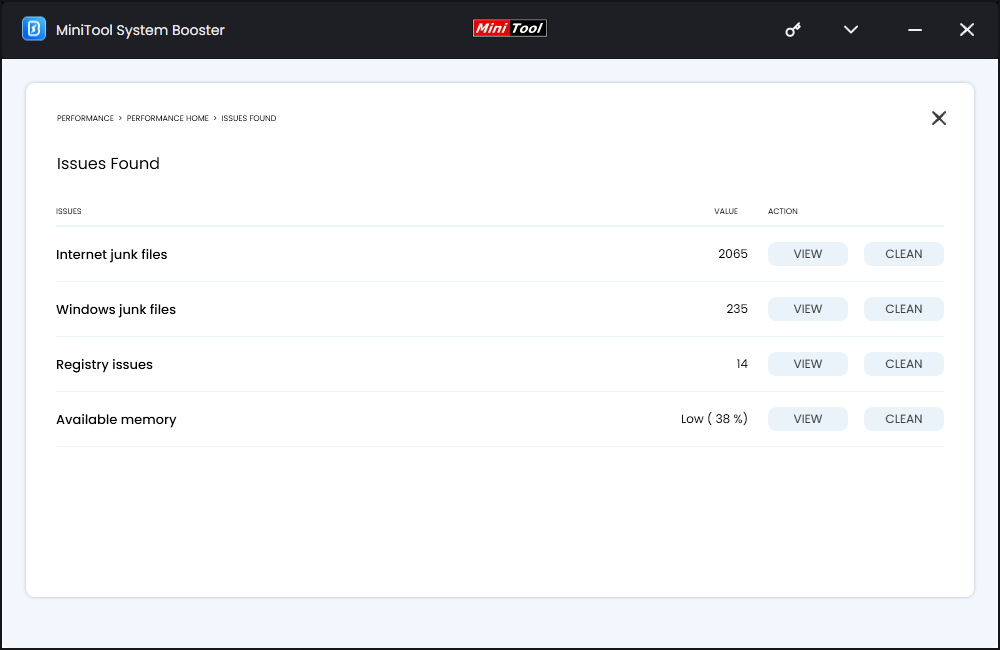
To maintain your computer, you can run the ActiveCare feature. It only takes a few moments to remove internet & system junk files, fix registry issues, find available memory, and reduce startup programs for you. Here’s how to do it:
Step 1. Launch MiniTool System Booster Trial Edition and you can enjoy all its features for free within 15 days.
MiniTool System Booster TrialClick to Download100%Clean & Safe
Step 2. In the main interface, toggle on ActiveCare and hit RUN SCAN to start scanning your Windows device for issues.
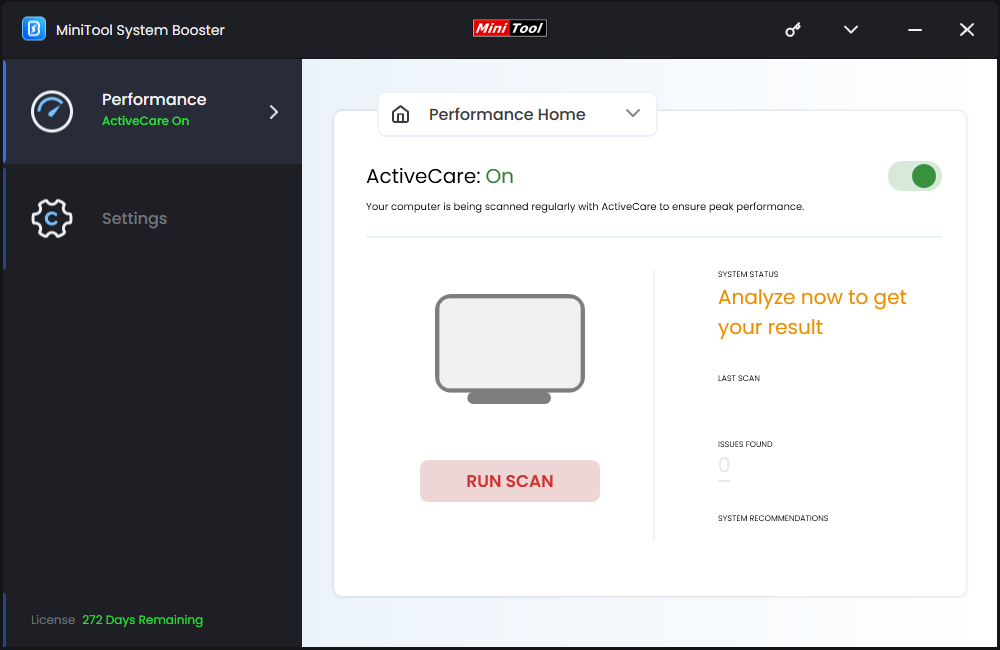
Step 3. After that, this program will list the system status and how many issues it finds. You can click on FIX ISSUE to solve all the identified problems at once.
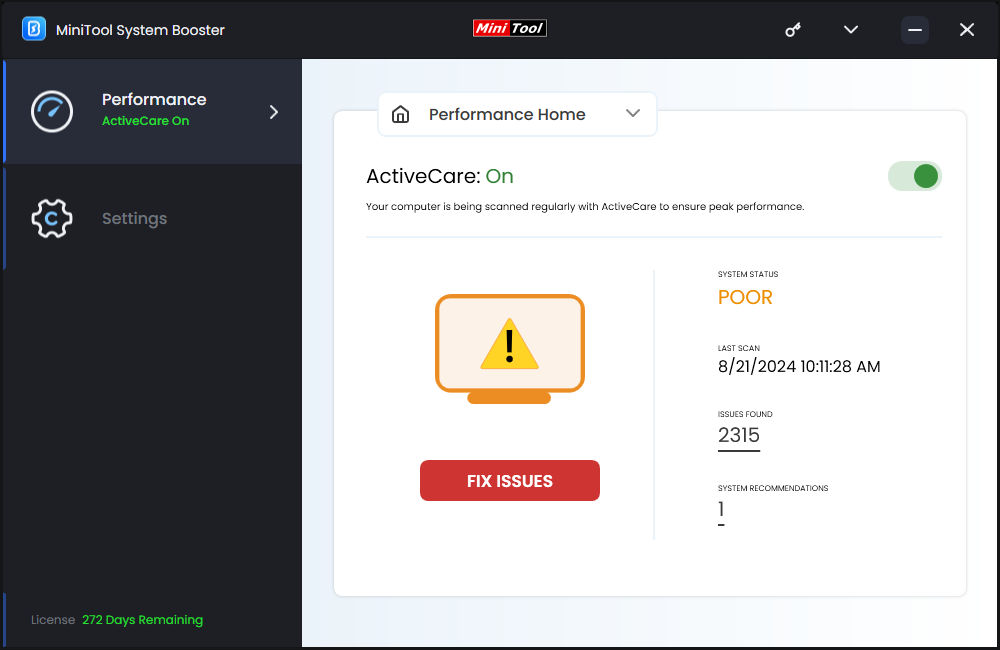
Step 4. Also, you can hit the numbers under ISSUES FOUND or SYSTEM RECOMMENDATIONS to view more details and choose what to clean up.
Final Words
This guide gives a brief introduction to the definition and functionality of Windows Automatic Maintenance. In short, this utility takes advantage of idle periods to make your computer run smoothly by running a set of maintenance tasks. Meanwhile, you can resort to some third-party programs like MiniTool System Booster to maximize the performance of your computer.
MiniTool System Booster TrialClick to Download100%Clean & Safe
Do you have any problems while using our product? If yes, please feel free to share them with us via [email protected]. Appreciate your feedback and support!


