CHKDSK Taking Forever
The Check Disk utility, also known as CHKDSK, is responsible for maintaining the integrity of file systems and listing & correcting errors on the disk. Usually, the CHKDSK scan takes from 20 minutes to 6 hours, depending on the size of your hard drive and the number of corrupted files & bad sectors.
Unfortunately, the process might stall or get stuck at particular percentages. Damaged file systems, too many fragmented files on the hard drive, or conflicted programs might be blamed. After knowing the causes for CHKDSK taking forever, what can you do to fix it? Scroll down to get the detailed instructions!
How to Fix CHKDSK Taking Forever on Windows 10/11?
Fix 1: Clean & Defrag Hard Drive with MiniTool System Booster
Too many temporary files or fragments on the hard drive might be the main factors that cause CHKDSK taking long time. To address this issue, it’s a good option to get rid of temporary files and defrag your hard drive. In this case, MiniTool System Booster comes in handy.
It is a piece of free PC tune-up software that can ensure you get the peak performance of your computer by executing various tasks, such as speeding up internet connection, freeing up memory, cleaning up registries, deleting junk files, and so forth. Now, let’s clean up and defrag your hard drive with MiniTool System Booster:
Step 1. Download, install, and then launch MiniTool System Booster Trial Edition.
MiniTool System Booster TrialClick to Download100%Clean & Safe
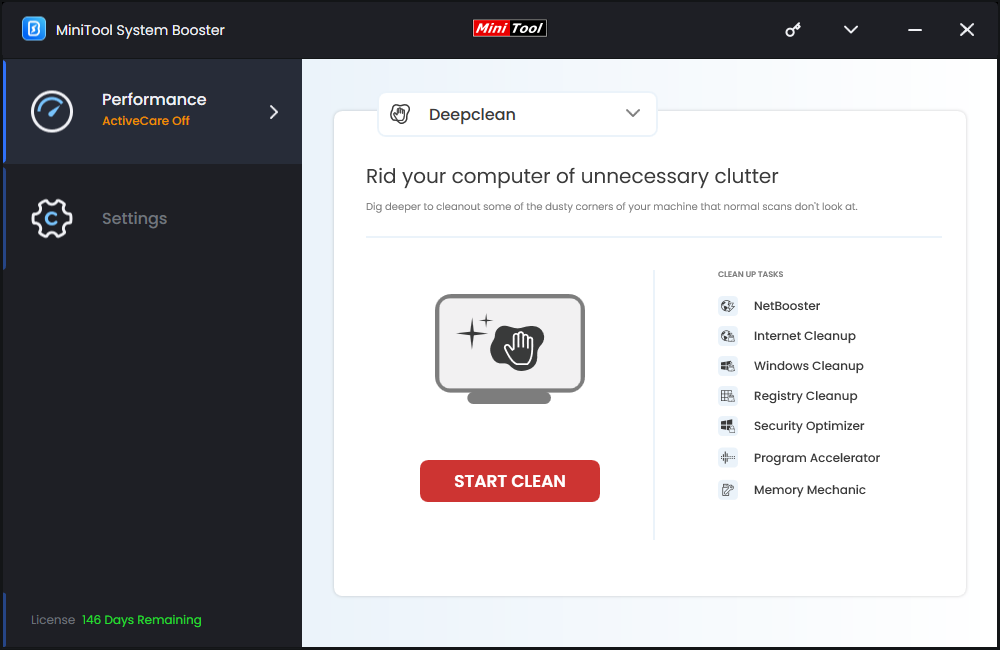
Step 2. In the main interface, click on the inverted triangle icon and select Deepclean.
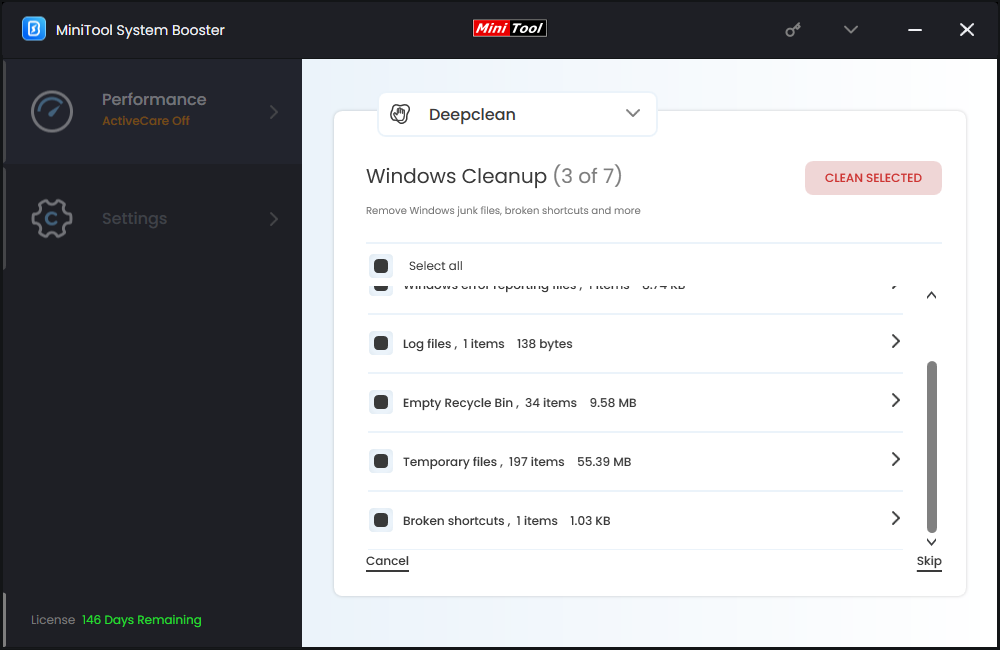
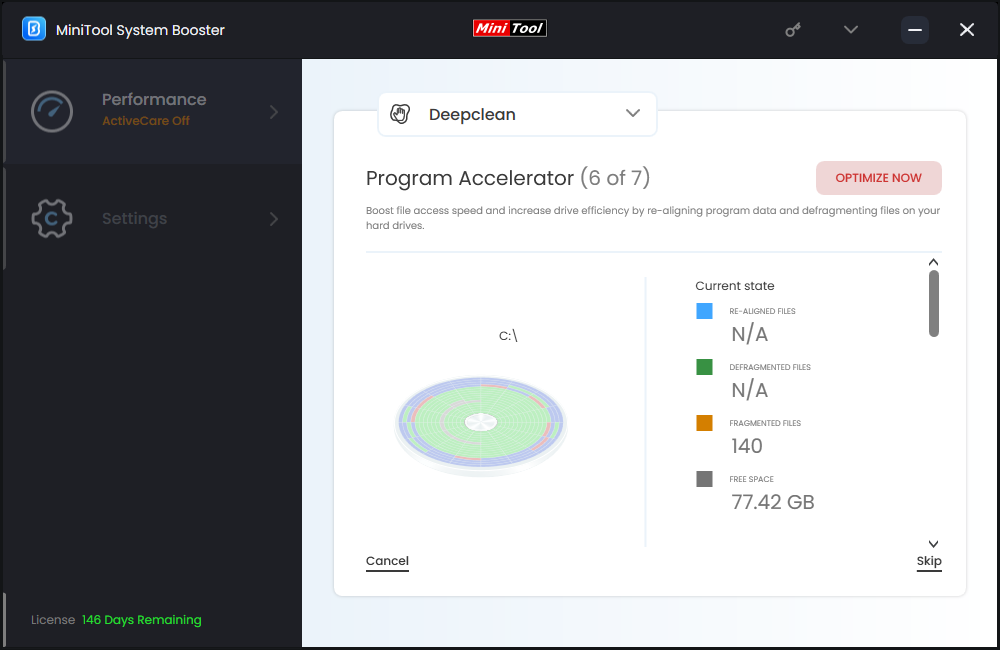
Step 3. After hitting START CLEAN, it will execute 7 cleanup tasks one by one.
The Windows Cleanup task can remove temporary files, memory dump files, items in clipboard, and so on. At the same time, this task is also capable of fixing broken shortcuts and emptying Recycle Bin. After scanning, hit CLEAN SELECTED to remove the selected unnecessary files.
The Process Accelerator task helps to re-align program data and defragment files on the hard drive to increase drive efficiency.

Fix 2: Clean & Defrag Hard Drive with Windows Inbuilt Tools
Windows 10/11 is also shipped with Disk Cleanup and Defragment and Optimize Drives that enable you to clean and defragment your hard drive respectively. Here’s how to utilize the two inbuilt tools:
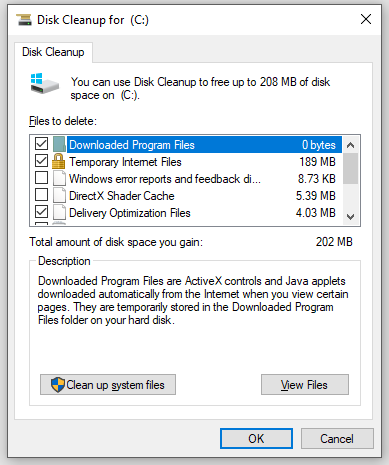
Move 1: Clean Your Hard Drive
Step 1. Press Win + R to open the Run box.
Step 2. Type cleanmgr and hit Enter to launch Disk Cleanup.
Step 3. Select the drive you want to clean up, tick the files you want to delete, and then hit OK to save the changes.
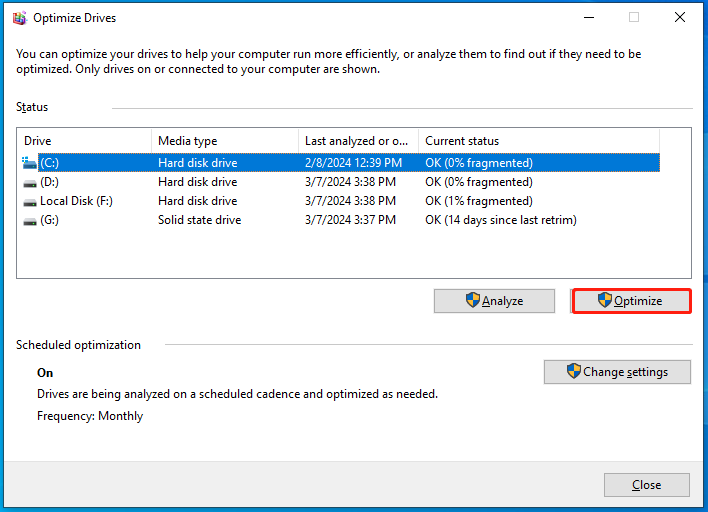
Move 2: Defrag Your Hard Drive
Step 1. Type defrag in the search bar and hit Defragment and Optimize Drives.
Step 2. Highlight the drive you want to defrag and hit the Optimize button to start the process.
Fix 3: Perform a Clean Boot
A clean boot will start your system with a minimal set of drivers and services so that you can exclude the interference of any background programs. Here’s how to perform a clean boot:
Step 1. Press Win + S to evoke the search bar.
Step 2. Type system configuration and hit Enter.
Step 3. In the Services section, tick Hide all Microsoft services and hit Disable all.

Step 4. In the Startup tab, click on Open Task Manager.
Step 5. Right-click on each enabled item and select Disable.
Step 6. Go back to System Configuration, save all the changes you’ve made, and then reboot your PC to check for any improvements.
Fix 4: Repair Corrupted System Files
Any system file corruption can result in some issues. CHKDSK taking long time is one of them. To repair corrupted system files, running System File Checker and Deployment Image Servicing and Management is highly recommended. To do so:
Step 1. Press Win + R to open the Run box.
Step 2. Type cmd and press Shift + Ctrl + Enter to launch Command Prompt with administrative rights.
Step 3. In the command window, type sfc /scannow and hit Enter.
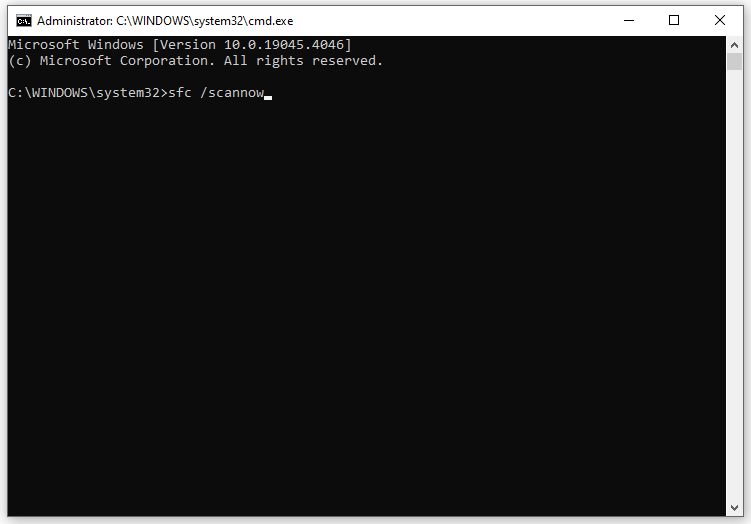
Step 4. If it returns a message saying that Windows Resource Protection didn’t find any integrity violation, run the following command:
Dism /Online /Cleanup-Image /RestoreHealth
Step 5. After completion, run the CHKDSK command again to see if CHKDSK taking forever is gone.
Also see:
# 9 Tips to Fix CHKDSK an Unspecified Error Occurred Windows 10
# Fix CHKDSK Cannot Continue in Read-only Mode – 10 Solutions
# Here You Are: Solutions to CHKDSK Not Working in Different Cases
Final Words
This guide illustrates what to do if CHKDSK gets stuck or takes an incredibly long time. When CHKDSK or other programs on your computer proceed sluggishly, consider performing a deep scan of your computer via MiniTool System Booster. With it, you can run your computer more smoothly and enjoy optimal system performance.
For more queries while using MiniTool System Booster, welcome to contact us directly via [email protected]. We will replay to you as soon as possible.