To save space on your disk, Windows lets you delete files that you do not need. But you may meet the delete option missing issue when you right-click the file/folder. This post lists the easy and great methods.
Delete Option Missing
Since upgrading to Windows 10, I am unable to delete ANY icons or saved folder on the desktop no matter how many different ways. I try!!! The "delete option does no even appear when I right-click. As a matter of fact, once anything has been save anywhere on my computer, I am unable to delete it!!Microsoft
Some users experienced this “delete option missing” issue in the right-click context menu on Windows 11/10. You can still use your keyboard to delete the files, but the Delete option should be in the right-click context menu because this is a Windows feature. In this article, we will give solutions.
How to Fix Delete Option Missing
Fix 1: Check If You Are Deleting a Folder from Quick Access
First, you should check if you are deleting the file/folder from Quick Access. Quick Access is the menu on the left side of File Explorer on Windows 11/10. It provides users with the convenience of opening folders directly and quickly.
Folders that you open most of the time automatically appear in Quick Access. However, you can also pin folders to the quick-access menu. If you delete a folder from Quick Access, you will not see the Delete option in the right-click context menu. Folders displayed in Quick Access cannot be deleted.
Fix 2: Via MiniTool System Booster
If you don’t delete a folder from Quick Access but still can’t find the delete option. There is another way for you to delete files – use a professional PC optimizer. Speaking of the PC optimizer, MiniTool System Booster is worth trying.
As a comprehensive PC tune-up software, it allows you to clean up your PC including junk files, registry items, memory space, etc. Besides, it supports permanently deleting files, disabling unwanted startup programs, uninstalling apps, and more.
Step 1: Download MiniTool System Booster from the below button.
MiniTool System Booster TrialClick to Download100%Clean & Safe
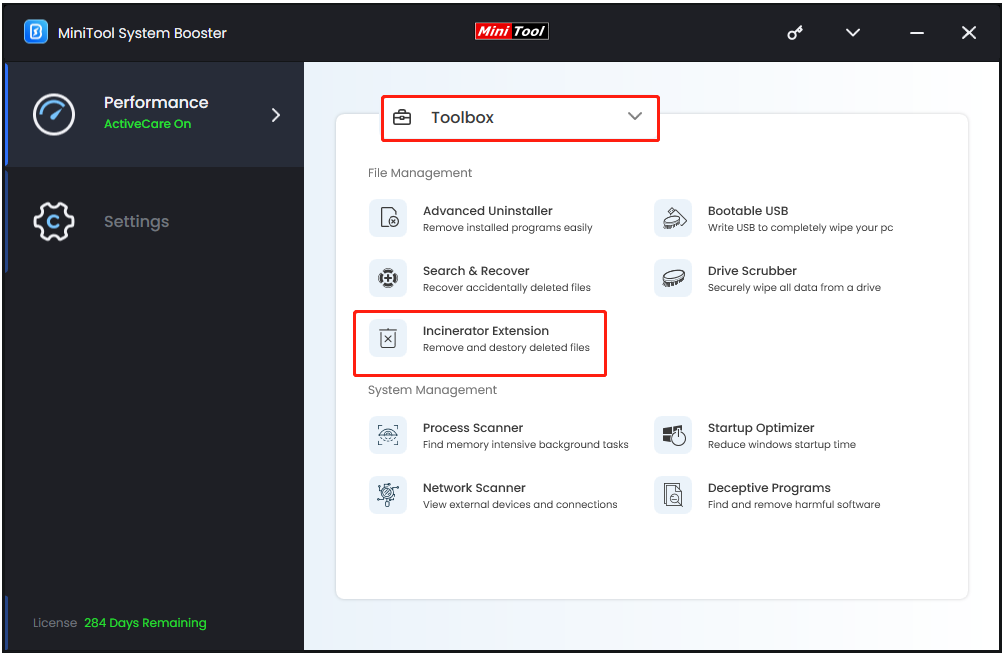
Step 2: Install and launch it to enter its main interface. Click the drop-down menu to choose Toolbox.
Step 3: Click the Incinerator Extension feature under File Management. This feature can help you remove and destroy the files forever.
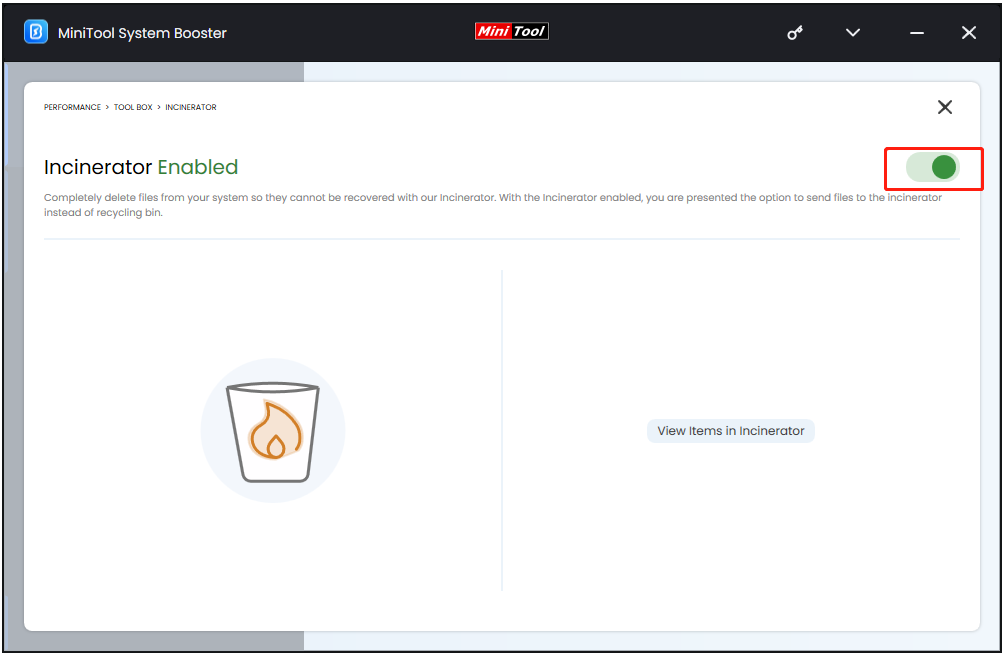
Step 4: Enable the Incinerator icon and you can see the Incinerator on the desktop.
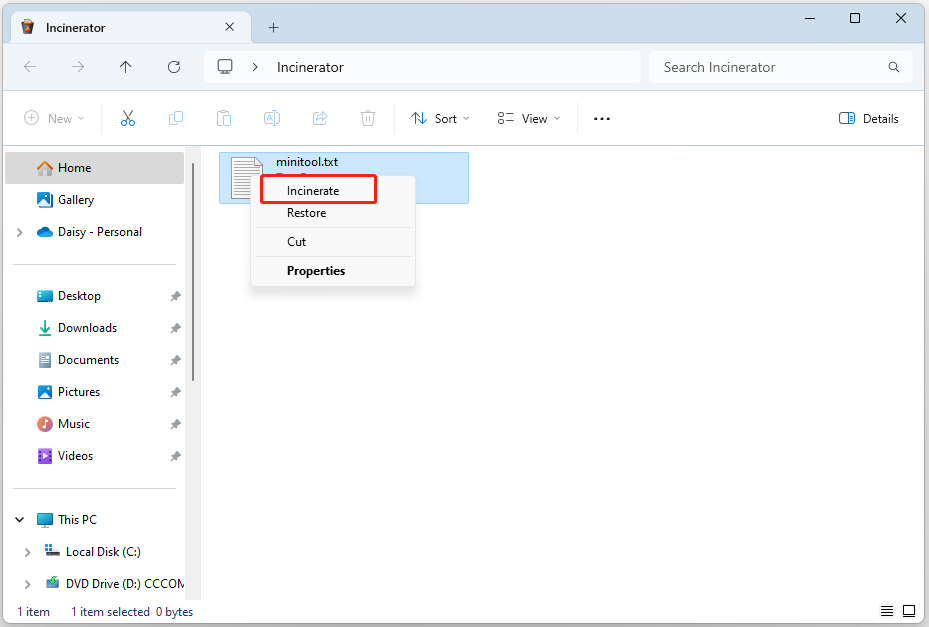
Step 5: Drag the files you want to remove into the Incinerator. Open Incinerator on your desktop, then select the target file and right-click it to choose Incinerate.
Fix 3: Run CHKDSK
CHKDSK is a utility that scans disks for errors and repairs them. If you are having problems with a particular hard drive partition, there may be some bad sectors or errors on that hard drive partition. In this case, running CHKDSK can help you solve the problem.
Step 1: Type cmd in the Search box and choose Run as administrator.
Step 2: Then, type the chkdsk G: /f command and press Enter. You should replace G as the drive that you want to check.

Fix 4: Repair Your System Files
If the system files are corrupted, you may encounter the “delete option missing” issue. So, you can use the SFC and DISM scan tools that can help you repair corrupted system files.
Step 1: Type cmd in the Search box and choose Run as administrator.
Step 2: Input the command sfc /scannow and press Enter. Then, this utility will start scanning for corrupted or missing system files and then replace them.
Step 3: After the process is finished, restart your computer and open Command Prompt as administrator again. Now, type Dism /Online /Cleanup-Image /Restorehealth and press Enter.
Fix 5: Try a New Account
Sometimes, the problem occurs due to a corrupted user profile. Create a new user profile on Windows 11/10 and see if the problem persists in the new account. If this solves your problem, you can transfer the data from the previous profile to the new user profile. Alternatively, use the same Microsoft account to sign in to the new profile and delete the old profile.
Fix 6: Perform a System Restore
If you have created a system restore point or system image backup with Windows snap-in tools, you can try using the restore point or image file to restore your computer to fix the “delete option missing on Windows 11” error. Here are the steps for system restoration:
Step 1: Type control panel in the Search box and click Open.
Step 2: Change it to small icons and click Recovery to continue.
Step 3: In the pop-up interface, please choose Open System Restore to continue.
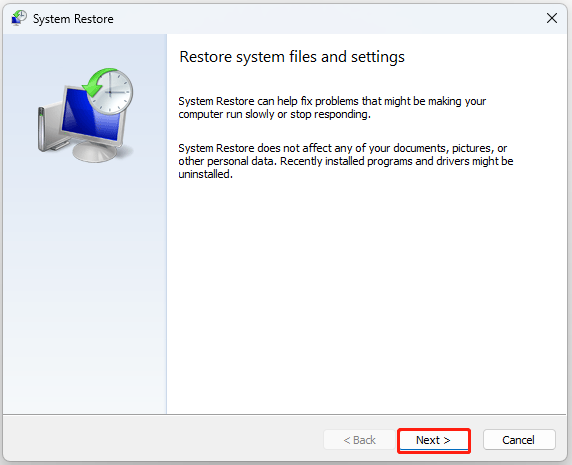
Step 4: In the Restore system files and settings interface, you can click Next to continue.
Step 5: Choose the restore point and click Next to continue. Then, it will ask you to confirm the restore point
Step 6: Click Finish. After the system restore is finished, try to shut down your computer again.
Final Words
How to fix the “delete option missing on Windows 11” issue? The above content provides 6 tips for you. If you have any problem with the MiniTool program, please contact us via the email [email protected] and we will reply to you as soon as possible.