What Is Delivery Optimization?
Delivery Optimization is a service used by Windows Update and Windows Store for download, sending updates between your PC to other PCs on your local network or your PCs on the Internet in order to get updates faster.
It uses configurable peer-to-peer networks or caching technology to reduce the Internet bandwidth consumption for patches and updates. While getting a limited or unstable connection, you can enable this feature to get updates. Then what will cause Delivery Optimization high memory usage?
Why Does Delivery Optimization Eat Huge Amounts of Memory/CPU?
1. Background App Updates: Delivery Optimization is also responsible for updating Microsoft Store apps and other applications. If there are available updates, it may be downloading them.
2. Peer-to-Peer Sharing: This feature enables your computer to share updates with other PCs over a local network or the Internet. Once enabled, your computer may upload updates to other users.
3. Content Delivery Network (CDN) Caching: Delivery Optimization may download content from Microsoft servers for caching, even after Windows updates are complete.
4. Scheduled Tasks: Sometimes, Windows performs maintenance tasks or checks that involve downloading data, even when unrelated to updates.
How to Reduce Delivery Optimization Memory Usage?
Solution 1: Check Background Updates
It’s possible that your Windows applications are downloading and updating through Store in the background when finding Delivery Optimization taking too much memory. In this case, you should go to Windows Store and check for any current downloads. If there are any pending tasks, complete them as soon as possible.
Solution 2: Close Automatic Updates in Store
Automatic updates downloaded by the Windows Store in the background might also be a factor contributing to Delivery Optimization high CPU or memory. Turning automatic updates off might be helpful. Follow the instructions below.
Step 1. Type Store in the search bar and choose Microsoft Store.
Step 2. Click on the profile icon at the top and select Settings from the drop-down options.
Step 3. In the Settings section, toggle off the App updates option.
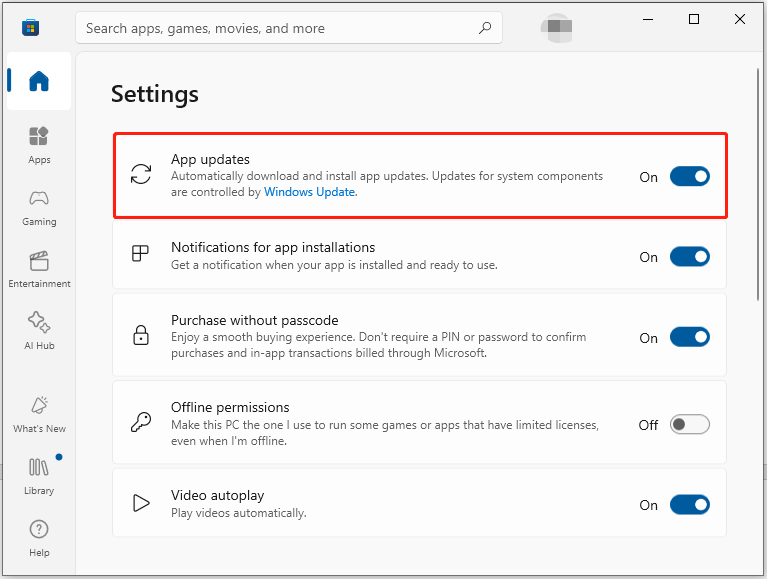
Finally, exit the Store app and restart your PC to check if the high memory issue goes away.
Solution 3: Work with MiniTool System Booster
Sometimes, you might see the Delivery Optimization service eat up resources including memory, CPU, and disk space, resulting in your system getting sluggish. What should you do to deal with this problem? We highly recommend that you try a powerful PC optimizer – MiniTool System Booster.
Memory optimization is a major highlight of MiniTool System Booster. When handling multiple tasks or running large-scale games, memory resources often become a bottleneck. This program can close unnecessary background processes and release more available memory, thereby making computer run more smoothly and reducing the occurrence of lagging.
Now, let’s use this amazing program to solve the Delivery Optimization high memory issue.
MiniTool System Booster TrialClick to Download100%Clean & Safe
Step 1. When you have downloaded and installed the program, open it and click Performance Home to choose Deepclean in the dropdown menu.
Step 2. Tap on START CLEAN to perform its 7 tasks, in which you should run Internet Cleanup, Windows Cleanup, and Memory Mechanic. As for the rest, you can click Skip to ignore them or follow their instructions to complete them.
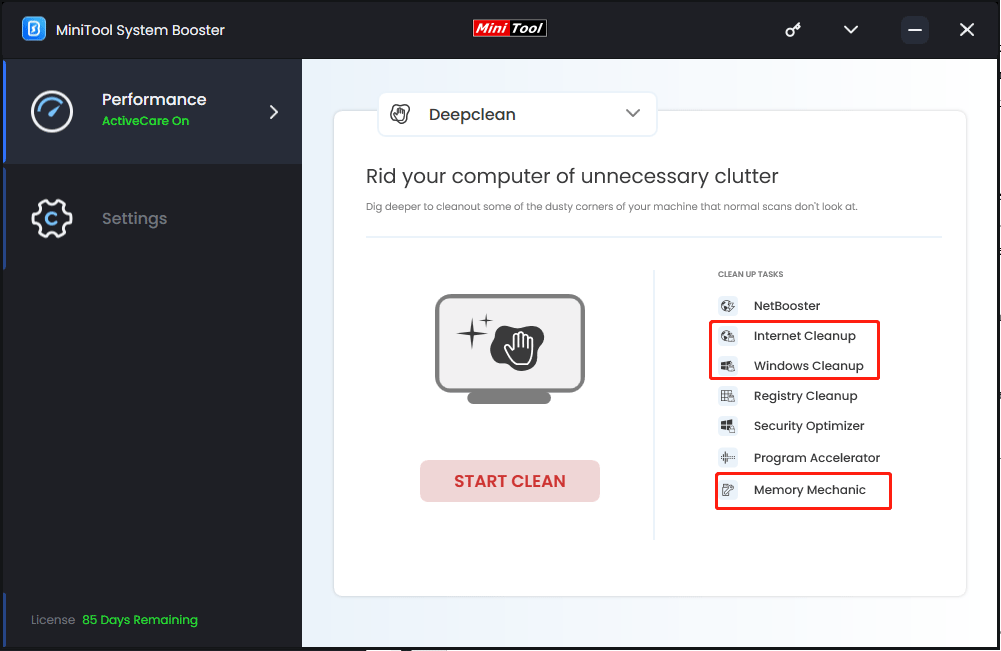
Step 3. After the clean and fix-up, turn to Toolbox via the top menu > go to Process Scanner > click on Scan now to scan your running background processes.
Step 4. Then choose the unnecessary processes and click Terminate Process to stop them.
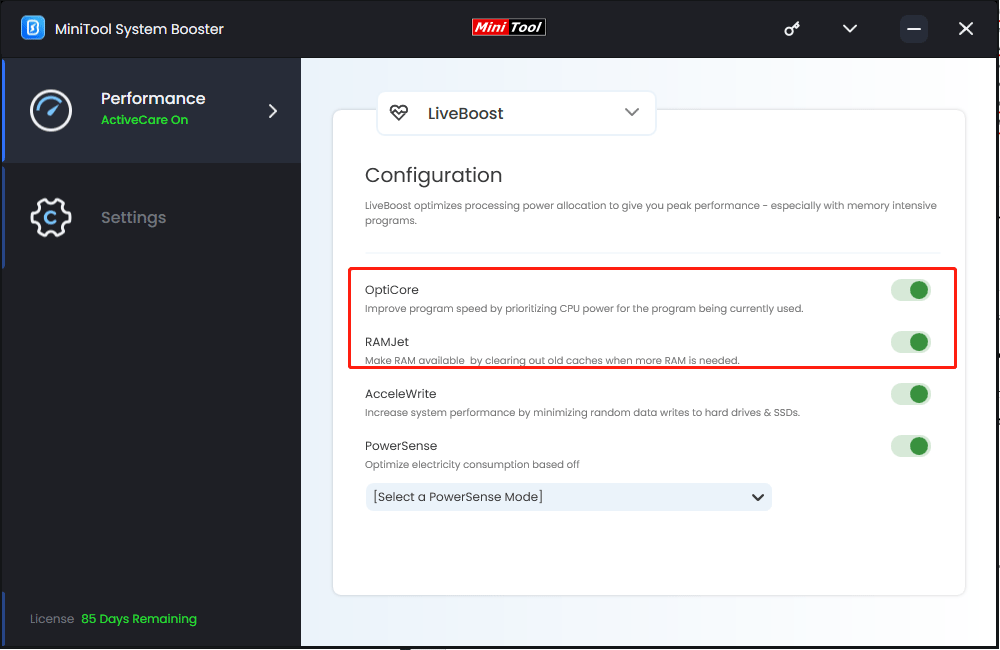
By the way, the OptiCore and RAMJet features in LiveBoost can also prioritize CPU power for your system and clear old caches to free up RAM.
Solution 4: Modify the Group Policy
Warning: Do not change the policies you don’t understand to avoid causing further system problems. Please follow the steps below to operate.
Step 1. Press the Win + R keys to open the Run dialog.
Step 2. Input gpedit.msc in the address bar and click OK to open Group Policy.
Step 3. In the Local Group Policy Editor window, expand the Computer Configuration category > select Administrative Templates > Windows Components > locate Delivery Optimization.
Step 4. In the right pane of Delivery Optimization, look for and double-click on Download Mode.
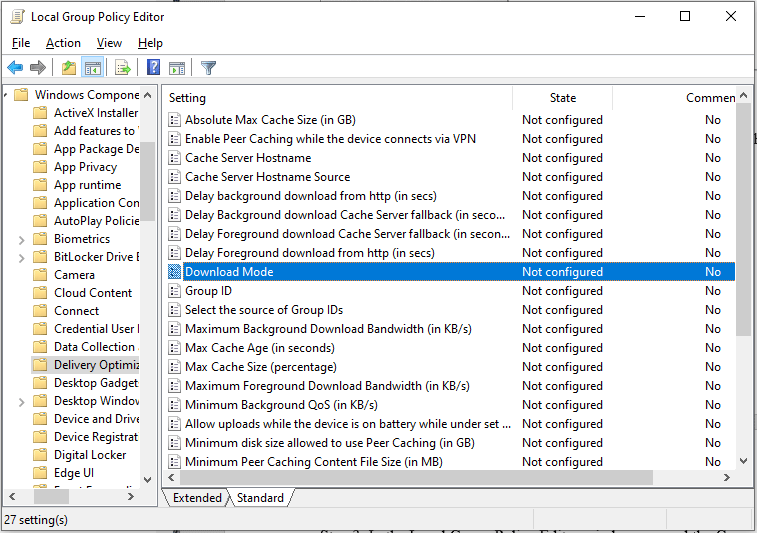
Step 5. There will be a new window popping up and you need to check the Enabled option. Then set Download Mode to Simple (99).
Step 6. After changing, click Apply and OK to save your previous settings.
Once the Group Policy window is closed, restart your computer and check for the high memory issue.
Related article: How to Fix “This Program Is Blocked by Group Policy” Error
Solution 5: Disable Delivery Optimization
If none of the above methods works, you can resort to disabling the Delivery Optimization service. Here’s how to do it.
Step 1. Press Win + I together to evoke Settings.
Step 2. Navigate to Update & Security > Delivery Optimization.
Step 3. In the Delivery Optimization section, toggle off the button under Allow downloads from other PCs.
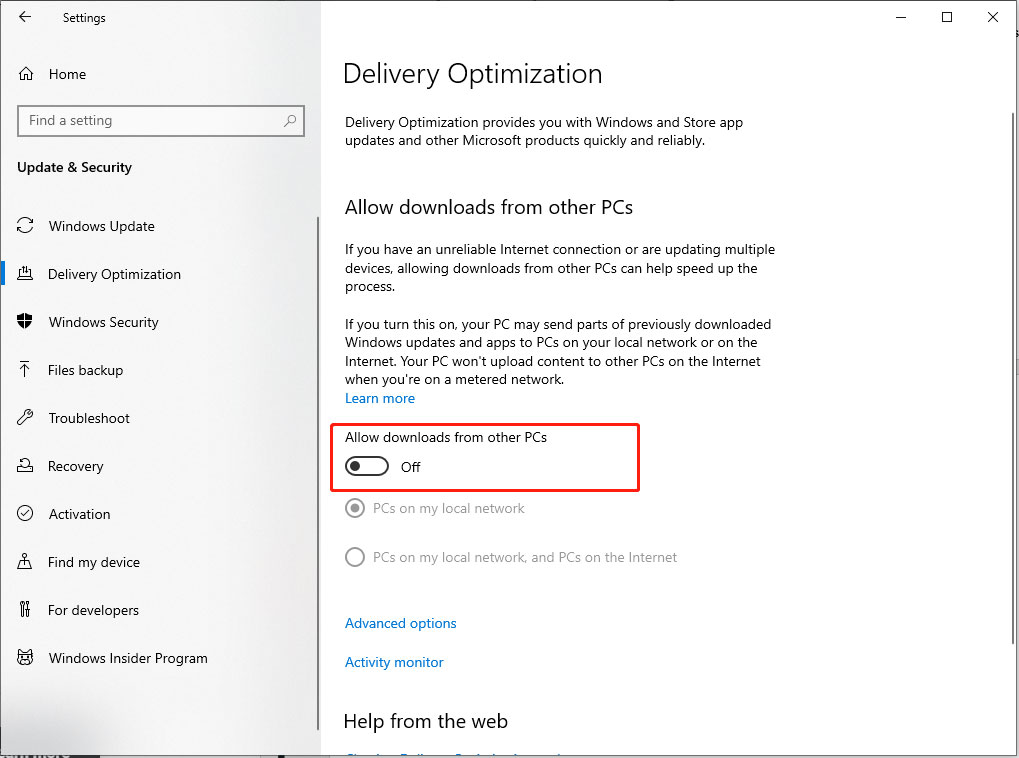
Go to Task Manager and see if Delivery Optimization high memory still exists.
Final Words
In this troubleshooting guide, targeting Delivery Optimization high memory, we share several effective solutions with you. Among them, MiniTool System Booster should be a better choice to free up RAM & CPU and boost your PC performance. Give it a shot now!
MiniTool System Booster TrialClick to Download100%Clean & Safe
If you have any questions about our product, please send an email to [email protected]. We are very grateful and will reply to you as soon as we can.


