Overview of Windows Efficiency Mode
What is efficiency mode in Windows? Efficiency mode, previously known as Eco mode, in Windows 11/10 is designed to limit the resources that an application can use to help improve energy efficiency and reduce the system’s overall resource usage.
Some applications do not support this feature since enabling it reduces the priority of using system resources. So, you can enable or disable efficiency mode only for supported processes.
Instead, some users want to disable efficiency mode because they experience performance issues and crashes. If you are suffering from the same problem or need to run resource-intensive processes, then you may want to turn off the efficiency mode feature in Windows 11/10.
How to Turn off Efficiency Mode in Windows 11?
Way 1: Use Task Manager
In Windows 11 22H2, you can turn on efficiency mode for some applications in the Task Manager app. In this case, it’s also available to disable the feature in Task Manager on Windows 11. Let’s see how it works:
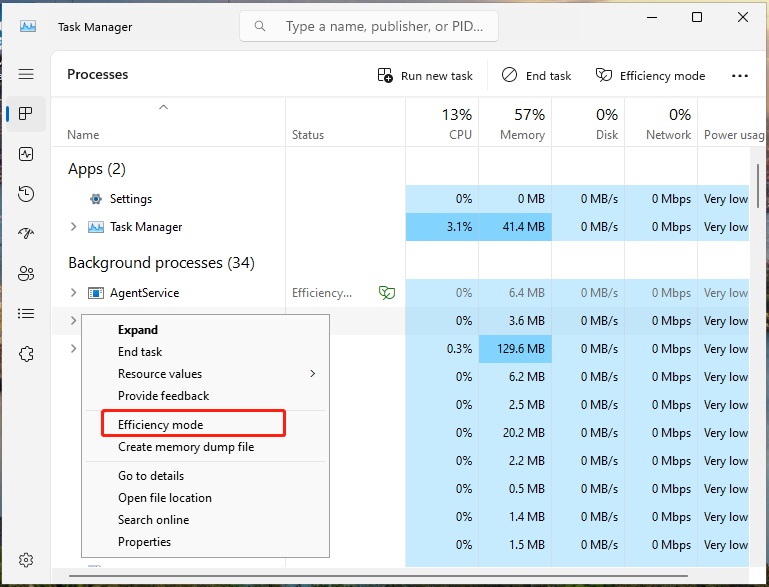
Step 1. Press Ctrl + Shift + Esc to open Task Manager.
Step 2. In the Processes tab, locate and right-click on the apps you want to disable efficiency mode.
Step 3. Then select Efficiency mode from the context menu, and it will be turned off.
Way 2: Through Windows Settings
Since efficiency mode can lead to high battery usage, poor response times, and lag, you can modify the corresponding settings in Windows Settings. This action is relatively complicated, but it can also do the trick. Follow the steps below:
Step 1. Press Win + I to bring up the Settings window.
Step 2. Go to System > Power & sleep > find Related settings in the top right corner > tap on Additional power settings.
Step 3. In the Power Options window, click Change plan settings beside the existing power plan > select the Change advanced power settings link.
Step 4. You’ll see another Power Options box. Expand Processor power management > Minimum processor state > change the value to 100%.
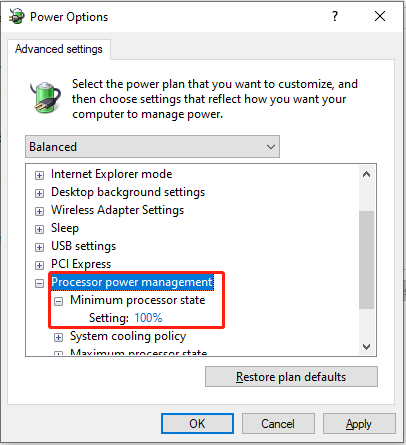
Step 5. Click on Apply and OK to make the changes to take effect.
Once you complete these steps, efficiency mode will be disabled.
Way 3: Try Group Policy Editor
If you are tech-savvy, you can also disable efficiency mode using Group Policy Editor or Registry Editor. Here’s how to use Group Policy Editor.
Step 1. Press Win + R to evoke the Run dialog box.
Step 2. Type gpedit.msc and hit Enter to open Group Policy Editor.
Step 3. In the Group Policy Editor window, navigate to the following location:
Computer Configuration > Administrative Templates > System > Power Management > Energy Efficiency Mode
Step 4. Double-click Turn off Energy Efficiency Mode on the right pane > choose Enabled > hit OK to keep the setting.
Way 4: Disable with Registry Editor
Next up, we will show you the steps to turn off efficiency mode in Registry Editor. You should operate with caution, avoiding system crashes caused by mistaken deletion. To do that:
Step 1. Press the Windows and R hotkeys to open the Run window.
Step 2. Input regedit and click OK to access Registry Editor.
Step 3. In the Registry Editor window, go to the following path:
HKEY_LOCAL_MACHINE\SYSTEM\CurrentControlSet\Control\Power\PowerSettings\54533251-82be-4824-96c1-47b60b740d00\3c0bc021-c8a8-4e07-a973-6b14cbcb2b7e
Step 4. Double-click Attributes and replace the value data with 2.
Step 5. After that, click OK to save the changes.
MiniTool System Booster – Optimize Power Usage & Speed up PC
The purpose of enabling efficiency mode is to limit resource consumption on your computer. But now, you have to disable it due to the horrible performance issues. You may wonder what else you can do to achieve this goal without affecting the performance of PC.
Here, we strongly recommend you try a professional PC optimizer – MiniTool System Booster. This program provides you with a 15-day free trial that optimizes resource usage by removing over 50 types of junk files and cleaning up accumulated browsing data, Windows files, registry entries, etc.
Now, let me show you how to run it:
# Deepclean
To optimize resource usage for PC, the Deepclean tool can meet all your needs. It consists of 7 cleanup tasks, including NetBooster, Windows Cleanup, Internet Cleanup, Registry Cleanup, Security Optimizer, Program Accelerator, and Memory Mechanic.
Step 1. Download and install MiniTool System Booster Trial Edition.
MiniTool System Booster TrialClick to Download100%Clean & Safe
Step 2. After installation, double-click on its shortcut on your desktop to launch it.
Step 3. Expand the drop-down menu of Performance Home and select Deepclean.
Step 4. Click on START CLEAN to initiate the following 7 tasks to thoroughly clean up your computer.

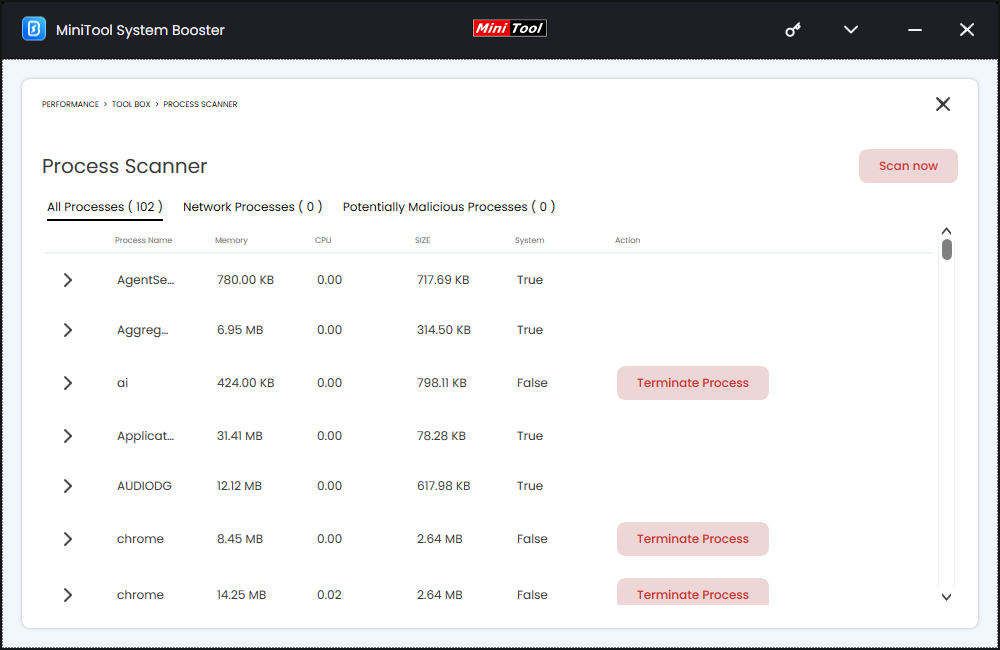
# Process Scanner
Another feature called Process Scanner can scan for the processes that are eating up your system resources and terminate them to reduce the load on your PC. To unlock this feature, go to the Toolbox page > hit Process Scanner > hit Scan now.
Wrapping Things Up
After reading this article, you should have understood how to disable efficiency mode in 4 easy methods. More importantly, it’s essential to use MiniTool System Booster to lower RAM, CPU, and disk usage for better system performance.
Please contact us via [email protected] if there are any problems with our product. We will reply to you as soon as possible.