Slow File Transfer Speed
In everyday life, you might need to transfer various files on the computer. Sometimes, even when there’s nothing wrong with your computer, the file transferring process seems to take forever. What are the culprits of slow file transfer speed? Some of them are:
- Disk fragmentations.
- Outdated USB drivers.
- Antivirus software interference.
- Accumulated temporary files.
- Enabling RDC, Drive Indexing, or Large Send Offload.
How to Fix Slow File Transfer Speed on Windows 10/11?
Fix 1: Run MiniTool System Booster
To troubleshoot slow file transfer speed, you can scan your computer with MiniTool System Booster. This is a piece of PC tune-up software that can speed up the overall performance of your computer. With this tool, you can boost the speed of your computer in real time by optimizing resource allocation, finding & repairing system issues, optimizing internet speed, cleaning up junk files and more.
Now, let’s see how to speed up file transfer via this tool:
Step 1. Launch MiniTool System Booster to enter its main interface.
MiniTool System Booster TrialClick to Download100%Clean & Safe
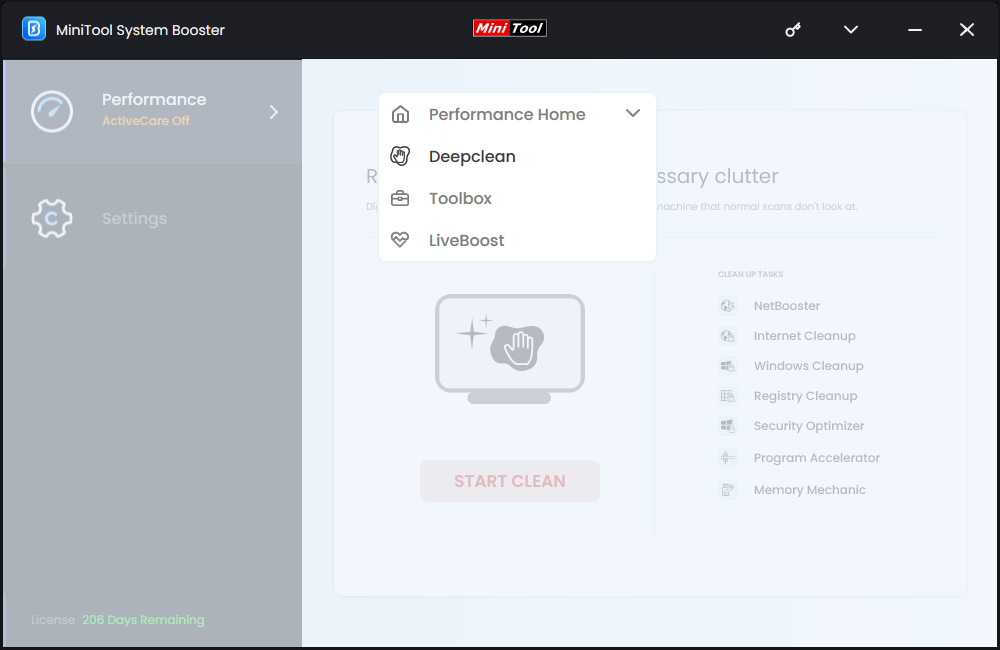
Step 2. Expand the drop-down menu beside Performance Home and select Deepclean.
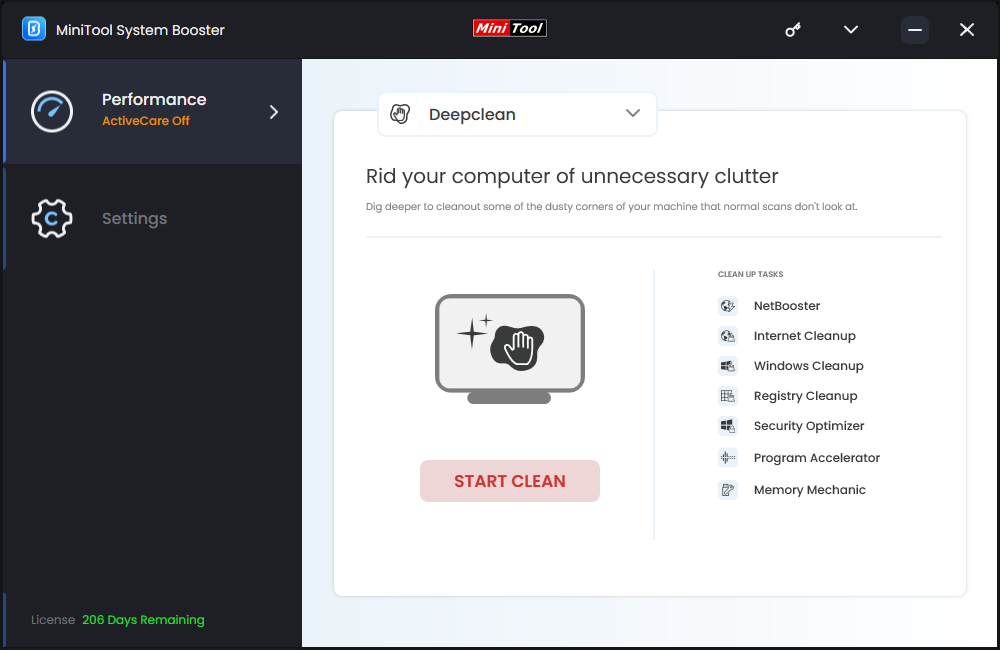
Step 3. After hitting STARTED CLEAN, it will run 7 tasks one after another.
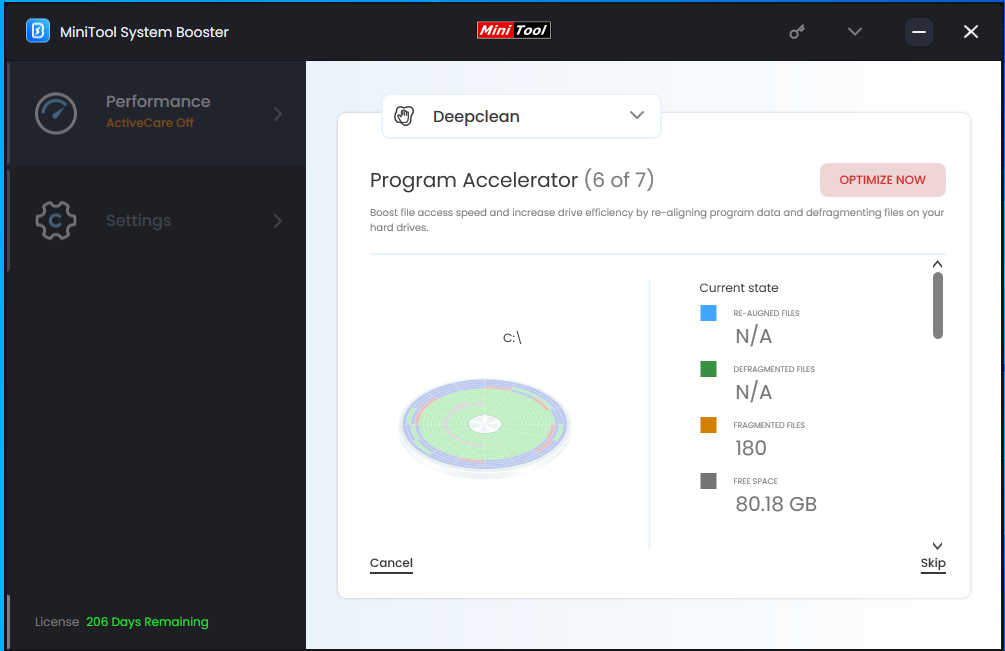
The Program Accelerator task will boost file access speed by re-aligning program data and defragmenting files on the hard drive.
Fix 2: Disable RDC
Enabling RDC might indirectly lower your transfer speed locally and on the network. If you have enabled this feature on your computer, turning it off might speed up file transfer. To do so:
Step 1. Press Win + S to open the search bar.
Step 2. Type windows features in the search bar and select Turn Windows features on or off.
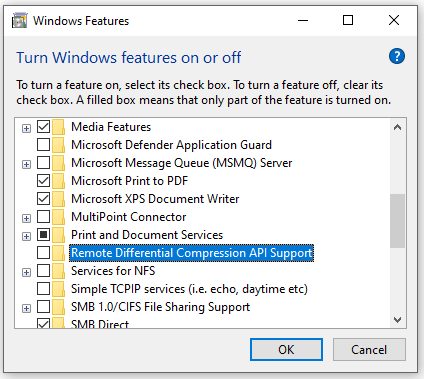
Step 3. Scroll down to find Remote Differential Compression API Support, uncheck it and then hit OK.
Step 4. Restart your computer to see if slow file transfer speed is gone.
Fix 3: Check USB Port & Update the Drivers
If you only encounter file copy slow while transferring files from or to a USB flash drive, you can try updating every Universal Serial Bus Controller driver via Device Manager. To do so:
Step 1. Right-click on the Start icon and select Device Manager from the quick menu.
Step 2. Expand Universal Serial Bus controller > right-click on every entry inside Universal Serial Bus controller > hit Update driver > select Search automatically for drivers.
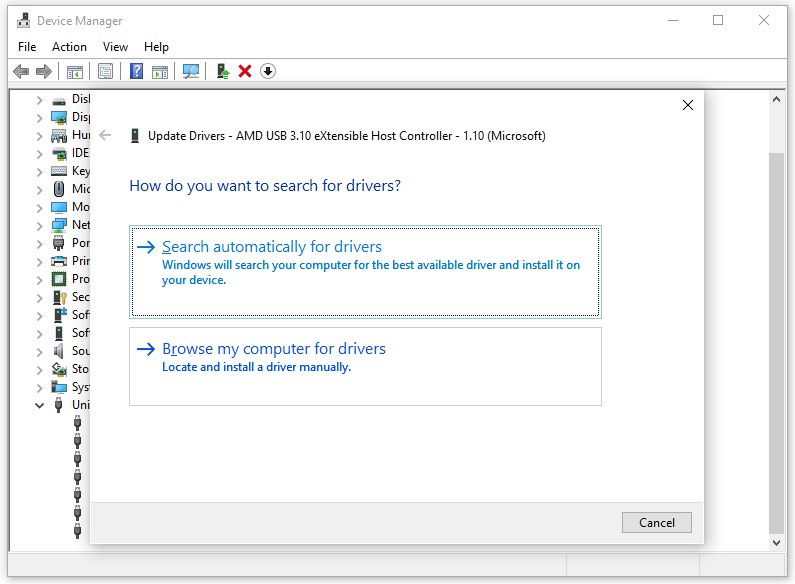
Step 3. If a new driver is identified, follow the instructions on the screen to install and download it.
Fix 4: Disable Real-Time Protection
During the file transferring speed, antivirus software might scan all the files for malware and even occupy more system resources, resulting in slow file transfer speed on your computer. That’s why you need to disable it until all files are transferred. To do so:
Step 1. Press Win + I to open Settings.
Step 2. Go to Update & Security > Windows Security > Virus & threat protection.
Step 3. Click on Manage settings and then disable Real-time protection.
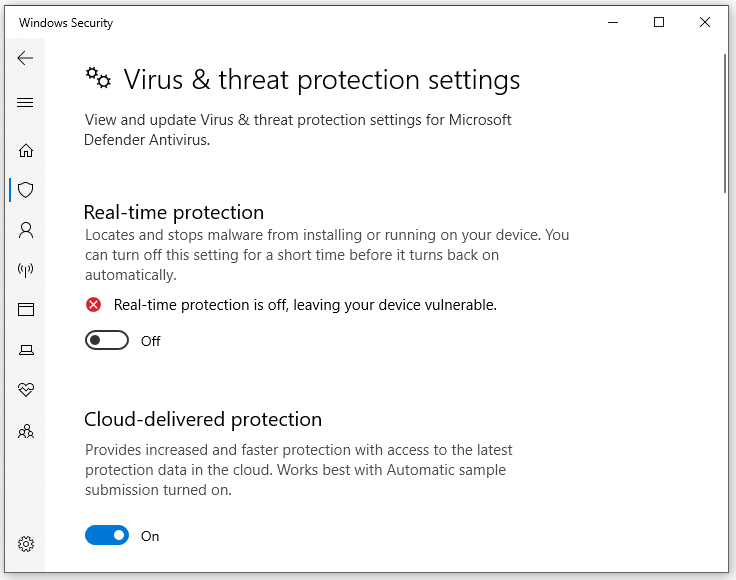
Fix 5: Run Disk Cleanup
The accumulation of temporary files might slow down the execution of various system services including the file copy or file transfer speed. Here’s how to clean the temporary files on your PC:
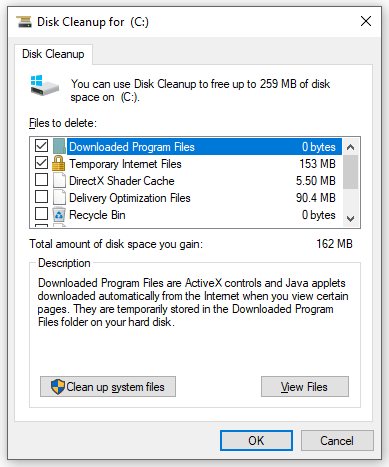
Step 1. Type disk cleanup in the search bar and hit Enter.
Step 2. Select the drive you need to clean up and hit OK.
Step 3. Tick the files you want to delete and hit OK to start the process.
Fix 6: Disable Large Send Offload
Large Send Offload (LSO) is designed to improve network performance, and it might be the culprit of slow file transfer speed because it lets background programs consumes lots of network bandwidth. In this case, another solution to fix file transfer slow is to disable LSO. Follow these steps:
Step 1. Type device manager in the search bar and hit Enter.
Step 2. Expand Network adapters and right-click on your network card to choose Properties.
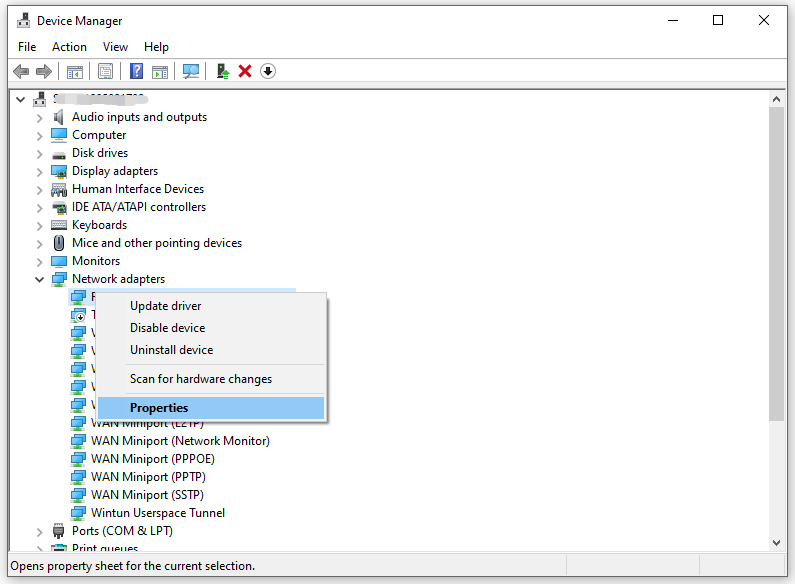
Step 3. Under the Advanced tab, choose Large Send Offload V2 (IPv4) and set the Value to Disabled.
Step 4. Hit OK > confirm this action > restart your computer.
Fix 7: Enable Defragmentation Services
When you start transferring data between drives, the Optimize drives service can run defragmentation to reorganizes and regroups data. It is proven that enabling auto-defrag drives can improve the file transfer speed, especially for those who upgrade from Windows 7 to Windows 10. Here’s how to enable this service:
Step 1. Press Win + R to open the Run box.
Step 2. Type services.msc and hit Enter.
Step 3. In the service menu, scroll down to find Optimize drives and right-click on it to choose Properties.
Step 4. Change the Startup type to Automatic and hit Start.
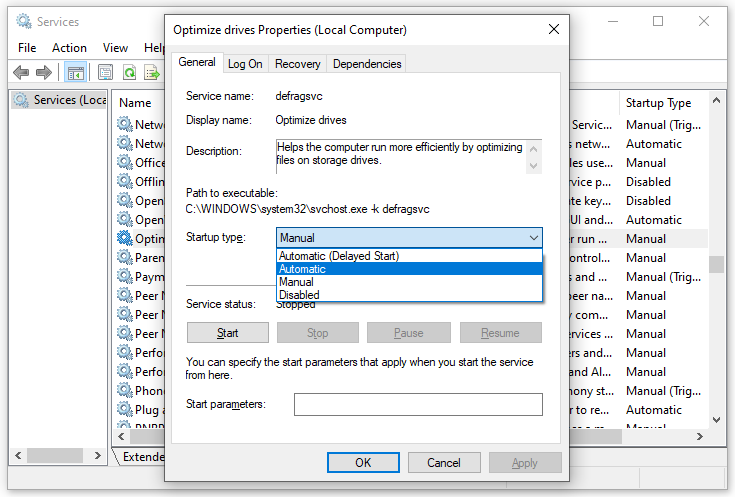
Step 5. Click on Apply & OK to save the settings.
Fix 8: Disable Drive Indexing
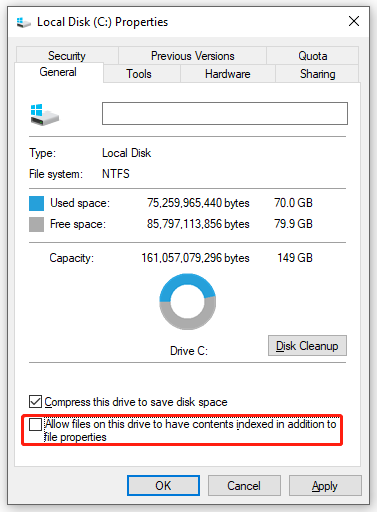
Windows offers Drive Indexing to speed up access to files stored on your computer. However, if this feature starts indexing files when you are transferring data, the transferring speed will be affected. Therefore, you had better disable it. To do so:
Step 1. Press Win + E to open File Explorer.
Step 2. Go to This PC > find the drive you want to relieve of indexing under Devices and drives > right-click on it to choose Properties from the context menu.
Step 3. Uncheck Allow files on this drive to have contents indexed in addition to file properties > save the changes > restart your computer.
Final Words
Slow file transfer speed might be annoying, but you can speed up the file transfer speed easily with the solutions above. For more advice about MiniTool System Booster, contact us freely via [email protected]!


