Unable to Uninstall Programs in Windows
Usually, it is easy to uninstall programs in Windows 10/11 from Settings, Control Panel, or the Start menu. However, the uninstallation process might not be as seamless as expected and you might be unable to uninstall programs in Windows devices.
If you receive an error when attempting to uninstall a program from your computer, scroll down to this guide to find feasible solutions now.
How to Fix Unable to Uninstall Programs in Windows?
Fix 1: Uninstall the Program via MiniTool System Booster
A third-party uninstaller might help you to remove the program completely. To do this job, MiniTool System Booster is a good choice. This tool is known as an all-in-one tune-up PC software that speeds up CPU, RAM, and hard drive resources with easy steps.
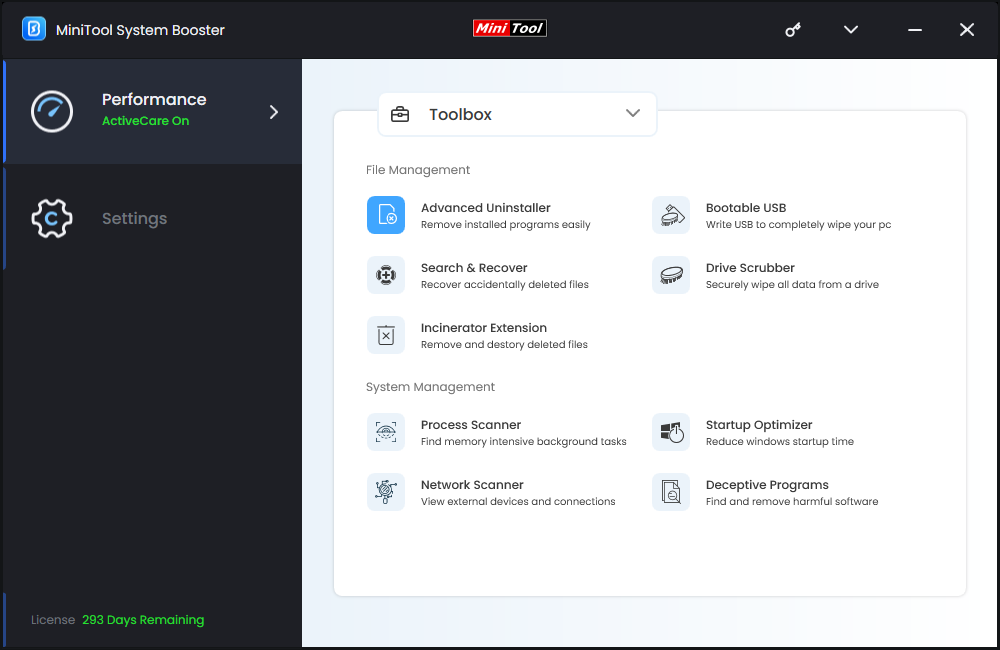
Also, MiniTool System Booster provides various system management tools to clean up unnecessary clutters, optimize startup programs, scan network connections, remove malicious software, and more. When encountering unable to uninstall a program in Windows PC, you can try this tool to uninstall the problematic program:
Step 1. Launch MiniTool System Booster and you can use it for free within 15 days.
MiniTool System Booster TrialClick to Download100%Clean & Safe
Step 2. Expand the Performance Home menu and select Toolbox.
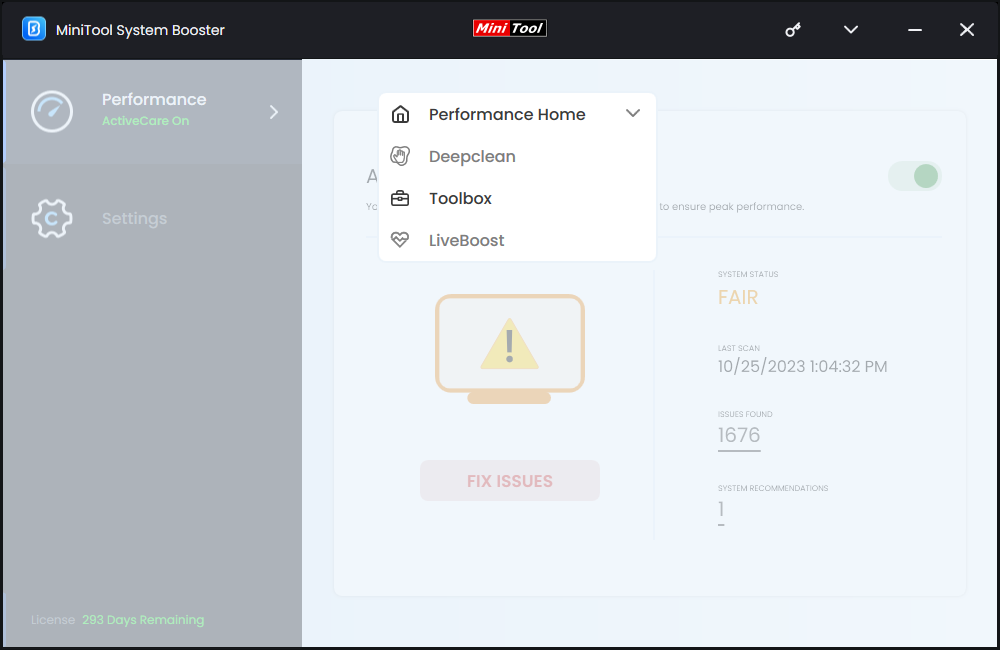
Step 3. Under File Management, click on Advanced Uninstaller.
Step 4. Now, you can see all the programs installed on your computer. Find the program you want to remove and hit UNINSTALL beside it.
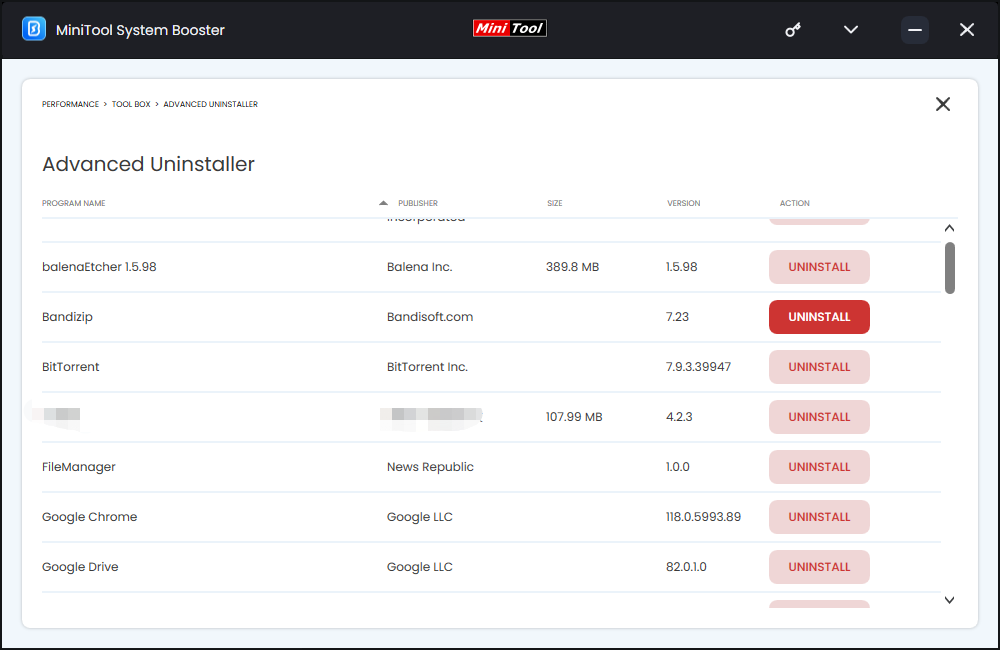
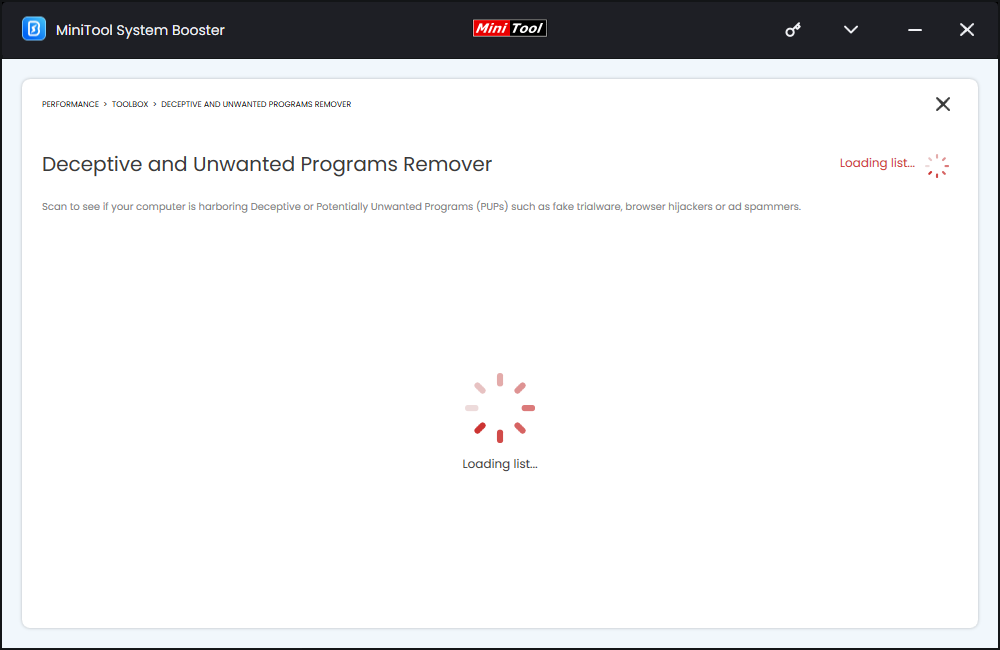
Fix 2: Uninstall the Program via Registry Editor
Registry Editor contains information, settings, options, and other values of programs installed on your computer. At the same time, you can modify the registry keys to enable, disable, or even uninstall programs. To do so:
Step 1. Press Win + R to launch the Run box.
Step 2. Type regedit and hit Enter to open Registry Editor.
Step 3. Navigate to the following path:
Computer\HKEY_LOCAL_MACHINE\SOFTWARE\Microsoft\Windows\CurrentVersion\Uninstall
Step 4. Under the Uninstall key, find the program you want to uninstall and right-click on it to choose Delete.
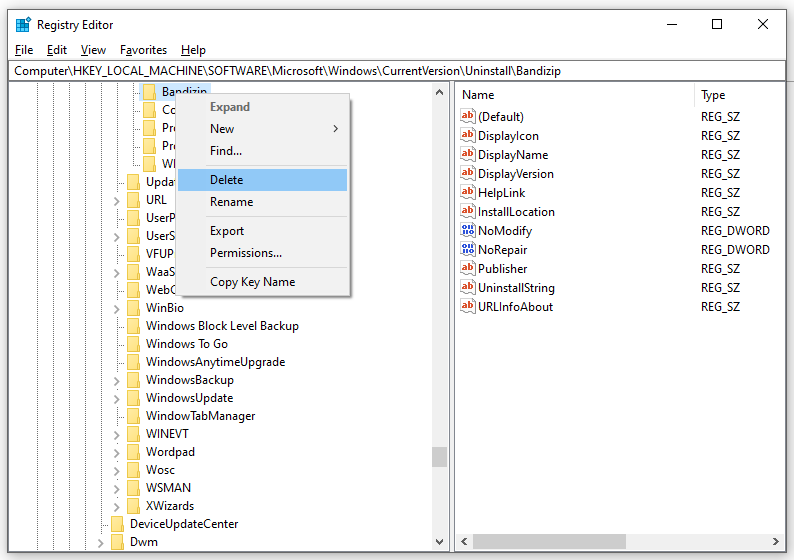
Step 5. Click on Yes to confirm your action and reboot your computer after completion.
Fix 3: End the Process in Task Manager
Even if you close some programs manually, they are still running in the background. If the program you want to uninstall is running, no wonder you cannot uninstall it. Therefore, you can end the process in Task Manager before uninstalling it:
Step 1. Right-click on the Start icon and select Task Manager from the quick menu.
Step 2. Head over to the Processes tab, find the program you need to uninstall, and right-click on it to choose End task.
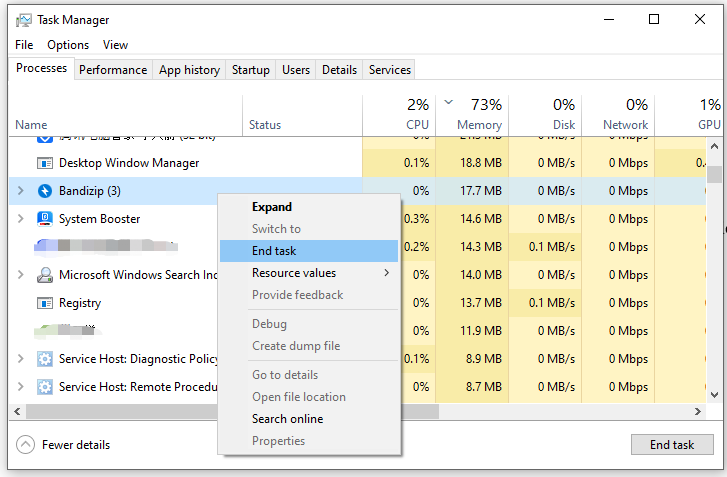
Step 3. Quit Task Manager and inspect if Windows program uninstallation failure is gone.
Fix 4: Restart the Windows Installer Service
The Windows Installer service is not only associated with the installation of programs, but also plays a vital part in the uninstallation process. If the Windows Installer service runs improperly, you will also have trouble uninstalling programs on your computer. In this case, restarting this service might do the trick. To do so:
Step 1. Type services.msc in the Run dialog and hit OK to open Services.
Step 2. Scroll down to locate the Windows Installer service and right-click on it to choose Properties.
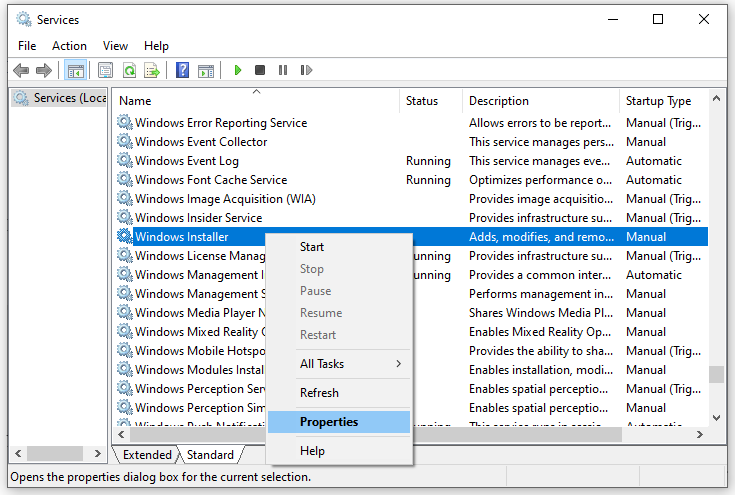
Step 3. Click on Stop to disable the service for a while and then click on Start. Make sure the Startup type is set to Automatic.
Step 4. Click on Apply & OK to save the changes.
Now, try to uninstall the program again to see if this solution makes a difference. If you are still unable to uninstall the program, follow these steps to re-registering the Windows Installer service:
Step 1. Launch Command Prompt with administrative rights.
Step 2. Run the following command one by one and don’t forget to hit Enter after each command.
msiexec /unreg
msiexec /regserver
Also see: Fixed: Windows Installer Needs to Be Upgraded Error in Windows 10
Fix 5: Run Program Install and Uninstall Troubleshooter
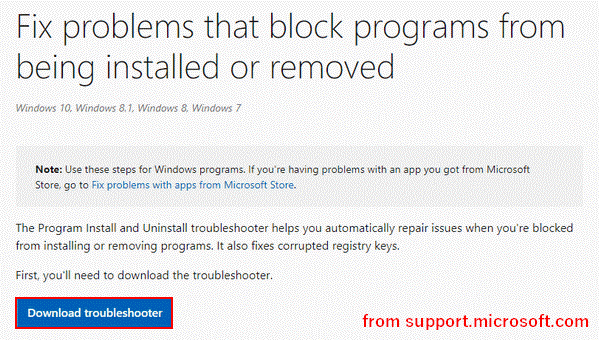
If you fail to uninstall programs in Windows 10/8.1/8/7, there is a free tool in Microsoft called Program Install and Uninstall program that might help you out. Since it doesn’t come with your Windows systems, you need to download and install it manually.
This troubleshooter can help you deal with these problems that block you from installing or uninstalling a program. Here’s how to use it to fix the uninstall problems:
Step 1. Download Program install and Uninstall troubleshooter and then run it.
Step 2. Click on the Uninstalling button when you see “Are you having a problem installing or uninstalling a program?”
Step 3. Now, you can see a list of programs on your device, select the program that you cannot uninstall and hit Next.
Step 4. Follow the prompts on the screen to complete the rest process.
Final Words
To sum up, once you don’t need a program on your system, you can remove it entirely via Settings, Control Panel, or the Start menu. If the normal uninstallation methods don’t work for you, it’s time to apply the solutions above to force uninstall the program. Hope you can get back on track with the uninstallation in no time!


