Windows File Explorer Slow
File Explorer or Windows Explorer is a resource management tool provided by Windows. This tool enables you to manage files/folders, and network connection, as well as search for files and related components. Unfortunately, Windows File Explorer slow might appear, making it take longer to load your files or search results.
Why is your Windows File Explorer lagging? Here, we collect some reasons about why Windows Explorer is slow:
- Small glitches and bugs in the system.
- Issues with search and indexing.
- Unavailable system resources.
- Incorrect folder optimization settings.
How to Fix Windows File Explorer Slow on Windows 10/11?
Fix 1: Restart File Explorer
Restarting File Explorer can help to refresh the File Explorer windows and solve some temporary glitches. If your Windows File Explorer is slow and unresponsive, follow these guidelines to restart it:
Step 1. Right-click on the Taskbar and select Task Manager.
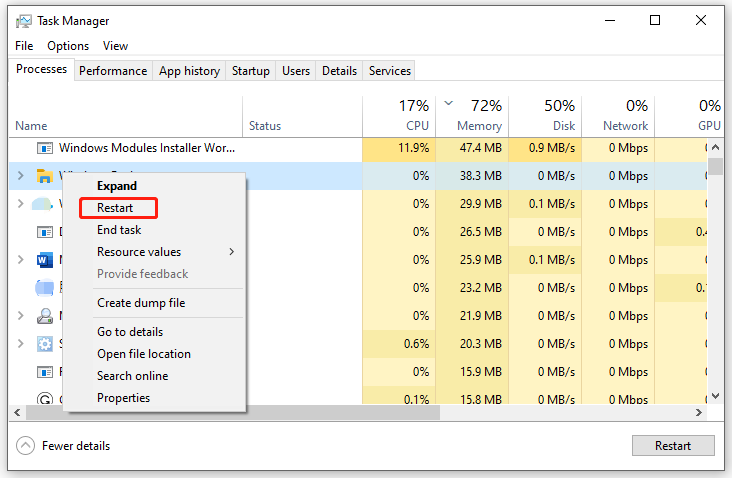
Step 2. Under the Processes tab, right-click on Windows Explorer and select Restart from the context menu.
Fix 2: Terminate Unnecessary Programs
Running too many programs simultaneously might slow down your computer, leading to Windows File Explorer slow. Therefore, you need to reduce the number of programs running on your PC. To speed up your computer, MiniTool System Booster is a top option for you.
It is a piece of all-in-one PC tune-up software that can maximize the system performance of your computer by cleaning junk files, improving internet connection, freeing up memory, removing harmful software, and more. Now, let’s see how to terminate memory-intensive tasks via this tool:
Step 1. Launch MiniTool System Booster for free and enter the main interface.
MiniTool System Booster TrialClick to Download100%Clean & Safe
Step 2. Click on Performance Home and then select Toolbox from the drop-down menu.
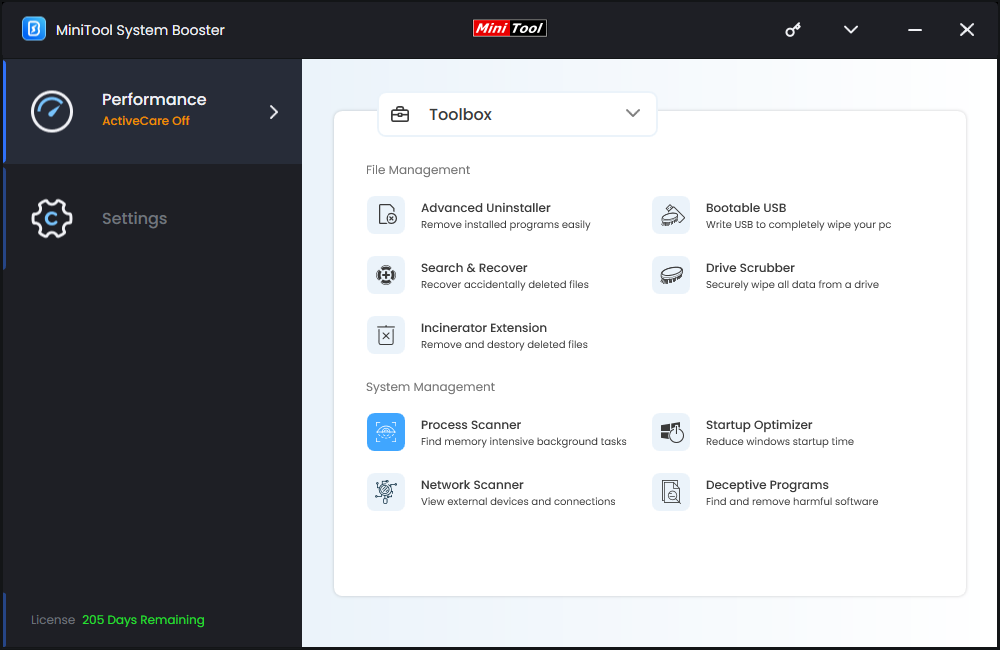
Step 3. In this page, click on Process Scanner under System Management.
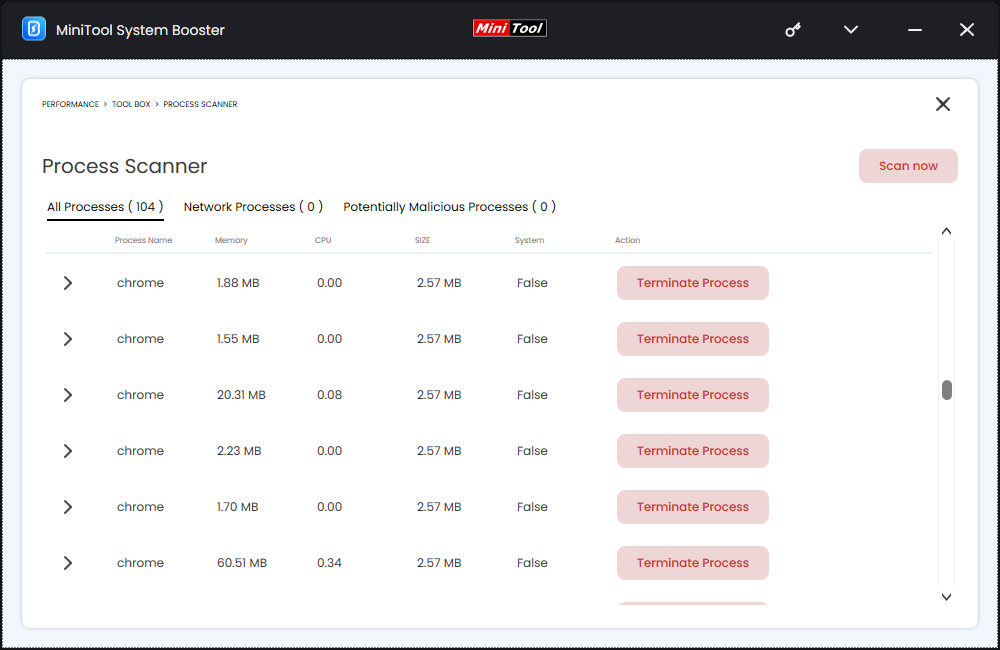
Step 4. After hitting Scan now, this feature will start finding memory-intensive background processes and then list their names and the system resources they use. Click on the Terminate Process button beside the task you want to end.
Fix 3: Run Search and Index Troubleshooter
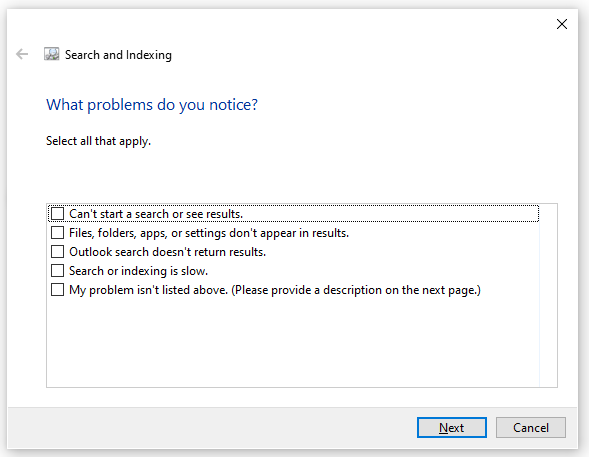
Another way to fix Windows File Explorer slow is to run Search and Index troubleshooter. This troubleshooter will detect issues with the indexing and loading of files in File Explorer and list some recommended solutions for you. To do so:
Step 1. Press Win + I to open Windows Settings.
Step 2. Go to Update & Security > Troubleshoot > Additional troubleshooters.
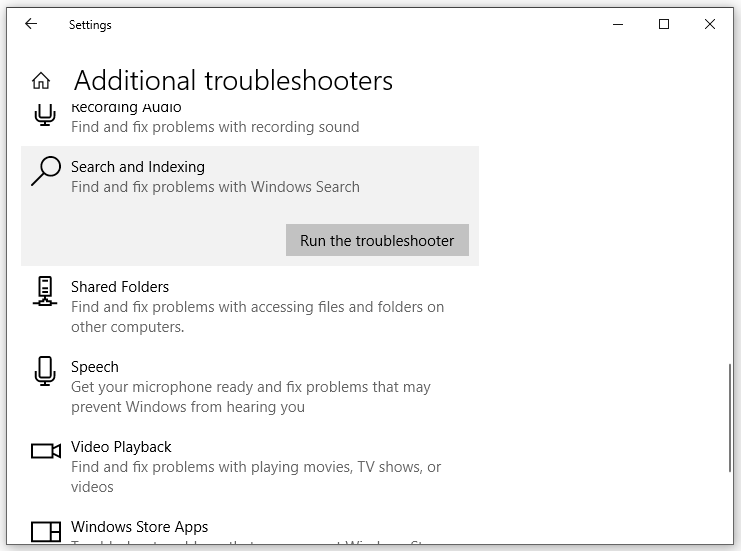
Step 3. Select the Search and Indexing option and hit Run the troubleshooter to start the detecting process.
Step 4. After scanning, you can select the problem you meet or describe your problem. Then, follow the solutions listed on the screen.
Fix 4: Change Folder Optimization Settings
Do you encounter Windows File Explorer slow with a folder that contains lots of files or subfolders? If this is the case, you need to change that folder’s optimizing settings. Here’s how to do it:
Step 1. Right-click on the problematic folder that slows down File Explorer and then select Properties.
Step 2. Under the Customize tab, set Optimize this folder for to General items.
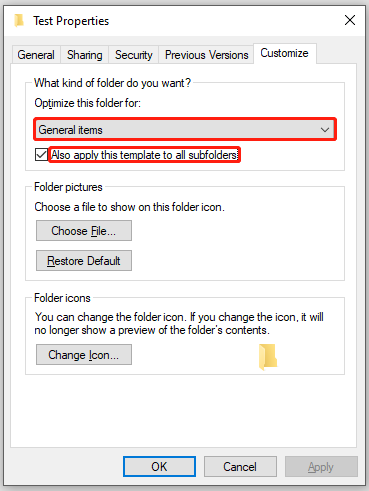
Step 3. Tick Also apply this template to all subfolders.
Step 4. Click on Apply & OK to make the changes effective.
Fix 5: Disable Quick Access
Quick Access makes it easier for you to find the files and folders that you frequently use. Although Quick Access allows you to access your files quickly, it might also slow down File Explorer. To address Windows File Explorer slow, you need to disable this feature.
Step 1. Type control panel in the search bar and hit Enter.
Step 2. Expand the drop-down menu beside View by and choose Small icons.
Step 3. Find File Explorer Options and then hit it.
Step 4. Click on the drop-down icon beside Open File Explorer to and select This PC.
Step 5. Uncheck Show recently used files in Quick access and Show frequently used folders in Quick access.
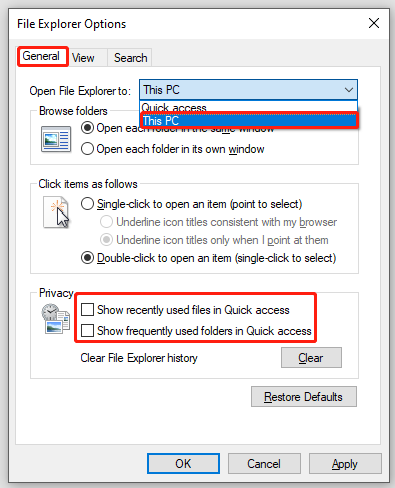
Step 6. Click on Apply & OK.
Fix 6: Reset File Explorer
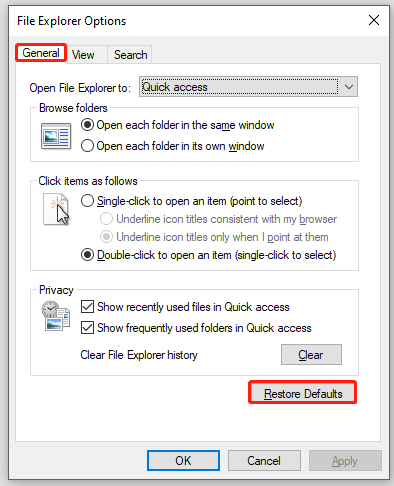
The last resort is to reset your File Explorer. By doing so, all the misconfigured settings will be restored to the default state. Here’s how to reset folder view, privacy, and search:
Step 1. Open File Explorer Options in Control Panel.
Step 2. In the General tab, hit the Clear button beside Clear File Explorer history > click on Restore Defaults located at the bottom > hit Apply & OK to reset the general settings of File Explorer.
Step 3. In the View tab, click on Reset Folders > hit Yes in the Folder View window > hit Restore Defaults > tap on Apply & OK to reset the folder view settings.
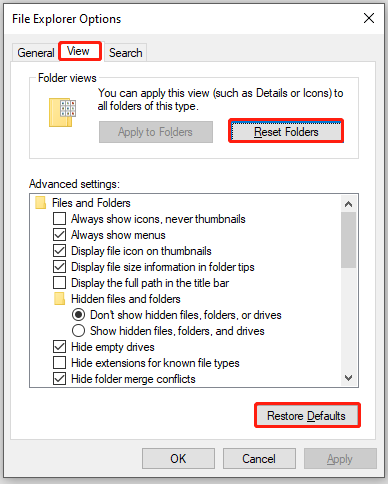
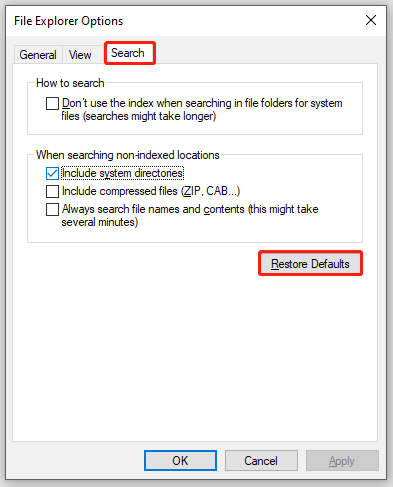
Step 4. In the Search tab, click on Restore Defaults to reset any changes made to how File Explorer performs searches for indexed and non-indexed locations.
We Need Your Voice
Now, you must be free from Windows Explorer slow and access your files again. When your computer or the programs on it are sluggish, it’s time to scan your Windows device with MiniTool System Booster for peak performance. If you have any problems while using this software, feel free to send us an email via [email protected]. We will reply to you as soon as possible.


