Google Chrome Closes Immediately After Opening or While Using
Google Chrome is a very convenient tool for our work, life, and entertainment. It is so powerful that you can get personalized search results instantly after entering the keywords. However, sometimes, Google Chrome might quit unexpectedly while opening the browser or browsing some web pages on your computer. What to do if Google Chrome closes by itself? In the following content, you can get some solutions to handle it.
How to Fix Google Chrome Closing Itself on Windows 10/11?
Fix 1: Clear Browsing Cache
To make Google Chrome load faster, the browser stores temporary files, images, and other data in its cache. Once the cached data is outdated or corrupted, it will affect the performance of the browser and even lead to Google Chrome closing automatically. If this is the case, you need to clear the cache in time.
When it comes to speeding up browsers, a PC tune-up software called MiniTool System Booster is worth a try. This freeware is designed to optimize your system performance from various aspects, such as removing junk files, deleting browser cache, defragging your hard drive, sparing system resources, and so on.
Now, follow these steps to delete the cached files of Google Chrome via this free tool:
Step 1. Launch MiniTool System Booster Trial Edition.
MiniTool System Booster TrialClick to Download100%Clean & Safe
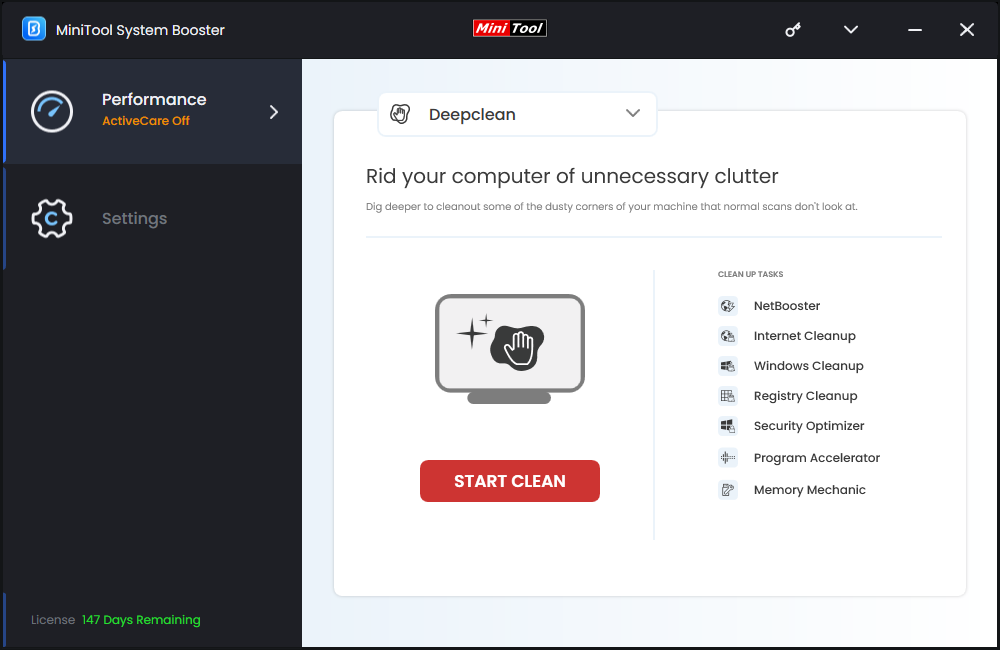
Step 2. In the main interface, click on Performance Home and select Deepclean.
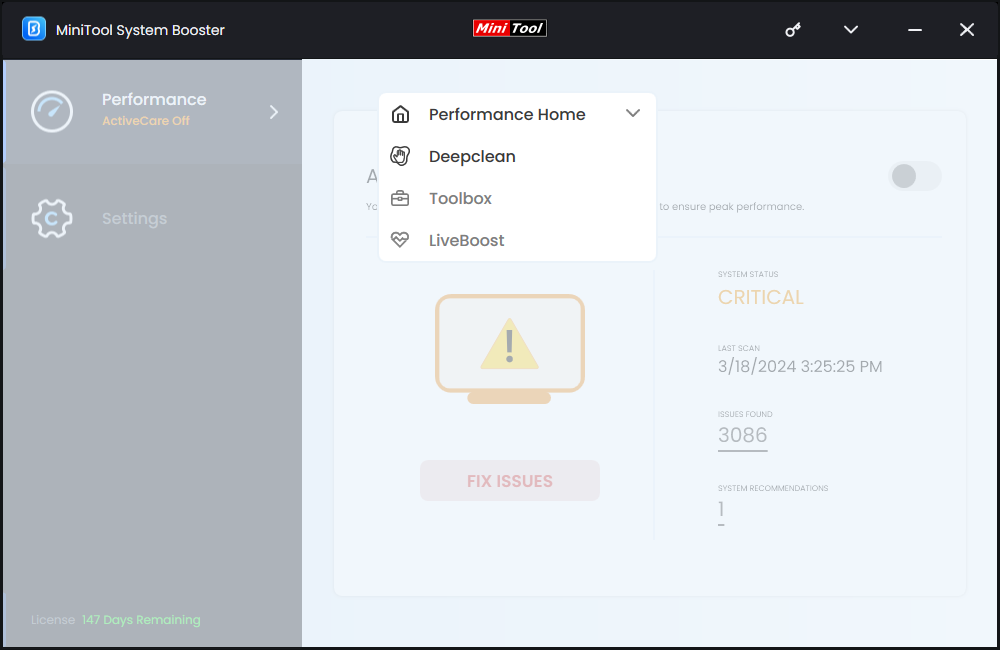
Step 3. Click on START CLEAN to initiate 7 tasks. You can run all the tasks in sequence or skip some of them according to your needs.
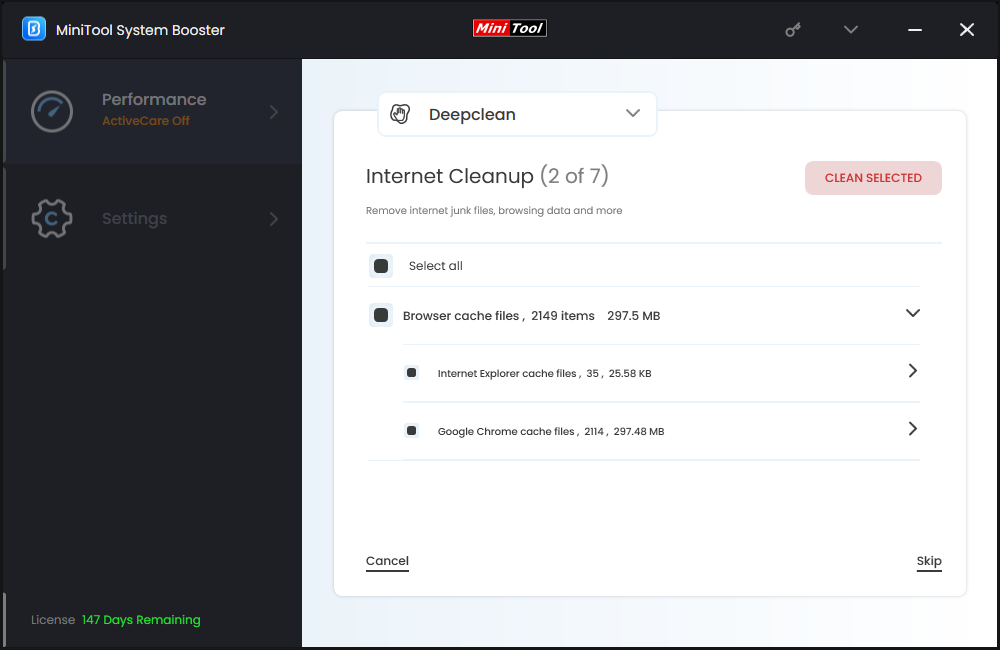
The Internet Cleanup task will list the cached files of all your browsers including search histories, cookies, cache, saved passwords and more. You can tick the files you want to remove and hit CLEAN SELECTED.
Fix 2: Check for Windows Updates
Updating your system to the latest version is also proven to be fruitful for Google Chrome closing automatically. Here’s how to do it:
Step 1. Press Win + I to open Windows Settings.
Step 2. In the settings menu, scroll down to locate Update & Security and hit it.
Step 3. In the Windows Update tab, click on Check for updates.
Fix 3: Disable or Remove Conflicted Extensions
If your Google Chrome closes itself after installing certain extensions, chances are that the extension you installed conflicts with the browser. Therefore, disabling or removing this extension might work. Here’s how to do it:
Step 1. Open Google Chrome Settings.
Step 2. In the left pane, click on Extensions.
Step 3. Now, you can see a list of installed extensions. Try disabling a newly installed extension to see if it works. If your browser still closes itself after a while, you can remove it to see if that solves this issue.
Also see: How to Disable and Enable Chrome Extensions/Plug-Ins/Add-Ons
Fix 4: Update Google Chrome
Like other software, Google Chrome often rolls out some bug fixes and security improvements. If you are running outdated Chrome, updating it to the latest version might be helpful. To do so:
Step 1. Open Google Chrome.
Step 2. Click on three-dot icon and select Settings from the context menu.
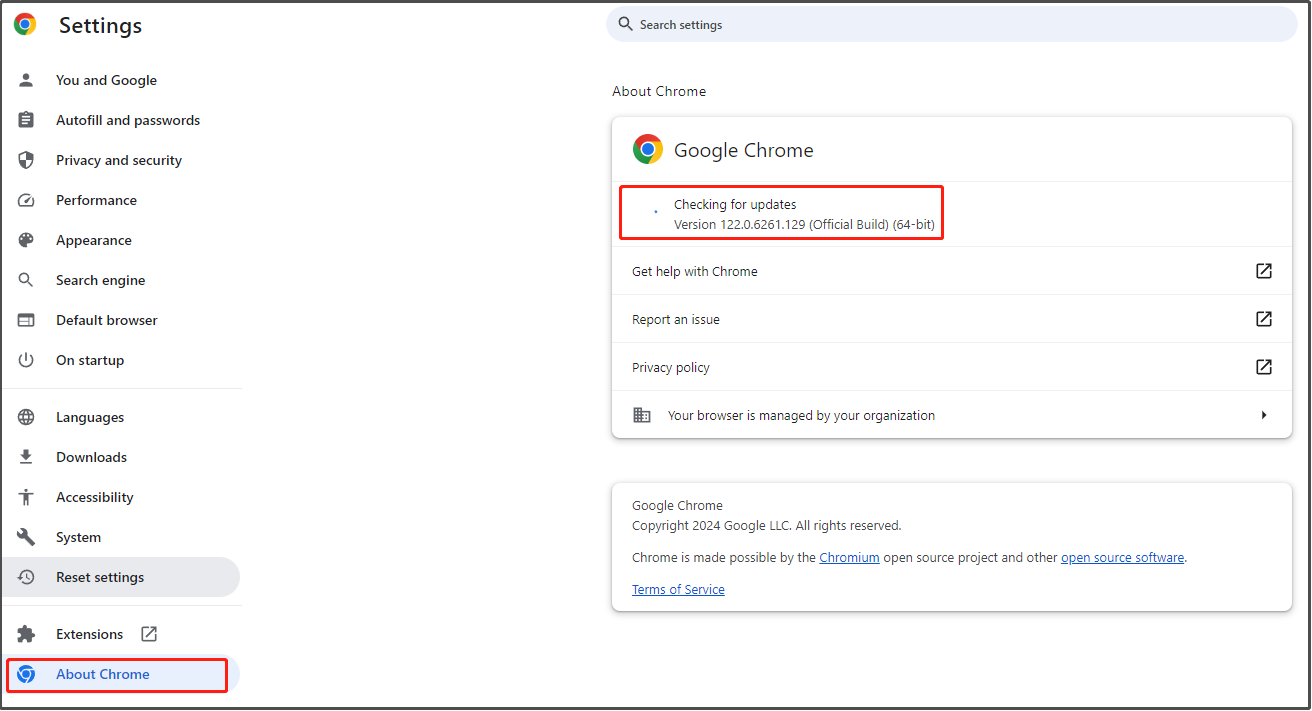
Step 3. Select About Chrome and then it will start checking for new updates for you.
Fix 5: Reset Google Chrome
Another way to fix Google Chrome is to reset the browser. By doing so, it will restore Chrome to its original state and wipe out any settings or data that cause the browser to crash. Here’s how to do it:
Step 1. Open Google Chrome Settings.
Step 2. Click on Reset settings and then hit Restore settings to their original defaults.
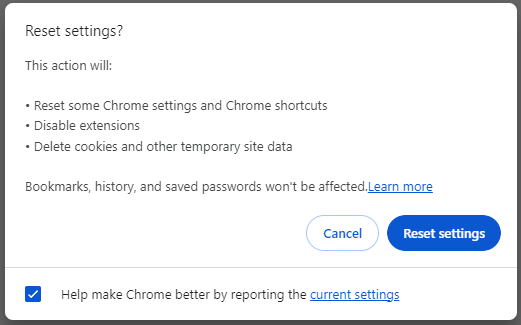
Step 3. Then, a prompt will appear to tell you what this action will do. If you are sure to make the change, hit Reset settings to confirm this action.
Fix 6: Reinstall Google Chrome
If all the solutions above fail to solve Google Chrome closing itself, the last resort is to reinstall the browser from the ground up. Follow these steps:
Step 1. Right-click on the Start menu and select Run.
Step 2. Type appwiz.cpl and click on OK to launch Programs and Features.
Step 3. Scroll down from the app list to find Google Chrome and right-click on it to choose Uninstall.
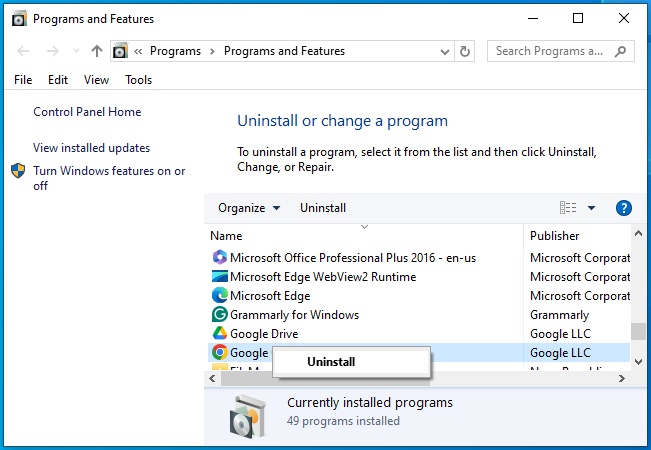
Step 4. Confirm this operation > follow the instructions on the screen to complete the process > restart your computer.
Step 4. After that, click on here to download Google Chrome again.
Some Small Tips for Google Chrome Closing Itself
- Restart your browser – this can be the simplest and most effective solution.
- Check your internet connection – make sure your internet is fast and stable.
- Avoid opening too many tabs simultaneously – running dozens of tabs at the same time may consume a lot of system resources.
- Scan your computer with antivirus software – try this method if you doubt that your Windows device is infected by malware or viruses.
Final Words
Now, you must be free from Google Chrome closing itself. Also, you get a handy tool called MiniTool System Booster to improve your browsing experience and system performance. When your computer is sluggish, scanning your computer with it might save your day.


