Perhaps you own an old Lenovo laptop and decide to dispose of it after purchasing a new one but you care about the privacy protection. In this light, “wipe Lenovo hard drive” will be the topic you should focus on.
Disk wiping refers to thoroughly deleting all the data on the hard disk, rendering it unrecoverable. Generally speaking, it is necessary in case you want to donate, sell, or give away the old Lenovo laptop. By this means, any third-party data recovery software such as MiniTool Power Data Recovery fails to recover deleted files.
As with laptops or desktops from other brand manufacturers, you have multiple options to securely erase the hard drive on Lenovo PCs. Below is a comprehensive guide on how to wipe a Lenovo laptop.
Suggestion: Back up Lenovo Data
Wiping a Lenovo hard drive is a one-way process to data oblivion, not offering a chance to go back for a forgotten file, so we first recommend backing up your vital files for future access when necessary. Data backup is just like a piece of cake with the support of MiniTool ShadowMaker.
This PC backup software has a significant impact on file backup, system backup, disk backup, and partition backup. Furthermore, it makes it easy to create automatic backups, incremental backups, and different backups, as well as clone the entire hard drive for disk backup or upgrade.
MiniTool ShadowMaker TrialClick to Download100%Clean & Safe
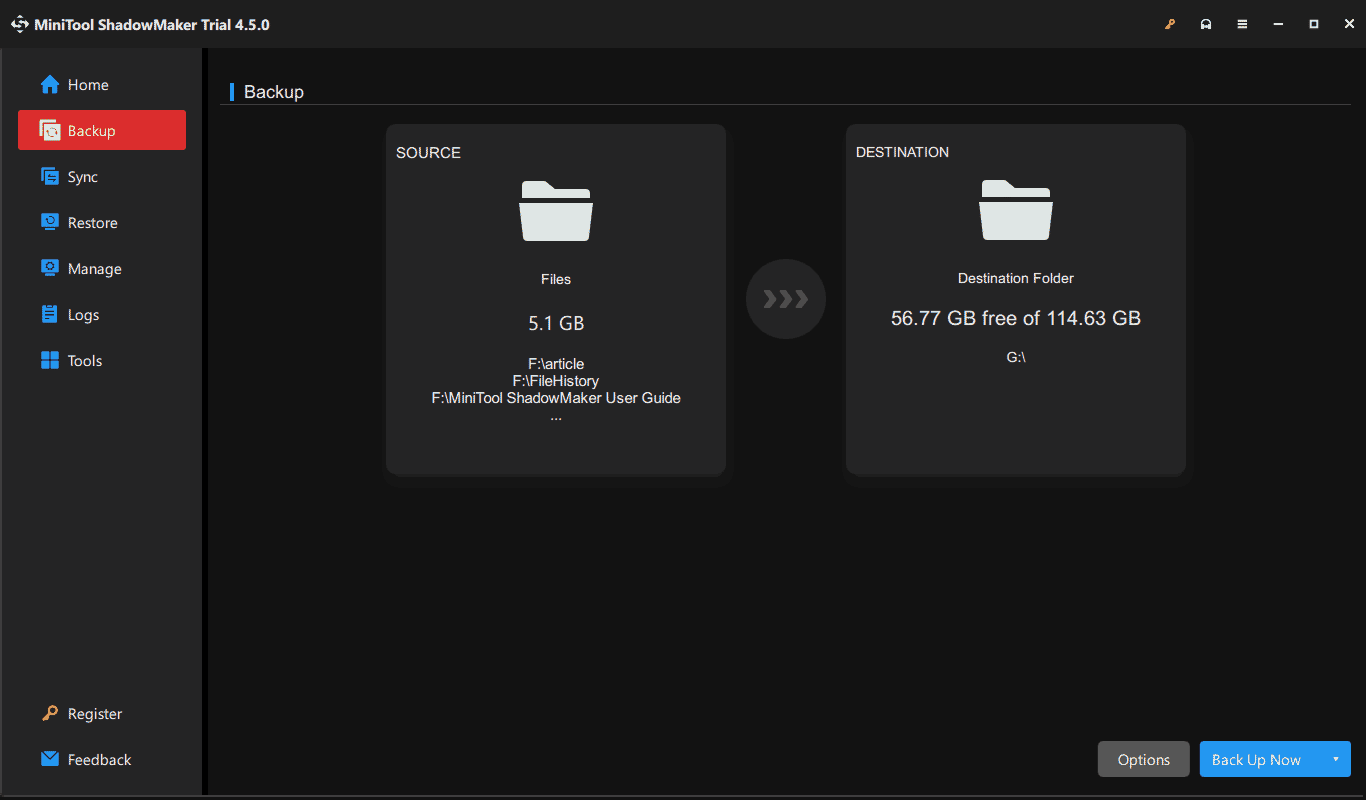
Step 1: Run MiniTool ShadowMaker Trial Edition.
Step 2: In Backup, hit the corresponding section to choose the backup source and target.
Step 3: Begin to back up Lenovo data.
Way 1: Wipe Lenovo Hard Drive via MiniTool System Booster
When it comes to “Lenovo wipe hard drive”, a professional disk eraser is essential and MiniTool System Booster will be a good assistant.
Even though this PC tune-up software is tailored for speeding up the PC and optimizing the system for optimal performance by speeding up RAM, improving CPU, cleaning up the system, etc., MiniTool System Booster offers some other rich features. Uninstalling apps, setting a proper power plan, defragmenting a hard drive, wiping a drive and more can be done by this utility in a walk.
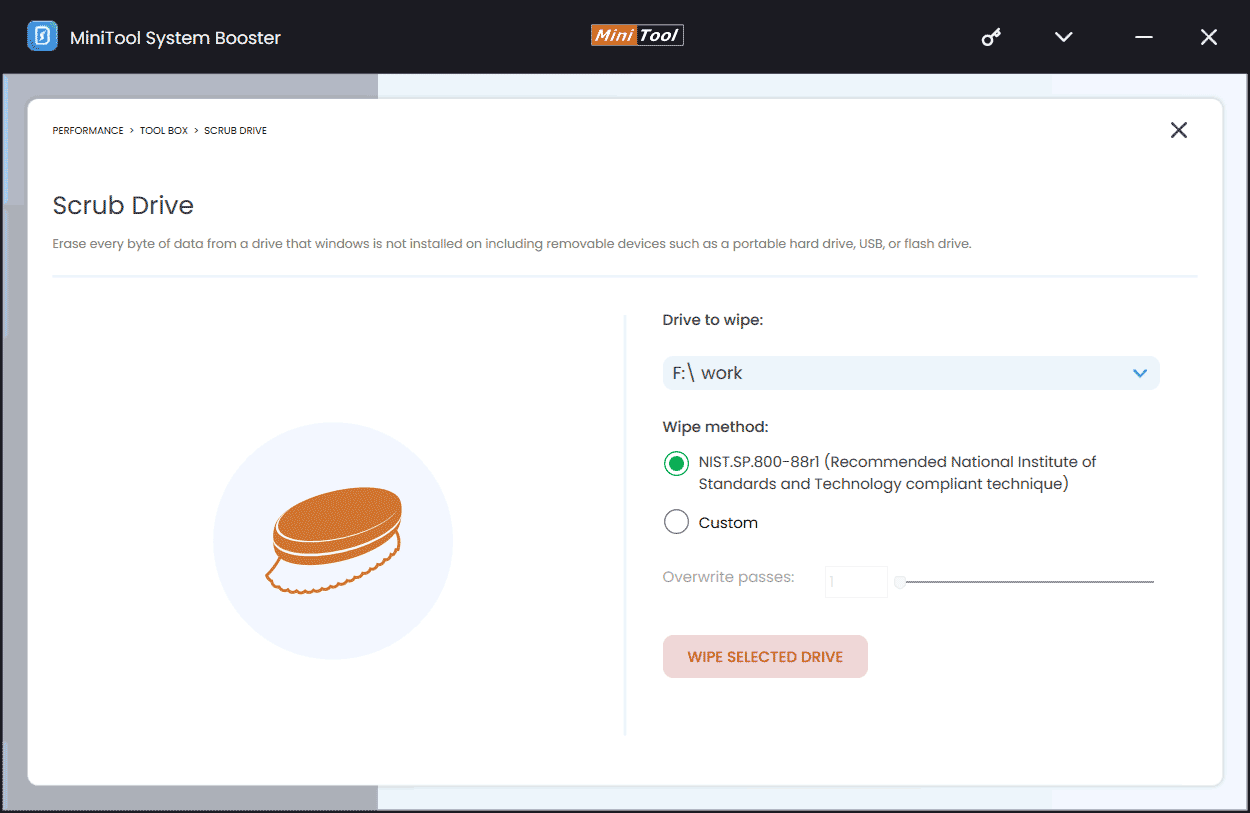
Its Drive Scrubber feature effectively erases all the data from a drive so that you are unable to recover the data using any software. To wipe Lenovo hard drives, you should wipe each partition one by one. Moreover, it won’t wipe the drive where Windows is installed.
Get started by downloading and installing this disk wiping tool!
MiniTool System Booster TrialClick to Download100%Clean & Safe
Step 1: Launch MiniTool System Booster on your Lenovo laptop.
Step 2: Under Performance, hit Toolbox from the top menu, and then tap Drive Scrubber to continue.
Step 3: In the new window, choose the data partitions on your Lenovo hard drive one by one, tick a wiping method, and hit WIPE SELECTED DRIVE.
Way 2: Lenovo Wipe Hard Drive via MiniTool Partition Wizard
Another MiniTool software, MiniTool Partition Wizard, favors wiping a hard drive. Beyond the capability of extending/shrinking/resizing/formatting/creating/recovering/converting a partition, and more basic disk management, this partition manager provides a feature to securely wipe Lenovo hard drives with ease.
It fills the entire hard drive by writing 0, 1, or 0 & 1 to completely erase the disk. In addition, MiniTool Partition Wizard supports wiping methods such as DoD 5520.22-M and DoD 5520.28-STD.
How to wipe a Lenovo laptop securely and thoroughly? Take these steps:
Step 1: Run MiniTool Partition Wizard on your Lenovo laptop.
Step 2: On its main interface, right-click on the Lenovo hard drive and choose Wipe Disk.
Step 3: Select a wiping method as per your need to securely erase the entire disk.
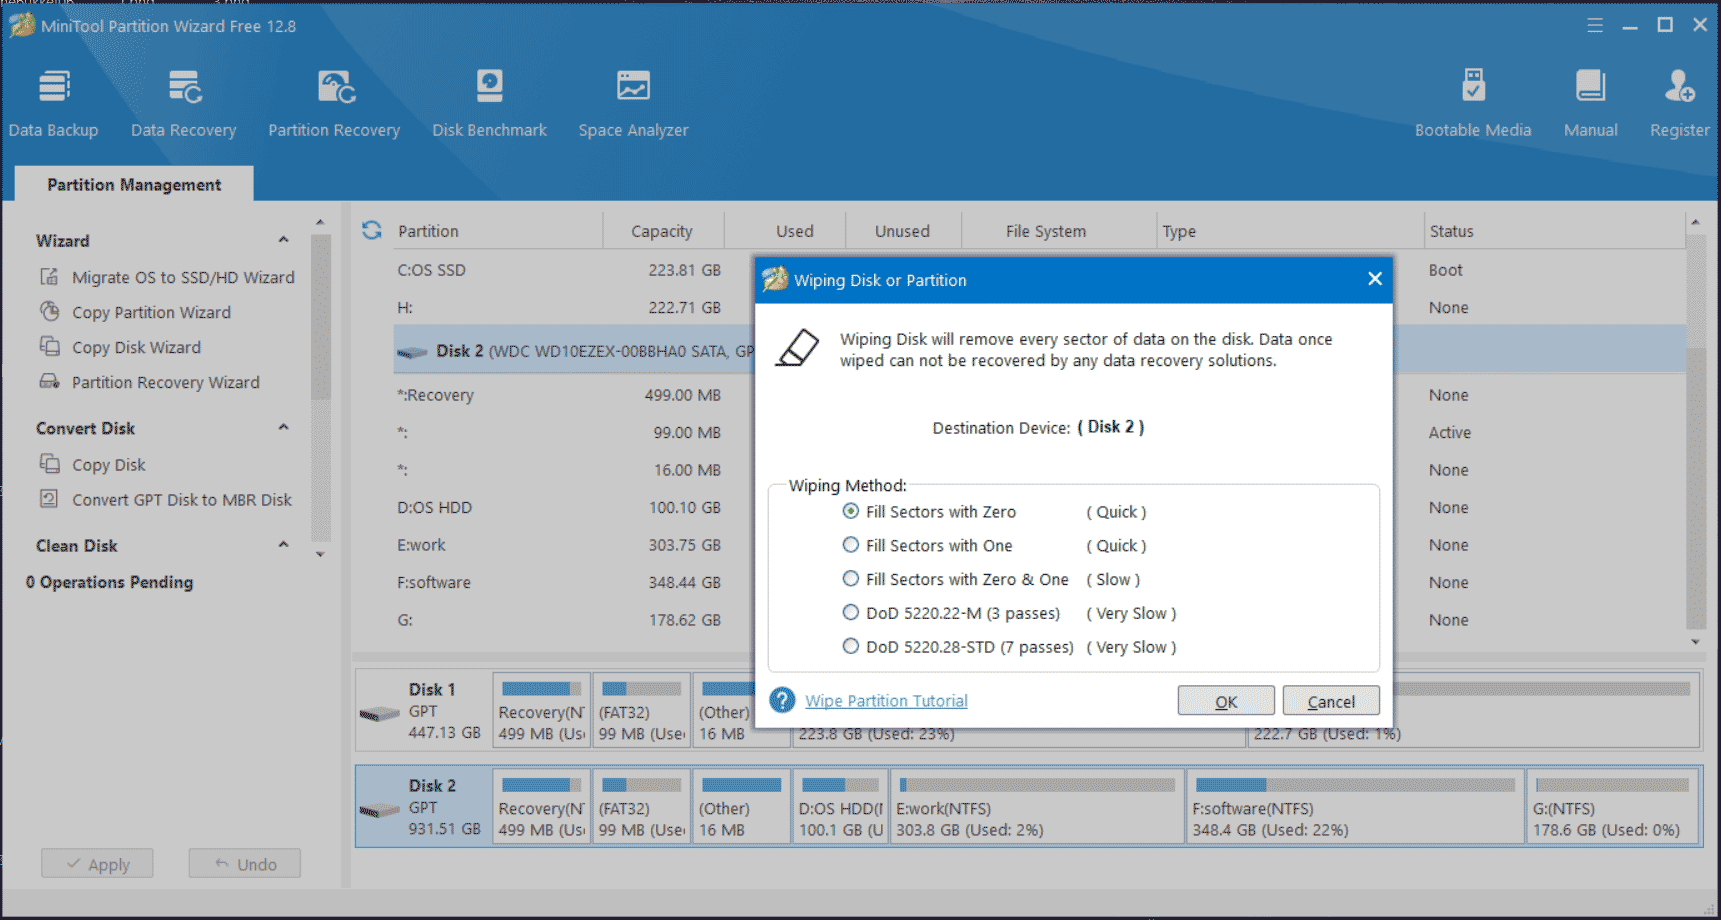
Step 4: Confirm the operation by hitting the Apply button.
Way 3: Lenovo Data Wipe from BIOS
Some manufacturers add a feature to allow secure wiping of a disk in BIOS and you may heard of HP Secure Erase and ASUS Secure Erase. Of course, Lenovo comes with such a tool, namely Lenovo Secure Wipe.
If you are a user of ThinkPad 2019 or later models, take these steps:
Step 1: Reboot the system and press F1 on the laptop to access the BIOS boot menu when seeing the Lenovo logo.
Step 2: Switch to Security and set ThinkShield secure wipe to Enabled. Then, save the setting by pressing F10 and reboot the PC again.
Step 3: On reboot, press F12 to load the Boot Menu, go to the App Menu interface, and choose ThinkShield secure wipe.
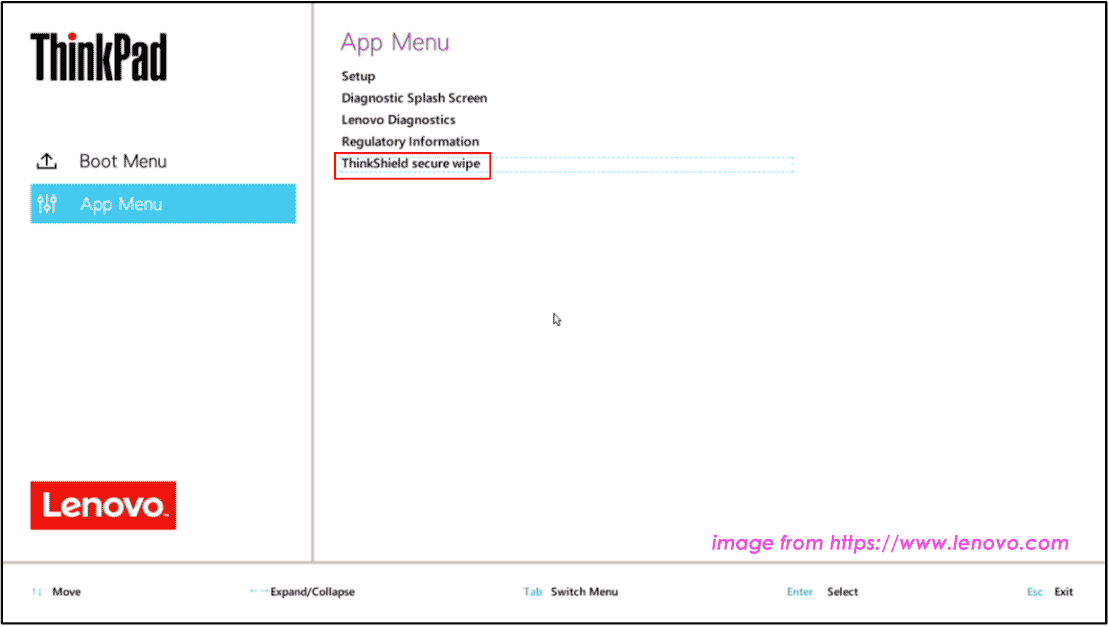
Step 4: You are required to choose the hard drive that you would like to wipe.
Step 5: Decide which wiping method you want to use.
Step 6: Hit Yes to confirm the operation and complete the rest process according to the instructions on the screen.
If you use other Lenovo laptops, the BIOS menu varies and you may need to wipe Lenovo hard drives in BIOS using the steps below:
Step 1: Press a specific key to enter BIOS based on your PC model.
Step 2: Under Security, hit Hard Disk Password.
Step 3: Choose Security Erase HDD Data.
Step 4: Enter a password to continue.
Final Words
How to wipe a Lenovo laptop? We have shared three options to help you easily perform Lenovo wipe hard drive and you have a clear understanding. Choose the way that best suits you and give it a try.


