If you are a music producer with a more than 5-year-old PC running Windows 10/11 operating system, it will be a good idea to optimize your PC for music production.
Suppose you are using loads of VSTs, tracks, and plugins to put the finishing touches on a dense mix, but a nightmare occurs. The playback is ruined and you meet conflicts, freezes, audio glitches, full-on crashes, etc. In such a situation, you can consider refreshing your PC to get the best out of it.
Below we outline some effective tips to optimize Windows 11/10 for music production. Of course, these tips also apply to optimize Windows 11 for audio/video editing.
1. Use MiniTool System Booster
When referring to “optimize PC”, the best way that comes to your mind is to use a professional tool to boost the system. MiniTool System Booster comes in handy.
To optimize your PC for music production/audio/video editing, you should make sure the machine has enough disk space and no other intensive apps are using RAM and CPU. The PC tune-up software, MiniTool System Booster, facilitates freeing up disk space, ending background programs, and ending startup items.
What’s more, it allows you to set a proper power plan for various uses to gain peak performance. In improving CPU and RAM performance, this utility works wonders.
Next, let’s explore how to optimize PC for music production/video editing/audio with the PC optimizer.
Step 1: Free download, install, and launch MiniTool System Booster.
MiniTool System Booster TrialClick to Download100%Clean & Safe
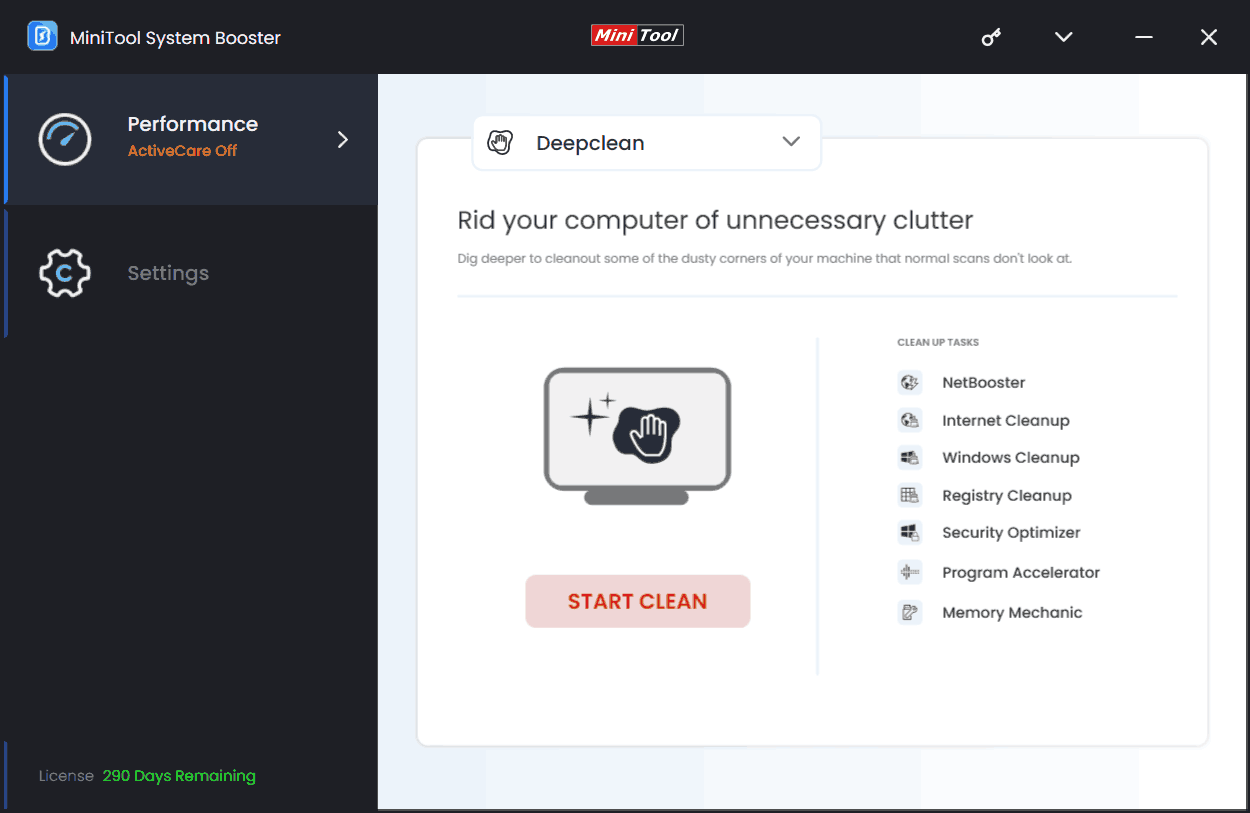
Step 2: Under the drop-down menu, move to Deepclean > START CLEAN. This will help deeply scan your system and clean up the machine by removing Windows junk files, Internet temporary files, and other data, defragmenting your hard drive, freeing up RAM, etc. To know each cleanup task, you can see this guide – How to Clean up PC to Free up Space? Run MiniTool System Booster.
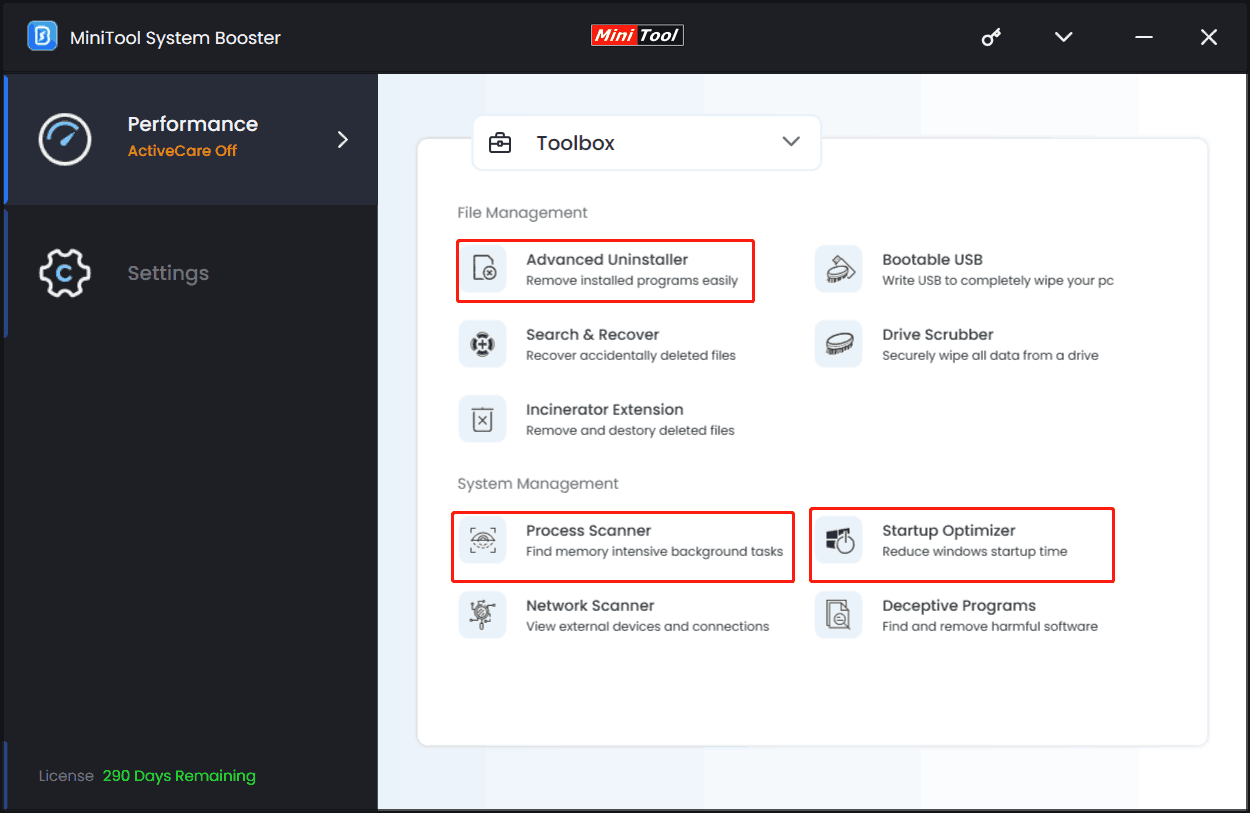
Step 3: Hit Toolbox which contains many tools to optimize your PC for music production or optimize Windows 11 for audio. Just click Advanced Uninstaller to uninstall unnecessary apps to free up disk space and RAM & CPU usage, click Process Scanner to end memory-intensive background tasks, and tap Startup Optimizer to disable startup items to reduce boot time.
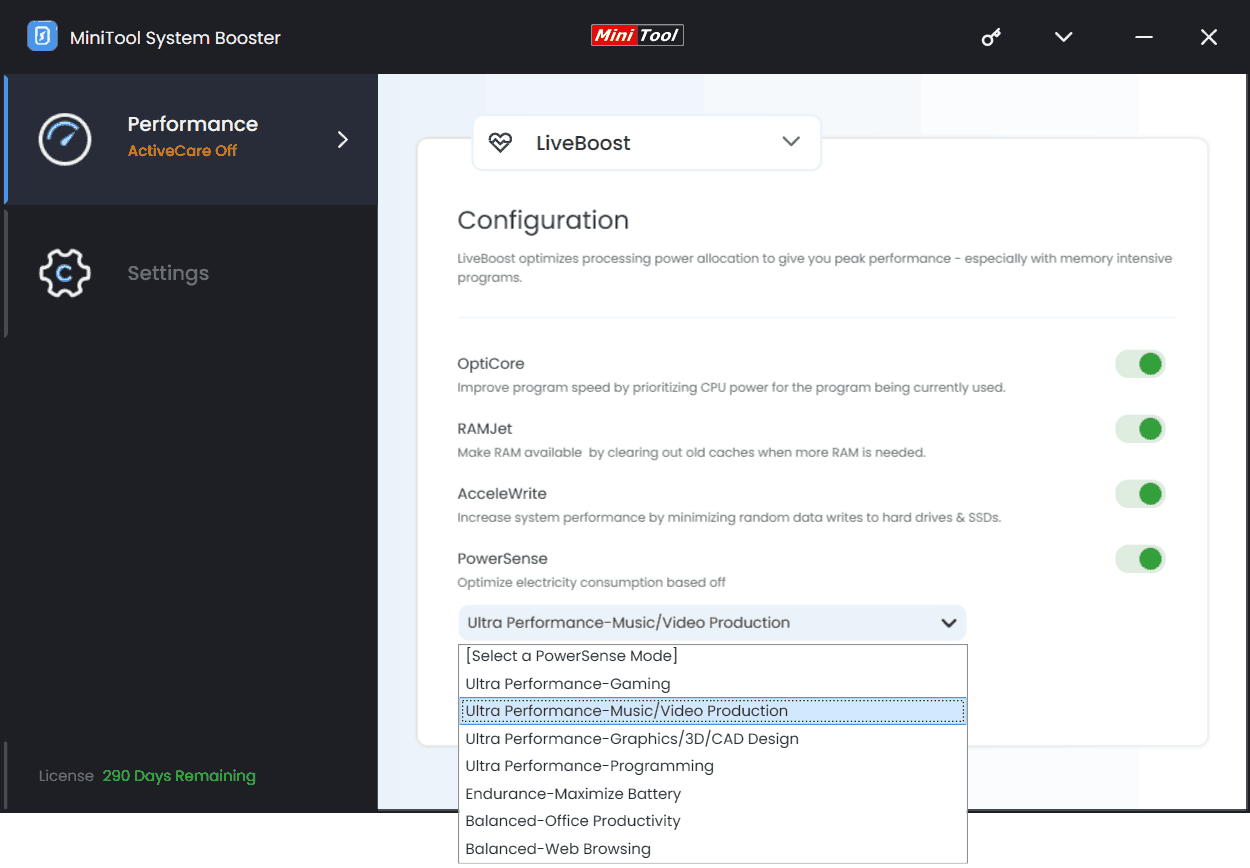
Step 4: Moreover, go to LiveBoost, enable OptiCore, RAMJet, AcceleWrite, and PowerSense, and choose Ultra Performance-Music/Video Production as a power option.
By taking these above steps, MiniTool System Booster can greatly optimize your PC for music production/video editing/audio. Beyond that, you can try some other tips in Windows 11/10 to boost the device.
2. Adjust Performance and Power Options
By adjusting power and performance options, you can easily make music production smooth. Take these steps:
Step 1: In Windows Search, type advanced system settings and press Enter.
Step 2: Click Settings under Performance and tick Adjust for best performance.
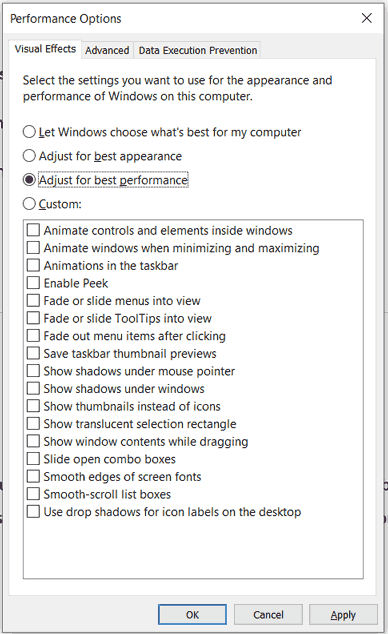
Step 3: Then, check the option of Background services under the Advanced tab.
Step 4: Head to Data Execution Prevention and make sure you choose Turn on DEP for essential Windows programs and services only.
Step 5: Save all the changes.
Step 6: Whereafter, access Control Panel, click Power Options, and set High performance as the power plan.
Step 7: Click Change plan settings > Change advanced power settings to open the Power Options window. Expand USB settings > USB selective suspend setting and set it to Disabled.
3. Kill Greedy Background Apps
Apps running in the background could take up system resources that should be going to DAWs (digital audio workstations), so ending these programs can let your PC focus on making music.
Step 1: Open Task Manager using Ctrl + Shift + Esc.
Step 2: In Processes, find those processes running much RAM/CPU usage, and end them.
Step 3: Besides, go to disable startup items under Startup.
4. Disable USB Power Management
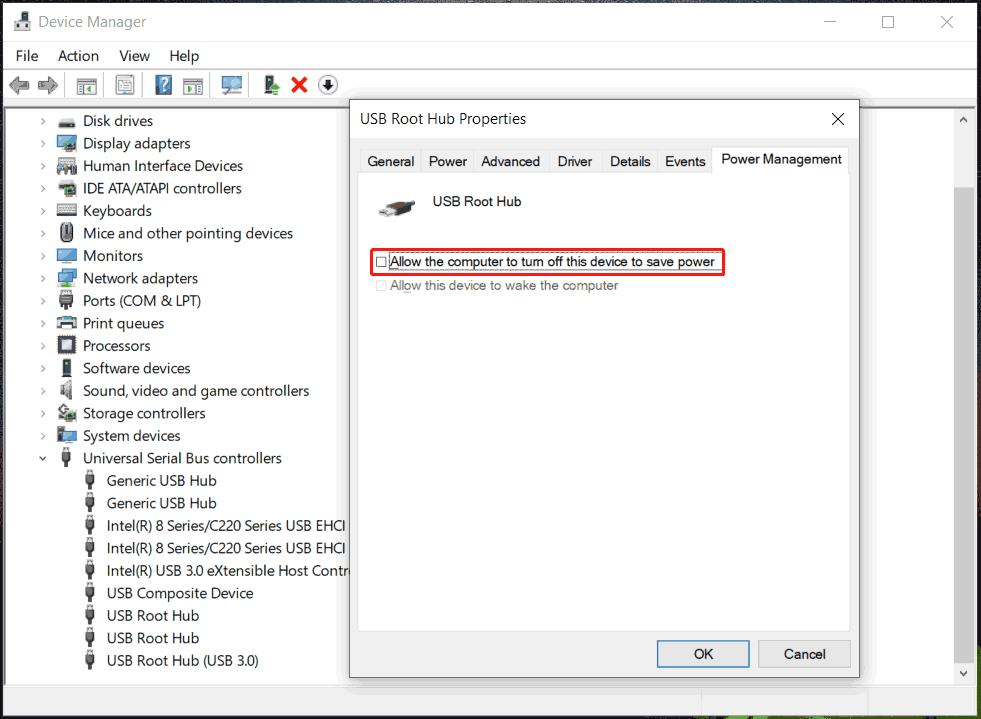
In case you use a USB device for music production, please disable USB power management. The system sometimes cuts power to currently inactive USB ports to be more power efficient. As a result, issues with hardware and delay in workflow happen.
Step 1: Open Device Manager by right-clicking on the start button and choosing this tool.
Step 2: Expand Universal Serial Bus controllers, right-click on USB Root Hub, and choose Properties.
Step 3: Under Power Management, untick Allow the computer to turn off this device to save power. Then, click OK.
5. Adjust Buffer Size
Make sure you have set the buffer size properly. To optimize your PC for music production, adjusting it depending on different stages can favor.
Usually, it is essential to keep the buffer size small during the recording phase, which means decreased latency. But you should use a high buffer size when mixing with more plugins and effects without causing clicks and pops.
Other Tips to Optimize Windows 11 for Music Production
Besides these above tips to optimize Windows 11 for video editing/audio/music production, you have some other options to make your task smooth and efficient.
- Match USB device port type
- Disconnect any USB devices you don’t use
- Use correct cables
- Disable system sounds
- Disable notifications
- Disable Windows automatic updates
- Perform a system scan for viruses and malware
- Always run your DAW as an administrator
- Try a third-party audio driver
- Upgrade your hardware like RAM or hard drive
Final Words
How to optimize your PC for music production or optimize Windows 11 for audio? There are several suggestions for you here. Take action if needed. To greatly boost the Windows 11/10 PC, we strongly recommend running MiniTool System Booster. Give it a try!
MiniTool System Booster TrialClick to Download100%Clean & Safe


