Overview of Windows Modules Installer
Windows Modules Installer (also known as Windows Modules Installer Worker, WMIW, or TiWorker.exe), a part of Microsoft operating system, is a system background program. It will automatically apply to Windows updates and install some programs released by Microsoft, fix or explore system files.
Besides, it performs regular maintenance on the system according to the set time, such as deleting temporary files, managing system disk fragmentation, scanning the disk for viruses, and other optimization operations. Typically, it takes a long time to start and run a computer after installing Windows 11/10 or when the system is just starting.
This system tool will run in the background immediately when your computer is connected to the internet so that it can check for available Windows or other program updates.
Triggers of Windows Modules Installer High CPU Usage
What is triggering Windows Modules Installer Worker to consume excessively high CPU resources?
You should bear in mind that updating Windows and associated applications really eats into your system’s resources. And this almost inevitably leads to high CPU from Windows Modules Installer but temporarily. However, if the CPU or disk usage remains excessively high for a long time after the update has been completed, it indicates you should do some troubleshooting.
How to Fix Windows Modules Installer Worker High CPU
Occupying too much CPU space can decrease the computer’s speed and affect PC performance. In particular, the Windows Modules Installer high CPU usage issue is sort of serious. So, how to reduce CPU usage from Windows modules installer? The fixes will be shown to you in the following paragraph. Follow the list and try them one by one until you find the one that works for the high CPU usage issue.
1. Convert Windows Installer Startup to Manual
You are able to set the Windows Modules Installer Worker as manual and then your computer will save power both from the CPU and the disk usage at the same time. In this way, however, the updates will not download automatically, so you need to update Windows manually once a week or a month. Follow these instructions:
Step 1. Open the Run dialog by pressing the Win + R key and type services.msc and click OK to launch Services.
Step 2. Locate Windows Modules Installer in the services list and right-click on it to choose Properties or just double-click Windows Modules Installer.
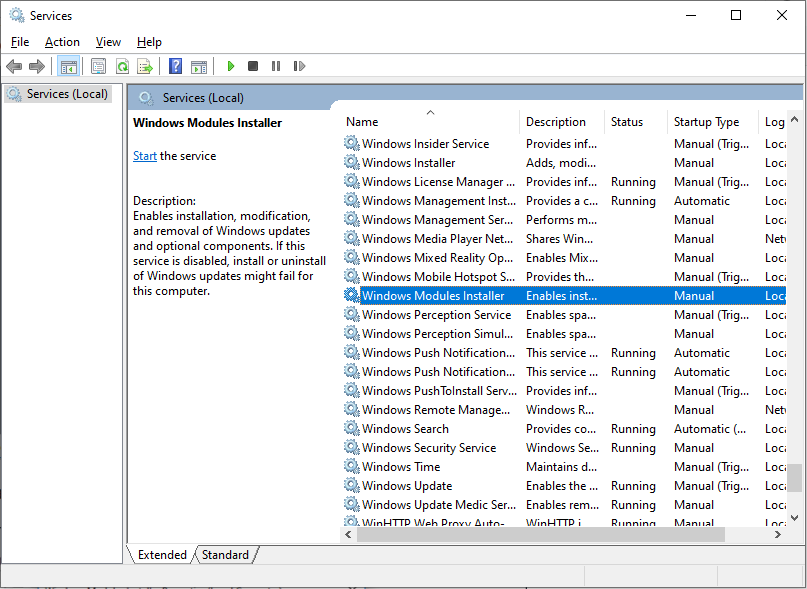
Step 3. Expand the Startup type list and choose Manual. Then click OK to save the change.
2. End the TiWorker.exe Process
If you find that the high CPU issue still exists after changing Windows Modules Installer as manual, you can try to terminate the TiWorker.exe process through Task Manager.
To do that:
Step 1. Right-click on the Taskbar and choose Task Manager in the menu list.
Step 2. Click on the Details tab, scroll down to find TiWorker.exe, and right-click it to select End task.
3. Remove the SoftwareDistribution Folder
Those corrupted Windows update files stored in the SoftwareDistribution folder can give rise to Windows Modules Installer high CPU usage. Deleting this folder may help you get rid of the error. To do that:
Step 1. Press Win and R together and type services.msc in the Run window.
Step 2. To stop the Windows Update service, slide down to select it and click Stop the service in the left side.
Step 3. Then type C:\Windows\ in the Run window and press Enter.
Step 4. Scroll down to find the SoftwareDistribution folder and then delete it.
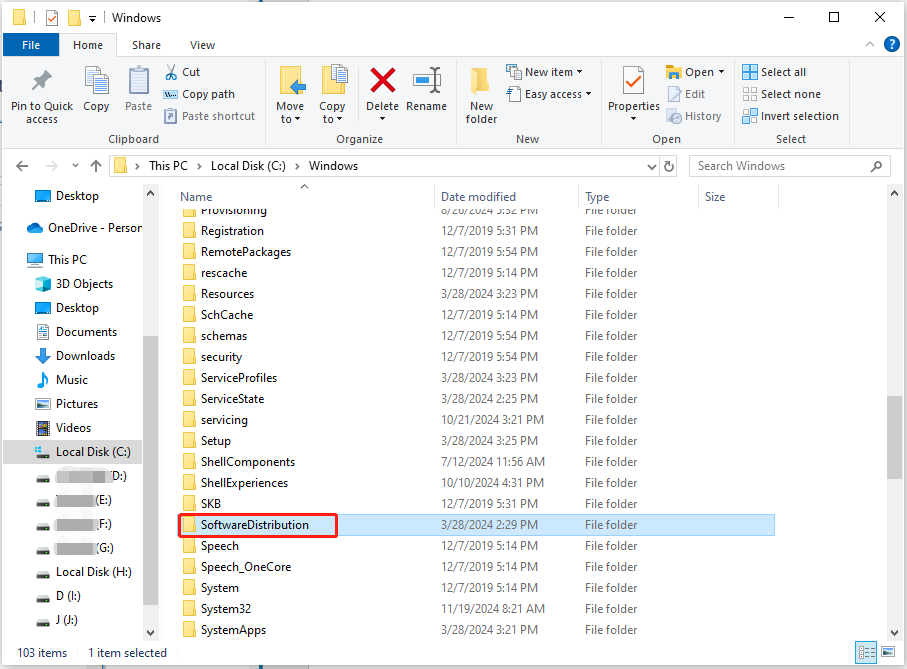
After that, restart your PC and check whether the high CUP usage issue is fixed.
Also read: Is It Safe to Delete Software Distribution Folder Windows 11?
4. Try Windows Update Troubleshooter
Windows Update Troubleshooter is a helpful tool to diagnose and troubleshoot issues related to Windows updates. To use it:
Step 1. Open Control Panel > locate Troubleshooting > click Fix problems with Windows Update under the System and Security section.
Step 2. Click Next and then the program will start to detect problems. Upon finishing, you can check if this action fixes Windows Modules Installer Worker high CPU.
5. Run SFC Scan
SFC (System File Checker) is a useful program, that enables you to scan Windows system files and repair lost or corrupted system files. To start the process:
Step 1. In Windows search, type cmd and open Command Prompt as an administrator.
Step 2. Type sfc /scannow in the pop-up window and hit Enter to run it. The scan process will take a long time so please wait patiently.
6. Try MiniTool System Booster
When you perform computing tasks like Windows update or browse webpages, it will generate obsolete and junk files. As is well known, the longer you use your computer, the more junk it will heap up. A lagging computer can easily reach 100% CPU usage, especially if it’s full of unnecessary programs running background and a pile of junk files.
One of the best ways to keep your PC running smoothly is to use a professional PC cleaner like MiniTool System Booster. It will streamline your machine on multiple fronts, such as managing startup programs, terminating resource-hogging programs, and clearing out junk files.
Next, let me show you how amazing it is.
Step 1. Download and install MiniTool System Booster. Then double-click on its shortcut on your desktop to open it.
MiniTool System Booster TrialClick to Download100%Clean & Safe
Step 2. Click on Performance Home and select Deepclean.
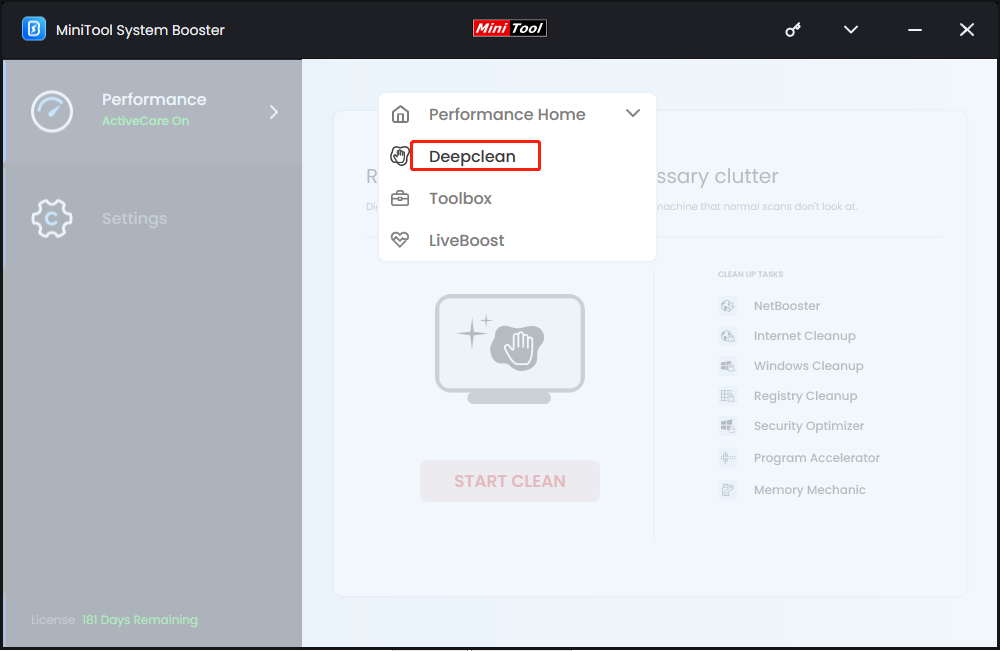
Step 3. Hit START CLEAN to carry out the following 7 cleanup tasks.
NetworkBooster – increases network speed and stability.
Internet Cleanup – sweeps up browsing data in your browsers.
Windows Cleanup – cleans up junk files in your system.
Registry Cleanup – removes invalid registry entries.
Security Optimizer – finds and repairs common Windows security vulnerabilities.
Program Accelerator – re-aligns program data and defragments hard drives.
Memory Mechanic – frees up memory.
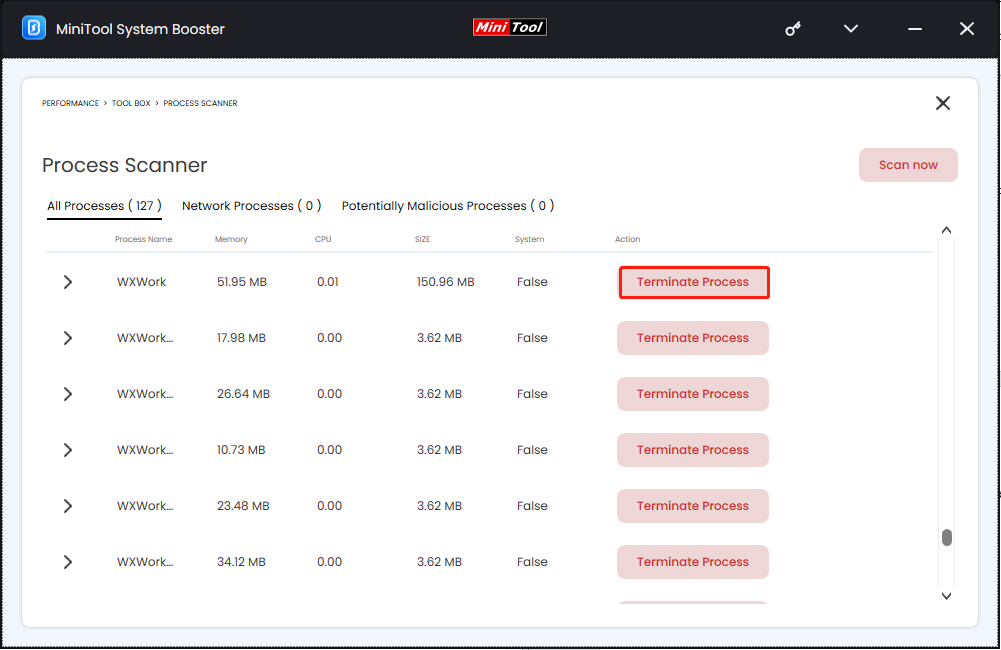
Step 4. After completion, switch to Toolbox from the top menu > choose Process Scanner under System Management.
Step 5. Click Scan now to show the list of processes running in the background and click Terminate Process to close the unwanted ones.
Final Words
Now you might have the answer about how to resolve Windows Modules Installer high CPU usage. What’s more, you can perform the all-around PC tune-up tool – MiniTool System Booster to optimize and clean your computer for optimal performance.
MiniTool System Booster TrialClick to Download100%Clean & Safe


