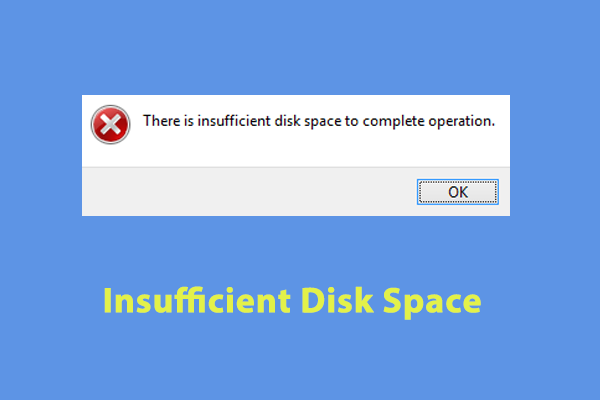
Every time you try to carry out an operation or install a program, you might be prompted by a message saying that there is not enough disk space but there is plenty. This guide from MiniTool System Booster will focus on this problem and list some effective workarounds for you.
Why does Computer Says Not Enough Space But There Is Plenty?
Most of you might prefer to create several partitions and allocate them to better manage files and programs on your computer. When you intend to download a file, execute an operation, or install a program, Windows might report that there is not enough disk space but there is plenty. How to fix this pesky issue? If you have no idea at the moment, take a closer look at the paragraphs below to get more solutions.
How to Fix Not Enough Disk Space But There Is Plenty Windows 10/11?
Fix 1: Free up Disk Space with MiniTool System Booster
When you open programs, browse webpages, or perform other computing tasks, it will generate obsolete files that occupy valuable disk space. The longer you use your computer, the more junk files it will accumulate. If computer says there is no disk space but there is plenty, deleting these junk files and cached data can work wonders.
If you wonder how to delete them, it’s time to resort to a third-party PC cleanup tool like MiniTool System Booster. This free tool comes with some great features to make your computer run at its best and last longer. For example, it supports managing startup programs, optimizing power usage, terminating resource-hungry programs, and keeping your computer clean.
Now, let’s see how to perform a thorough cleanup of your computer with it:
Step 1. Download and install MiniTool System Booster Trial Edition. After installation, double-click on its shortcut on your desktop to launch this freeware.
MiniTool System Booster TrialClick to Download100%Clean & Safe
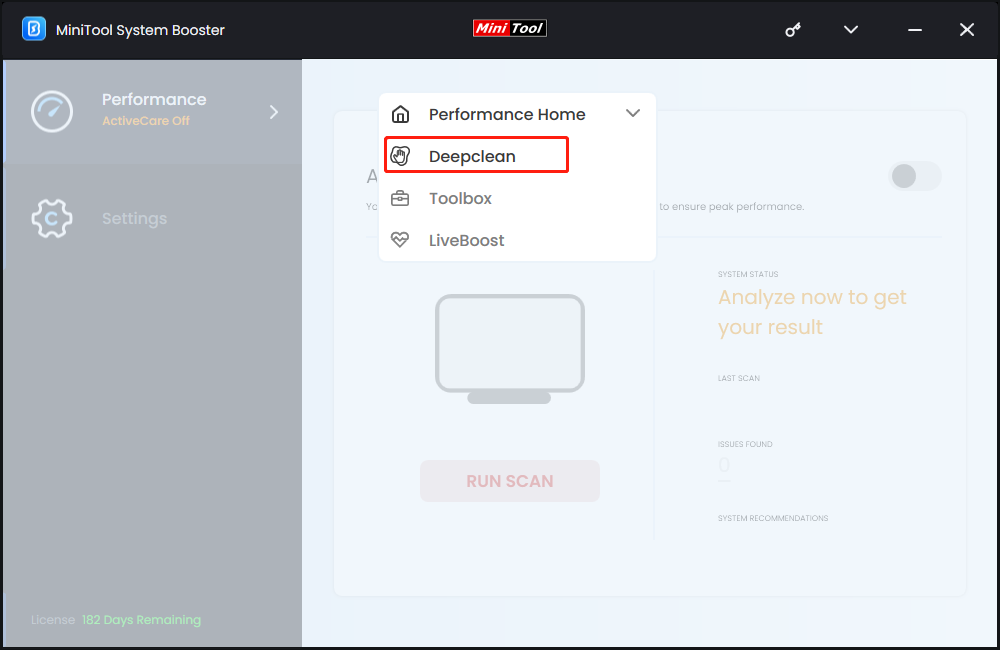
Step 2. In the menu bar, click on Performance Home and then select Deepclean.
Step 3. Tap on START CLEAN to run 7 cleanup tasks in order.
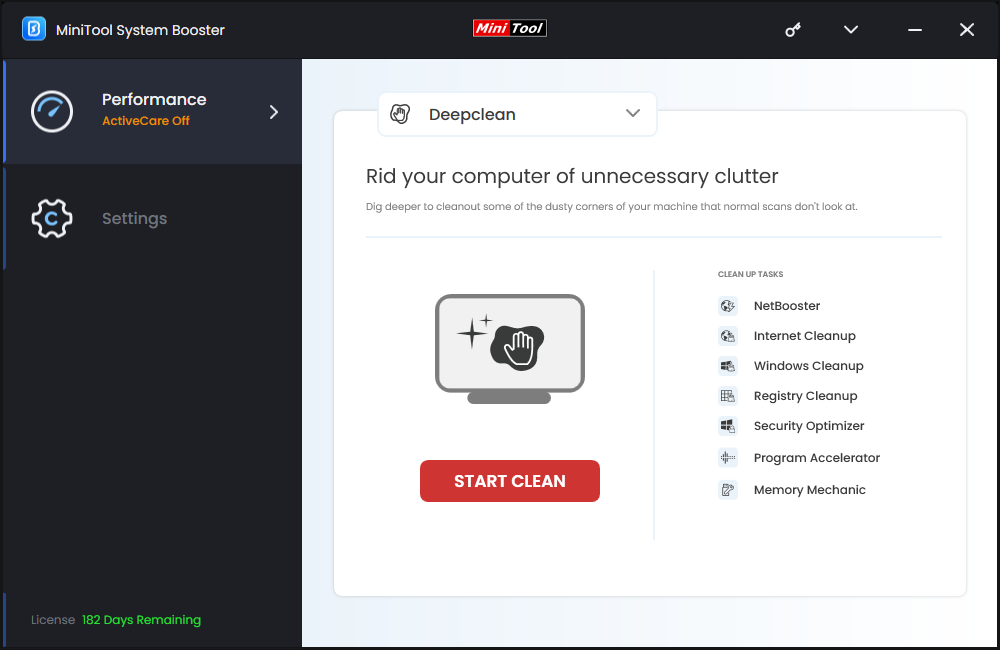
- NetworkBooster – increases network speed and stability.
- Internet Cleanup – sweeps up browsing data in your browsers.
- Windows Cleanup – cleans up junk files in your system.
- Registry Cleanup – removes invalid registry entries.
- Security Optimizer – finds and repairs common Windows security vulnerabilities.
- Program Accelerator – re-aligns program data and defragments hard drives.
- Memory Mechanic – frees up memory usage.
After the cleaning process is complete, redownload the desired programs or files to see if not enough disk space but there is plenty Windows 11/10 is gone.
Fix 2: Check Disk for Errors
A corrupted file system or disk can also cause Windows to report there is no disk space but there is plenty. To scan your hard drive for errors, you can run CHKDSK in File Explorer:
Step 1. Press Win + E to open File Explorer.
Step 2. In the left-hand pane, locate This PC.
Step 3. Under Devices and drives, right-click on the drive containing the Windows operating system (usually C drive) and select Properties from the drop-down menu.
Step 4. In the Tools tab, tap on Check under Error checking.
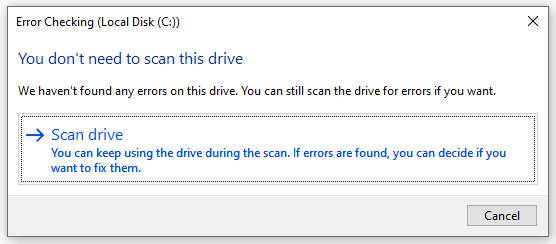
Step 5. Click on Scan drive to start the scanning.
Fix 3: Repair Corrupted System Files
Some Microsoft users reported that they have eliminated not enough disk space but there is plenty after utilizing System File Checker to repair system file corruption. Thus, you can also run this tool to detect any corrupted system files and repair them with the cached copy. To do so:
Step 1. Press Win + R to open the Run dialog.
Step 2, Input cmd and press Ctrl + Shift + Enter to launch Command Prompt as an administrator.
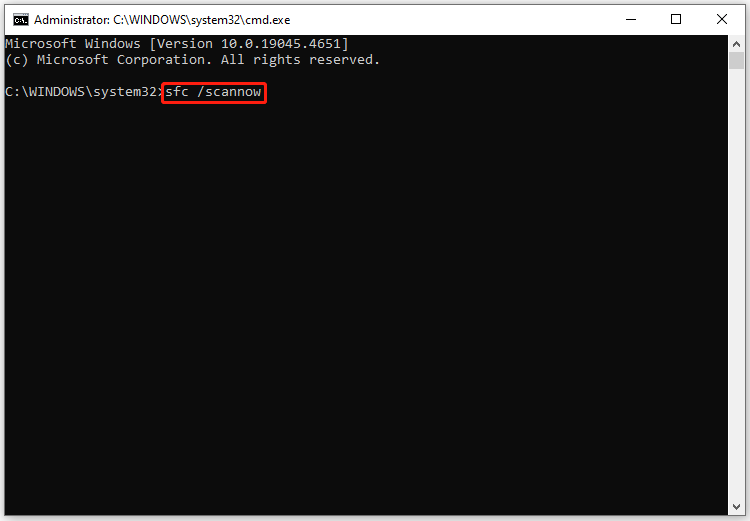
Step 3. In the command window, type sfc /scannow and hit Enter.
If this doesn’t work, run this command in Safe Mode to check for any improvements.
Fix 4: Run Disk Cleanup
Windows 10/11 provides a program called Disk Cleanup to scan for and remove useless temporary files on your hard drive. Here’s how to clean up your computer with it:
Step 1. Press Win + S to evoke the search bar.
Step 2. Type disk cleanup and hit Enter.
Step 3. Select the drive you want to clean from the drop-down menu and click on OK.
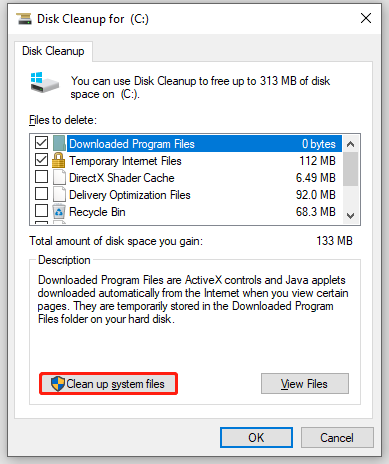
Step 4. In the Disk Cleanup dialog box, hit Clean up system files.
Step 5. If prompted, select the drive you want to clean up again and tap on OK.
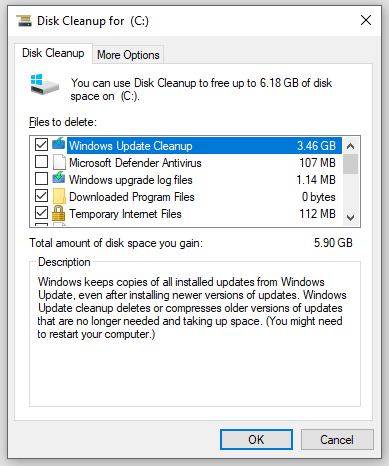
Step 6. In the file list, check Windows Update Cleanup, Previous Windows Installation, and other largest items that consume disk space.
Step 7. Click on OK and then confirm the operation.
Fix 5: Disable Disk Quotas Management
There is a possibility that the administrator on your computer enabled disk quota to limit the amount of storage space that you can use, triggering not enough disk space but there is plenty. In this case, consider disabling this feature to cancel this limit. Here’s how to do it:
Step 1. Open File Explorer and right-click on the drive you want to disable quotas for to select Properties.
Step 2. Under the Quota section, click on Show Quota Settings.
Step 3. Uncheck the Enable quota management option.
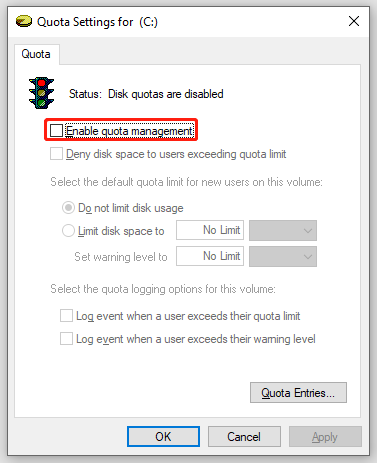
Step 4. Click on Apply & OK to make the change effective.
Fix 6: Change the Default Store Directory
If you never change the store directory, all the files or programs downloaded from platforms will save in the Downloads folder or the C:\Program Files (x86) folder, which might clog up your C drive in the long run. Therefore, you’d better change where new content is saved in time. Here’s how to change the default store directory on Windows 10/11:
Step 1. Press Win + I to open Windows Settings and head to System.
Step 2. In the Storage section, tap on Change where new content is saved.
Step 3. Choose the secondary drive to store new apps, documents, music, videos, pictures, and hit Apply.
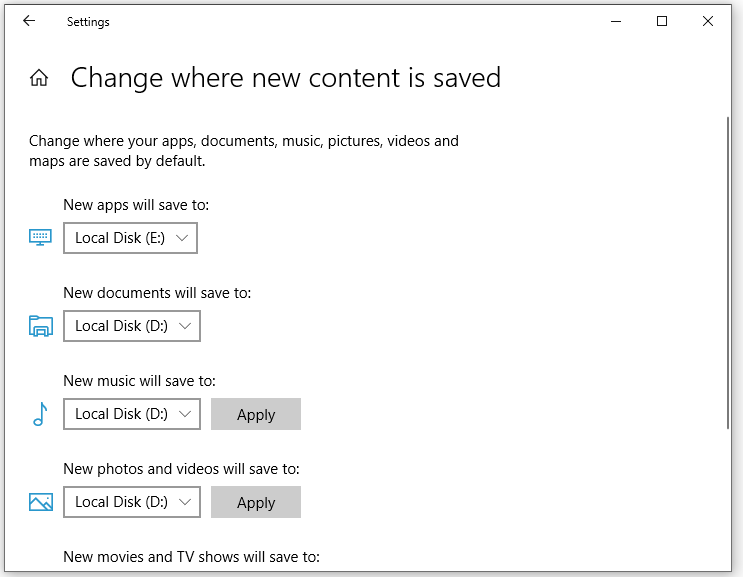
For certain platforms like Google Chrome, Steam, or more, follow these steps to modify the default storage location:
- For Google Chrome: click on Settings > Downloads > Change to choose another folder in a secondary drive.
- For Steam: launch Steam > open Settings > Downloads > Steam Library Folders > choose a secondary drive as the default store folder.
Wrapping Things Up
What can you do when Windows says there is not enough disk space even though there is plenty of available space on your hard drive? Now, you might have the answer. Most recommendedly, you can run the all-around PC tune-up tool – MiniTool System Booster to speed up and clean up your computer for optimal performance. Don’t hesitate to give it a shot.
MiniTool System Booster TrialClick to Download100%Clean & Safe


