Temporary files not deleting is an annoying issue that blocks you from freeing up disk space in Windows 11/10. How do you delete temporary files that won't delete? If you wonder about the ways, you come to the right place and you can find out multiple solutions to easily get rid of the trouble.
Temporary Files Not Deleting Windows 11/10
When using a computer, the Windows OS and the applications installed in it create temporary files for many things, for example, you browse the Internet, download Windows updates, etc. Temporary files may be log files, cached images, videos, and other data related to the service you’re using.
However, accumulated temp files may eat up the storage space (usually, a couple of gigabytes) and even slow down your computer. Hence, deleting them could be wise to free up space and boost the overall performance.
Unfortunately, you sometimes suffer from the issue of temporary files not deleting. Usually, you can use Disk Cleanup to delete Internet temporary files and other temp files. Also, run Storage Sense in Windows 11/10 settings to remove temp files. However, the temporary files remain on the PC after the deletion operation.
Why are temporary files not deleted? You may not have the necessary permissions to clear the temp files or some programs are using files in the Temp folder. Besides, the SoftwareDistribution directory, some third-party apps, etc. could result in Storage Sense/Disk Cleanup not deleting files.
Next, let’s explore how to fix Windows 11/10 temporary files not deleting.
Fix 1. Manually Delete Temporary Files
When temporary files won’t delete in Windows 10/11, try to manually delete them using these steps:
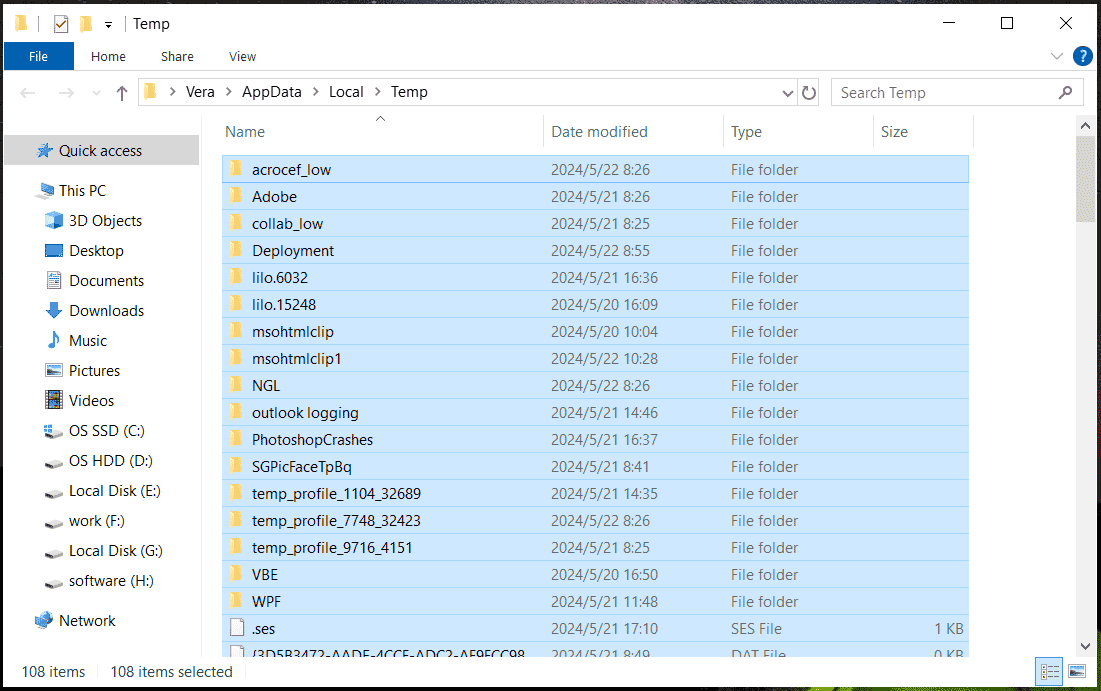
Step 1: Press Win + R, enter %temp% to the text box of Run, and click OK.
Step 2: In the Temp folder, press Ctrl + A to select all the files and folders, and press Delete.
Fix 2. Run Disk Cleanup as Administrator
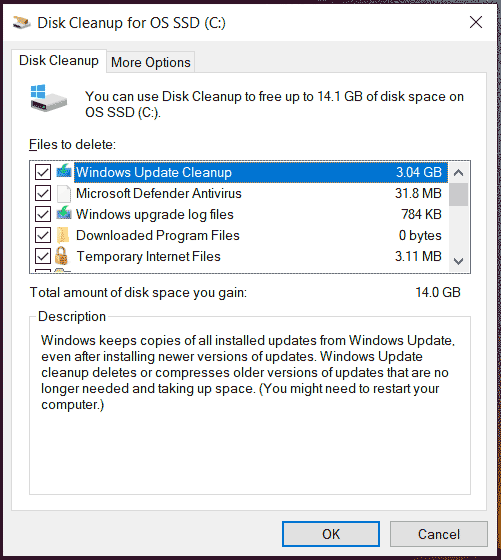
One reason why you cannot delete certain files with Disk Cleanup is this tool doesn’t have the necessary permissions. To solve the issue of temporary files not deleting Disk Cleanup, run this cleanup tool with admin rights.
Step 1: Type Disk Cleanup into the search box and then click Run as administrator from the right pane.
Step 2: Choose the drive you need to clean up like C.
Step 3: Check the boxes of the files you wish to delete and click OK > Delete Files.
Fix 3. Use MiniTool System Booster
According to users, a third-party application can be a good option when confronted with temporary files not deleting in Windows 11/10. MiniTool System Booster has been proven to be effective in deleting many junk files, including Internet temporary files, Windows temporary files, registry items, etc.
As a powerful PC tune-up software, MiniTool System Booster helps to speed up the system for optimal performance via several aspects, for instance, cleaning up your PC, freeing up memory, defragmenting a disk, boosting RAM/CPU, uninstalling unwanted apps, etc.
Get it straight away for a free trial in case Disk Cleanup/Storage Sense can’t delete temporary files.
MiniTool System Booster TrialClick to Download100%Clean & Safe
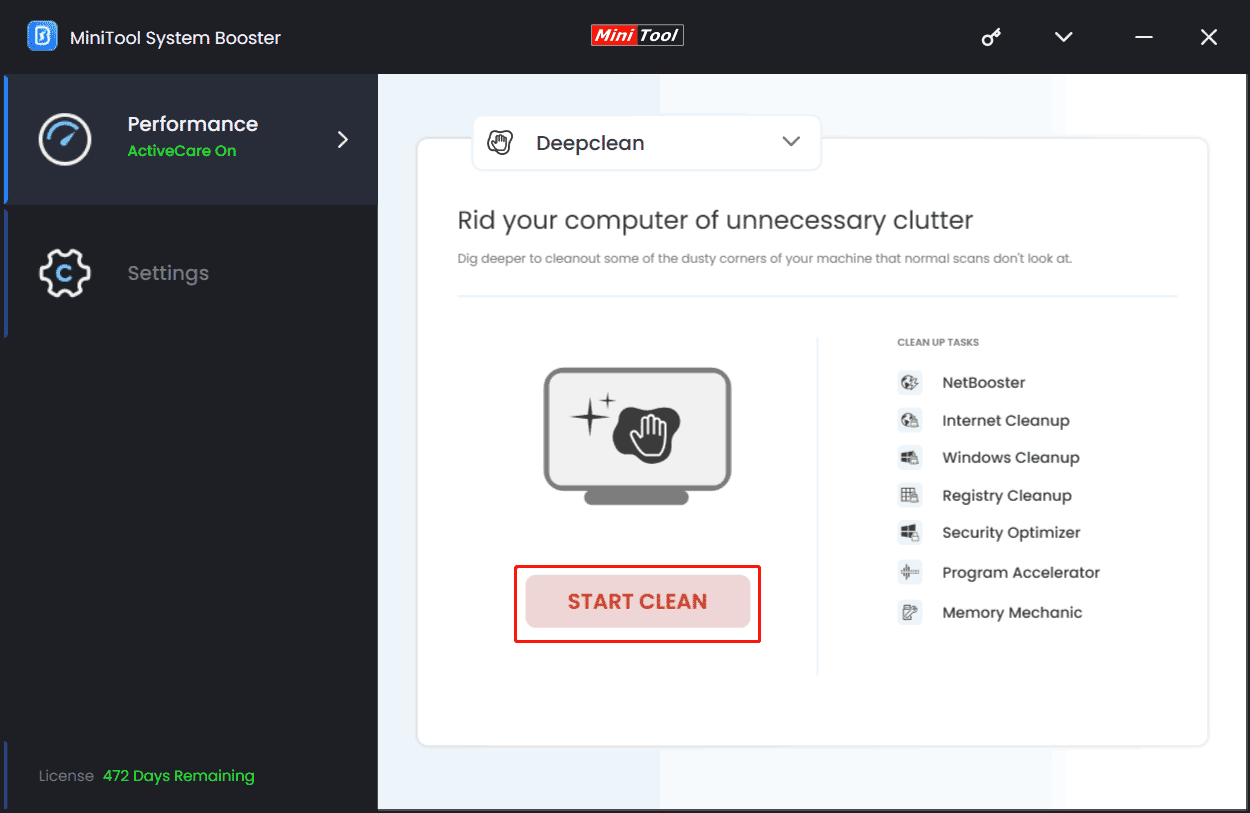
Step 1: Run MiniTool System Booster to enter its Performance tab.
Step 2: To delete temporary files, click Deepclean > START CLEAN.
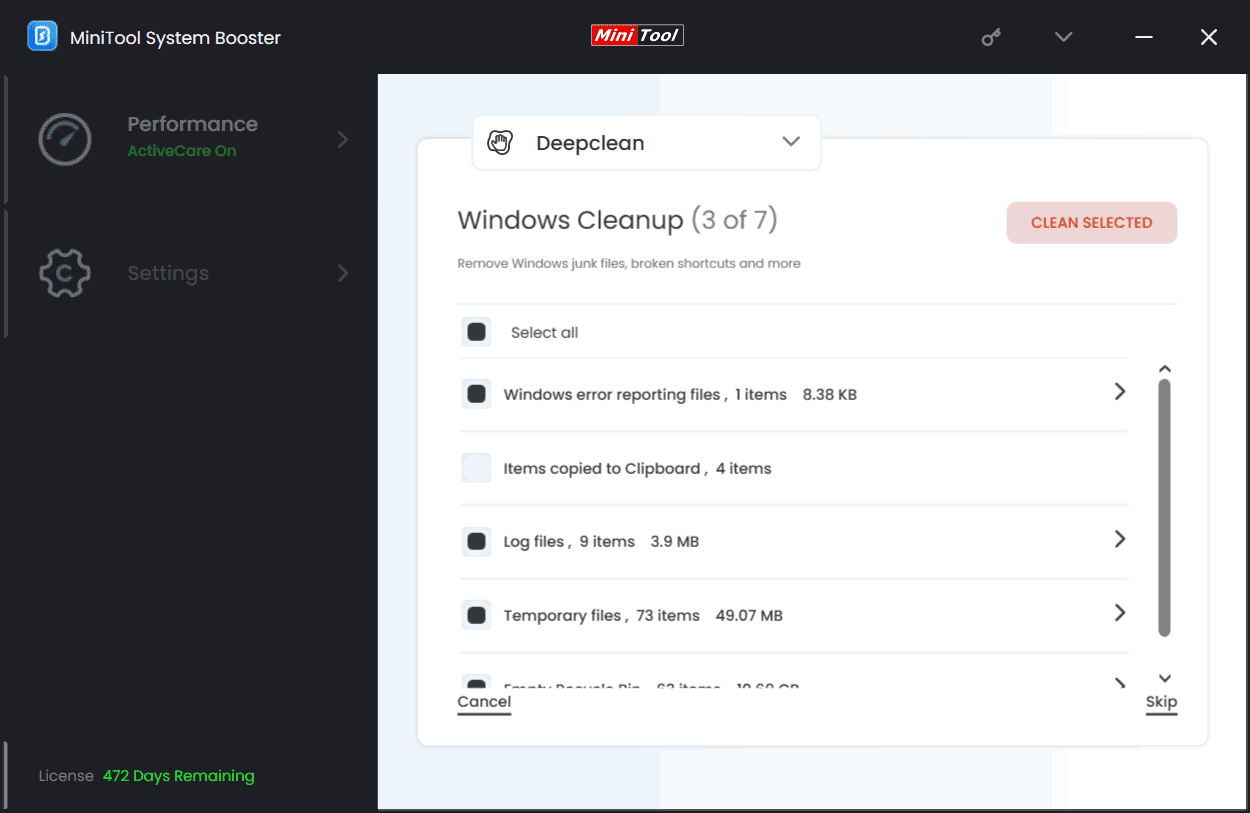
Step 3: Seven cleanup tasks begin and you can skip the ones you don’t need. Here you had better not skip Internet Cleanup, Windows Cleanup, and Registry Cleanup to remove Internet temporary files, & Windows junk files and clean out the registry. Do these operations as per the prompts on the PC screen.
Fix 4. Remove the Contents of the SoftwareDistribution Folder
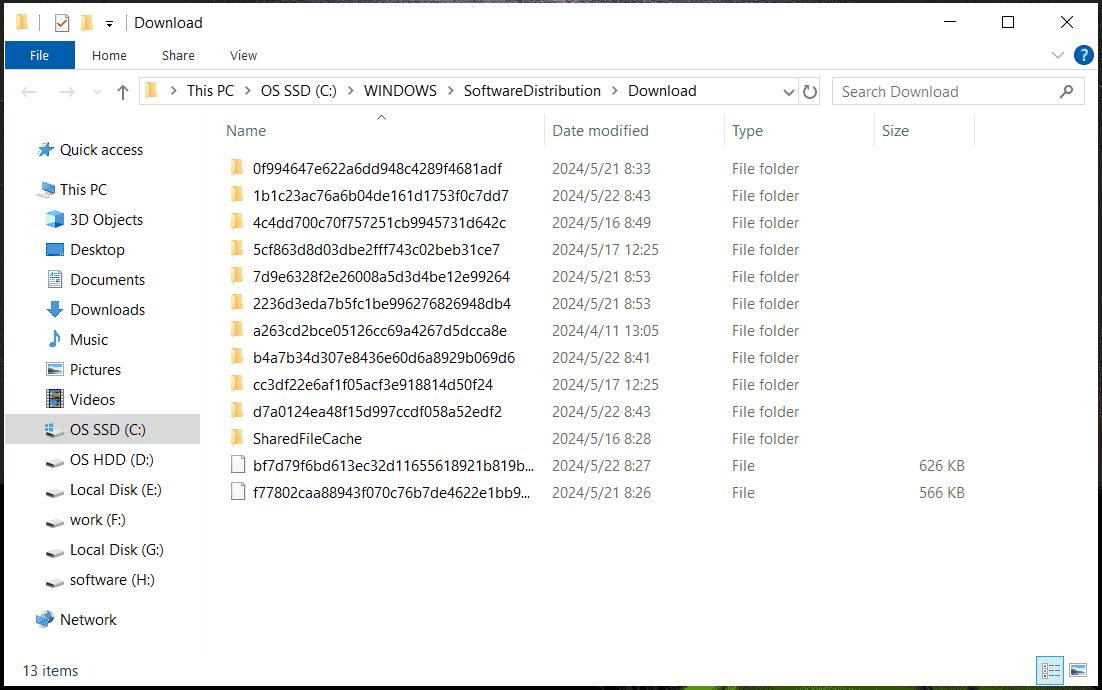
Temporary files not deleting may happen on Windows 11/10 because of the SoftwareDistribution directory. This folder includes Windows update files, but it could block you from deleting specific files. You can delete the contents of that folder to resolve your issue via the steps below.
Step 1: Open Run using Win + R, enter %WINDIR%\SoftwareDistribution\Download,and click OK.
Step 2: Choose all the files and folders and delete them. Now, temporary files can be deleted.
Fix 5. Uninstall Skype and Spotify
Sometimes you can’t delete temporary files in Windows 10/11 due to third-party applications like Skype and Spotify that can interfere with your system and trigger issues with temporary files. According to users, these two apps may be installed automatically after an update, then the issue starts appearing.
To get rid of the issue, try to uninstall Skype and Spotify.
Step 1: Open Control Panel via the search box.
Step 2: Click Uninstall a program under Programs.
Step 3: Locate Skype and Spotify, right-click on them one by one, and tap on Uninstall.
Fix 6. Delete Temporary Files in Safe Mode
While plagued by the issue of temporary Internet files not deleting or Disk Cleanup not deleting files, you can try to delete your temporary Internet files or other temporary files in Windows 11/10 Safe Mode.
To do that:
Step 1: Click Start > Power > Restart meanwhile pressing Shift to enter WinRE.
Step 2: Move to Troubleshoot > Advanced options > Startup Settings > Restart.
Step 3: Press F4 to access Safe Mode.
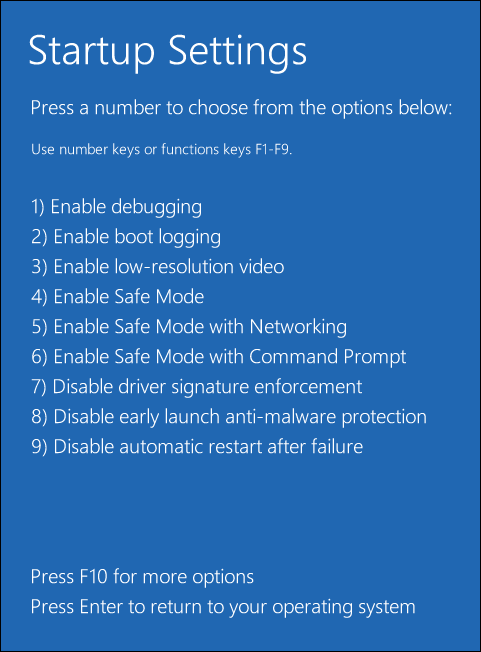
Step 4: Then, go to Disk Cleanup or Storage Sense and try to delete temporary files, and you won’t encounter any issues.
Also read: Disk Cleanup Not Deleting Files | Best Practice Solutions
Verdict
What if temporary files won’t delete in Windows 11/10? MiniToo System Booster helps a lot to delete junk files easily to free up space and speed up your PC. In addition, some other fixes can effectively get you rid of the trouble. Try them!
MiniTool System Booster TrialClick to Download100%Clean & Safe


